
Do you ever get in that side-dish-rut? Cooking the same vegetables over and over, in the same ways? I’ve fallen into that trap before too, which is exactly when I decided to mix things up with shredded Brussels sprouts.
I’m a big fan of green vegetable side dishes, and naturally when I think sprouts I think roasted. But when it came time to mix things up and cook Brussels sprouts in a different way, a light bulb went off thinking about my favorite shredded Brussels sprouts salad and how I love easy sauteed stovetop vegetable recipes lately.
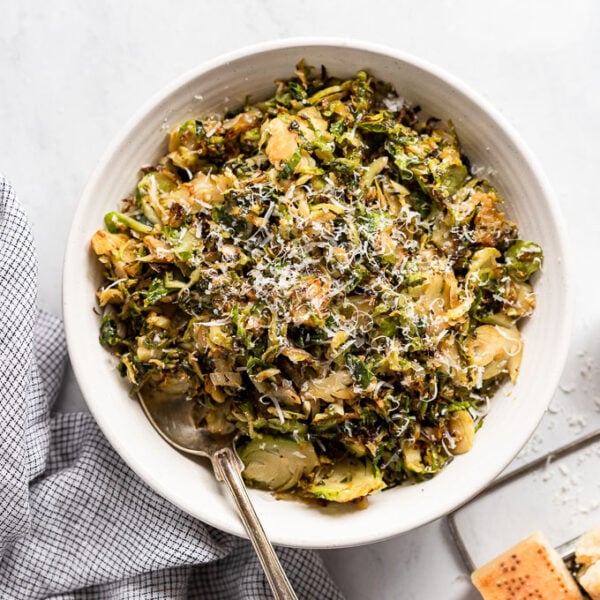
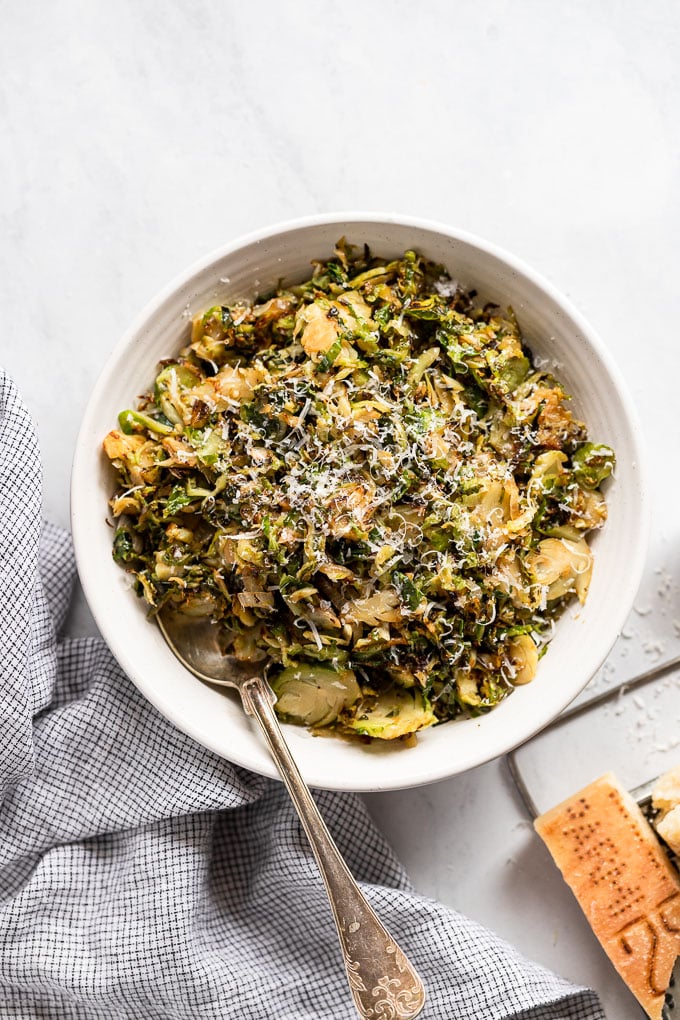
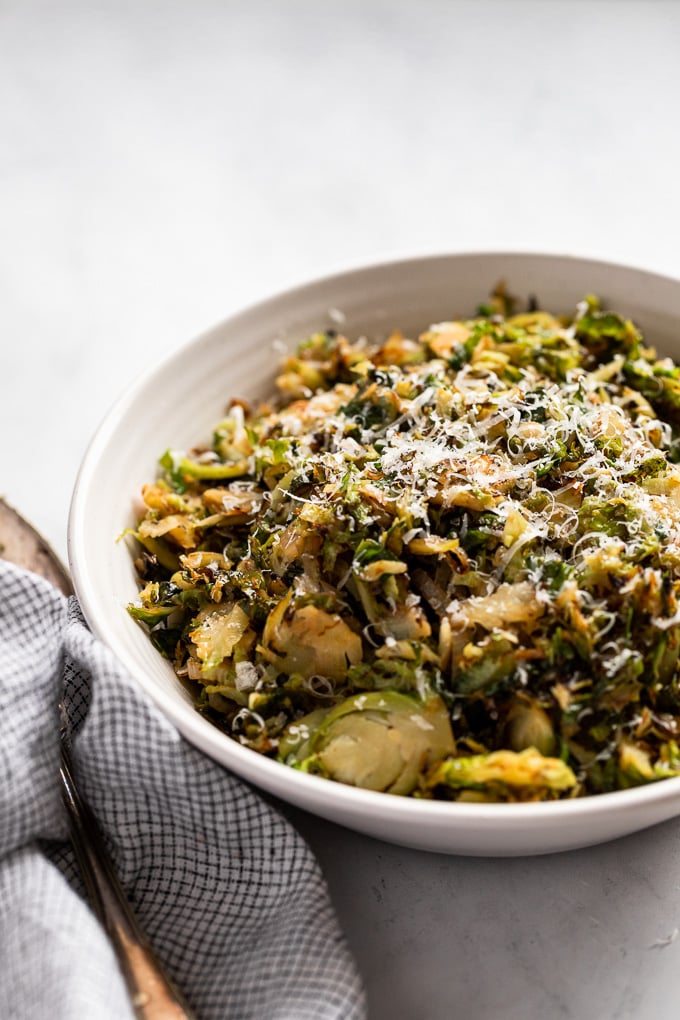
So here we are… sauteed sprouts in a cast-iron skillet that have crispy bits and a whole new texture. Paired with the iconic duo of shallot and garlic, they are loaded with flavor. Especially when topped with balsamic vinegar, maple syrup, and parmesan cheese. It’s a trifecta made in heaven.
They’re naturally gluten-free and vegetarian, yet can be easily made dairy-free and vegan by omitting the parmesan cheese and substituting nutritional yeast as desired. An easy side dish flexible enough to suit all your dietary needs!
What You’ll Need: Ingredients & Substitutions
You’ll need just a few simple ingredients for this recipe, which is another reason why it’s so easy to love! It’s also really customizable depending on what flavors you want to pair with the crisp-tender sprouts. Win, win, win!
Here’s what you’ll need:
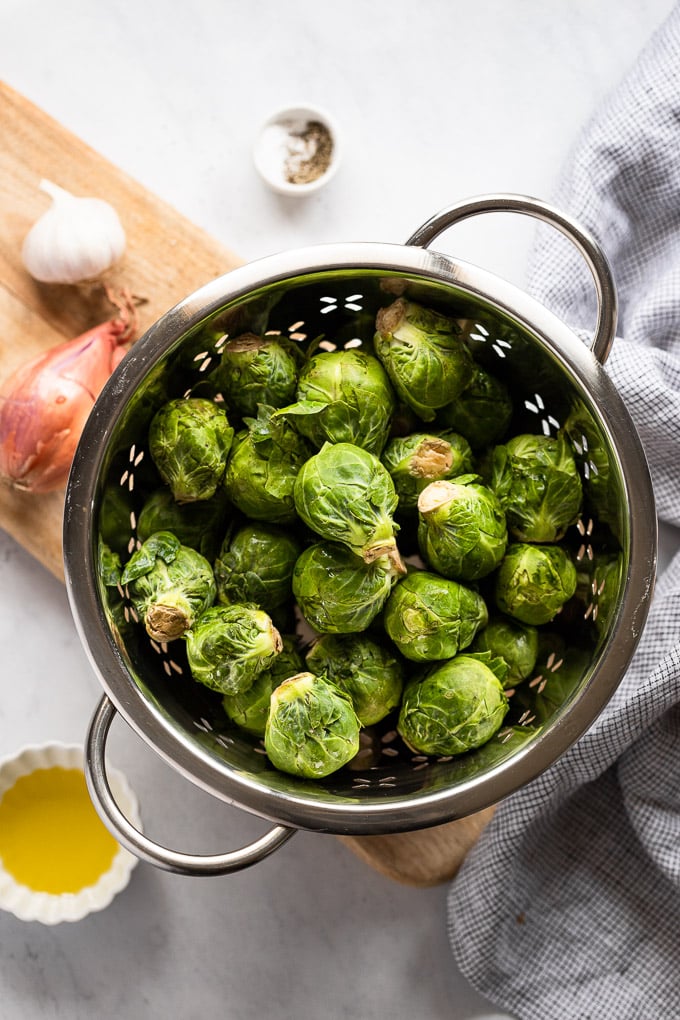
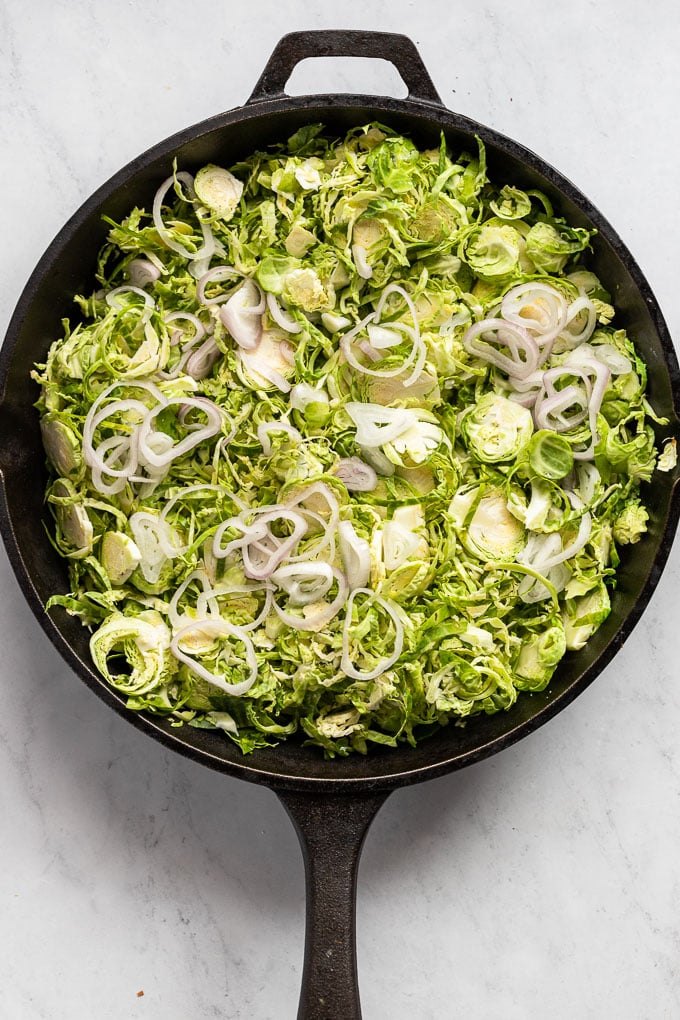
- Brussels Sprouts: this recipe is best with fresh sprouts so we can easily shred them.
- Shallot: milder than an onion and slightly sweet, it’s a delicious aromatic to pair with this side dish. If you need to, you can substitute finely chopped yellow or sweet onion.
- Garlic: honestly could I make a side dish without garlic? I don’t really think so…
- Salt: essential for adding in flavor! Add a few grinds of freshly cracked black pepper, too.
- Balsamic Vinegar + Maple Syrup: I love this combination together, it’s a little sweet, a little acidic, and pairs so well together. You can use one or the other, or both! If you don’t use either I recommend a splash of fresh lemon juice to pair with the brussels.
- Parmesan Cheese: a deliciously salty component that adds to the side, although it is optional, espeically if you’d like to make this a vegan side dish.
How to Make Shredded Brussels Sprouts in a Skillet
I highly recommend using a cast-iron skillet for this recipe. If you don’t have one, what are you waiting for? They’re great for pan-frying, for baking skillet cornbread, or garlic dinner rolls… really a kitchen must-have.
But I digress. If you don’t have one you can use a stainless steel saute pan or non-stick skillet, too. Cast-iron just helps give a really nice crisp to the shredded Brussels.
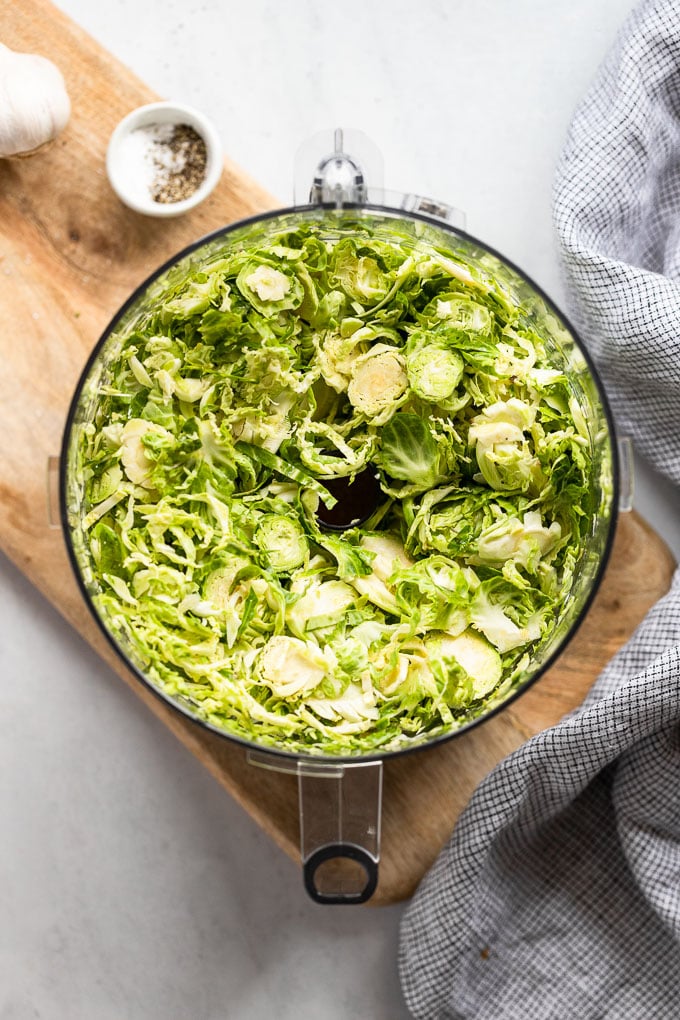
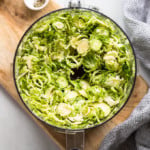
Shred the Brussels Sprouts
Before we start anything in the cast-iron skillet though, we’ve got to shred the Brussels sprouts! There are a few ways to go about this:
- Shred them in a food processor using the shredding disc attachment blade. This is probably the fastest and easiest way to shred the brussels sprouts, but it does require a few more dishes.
- Use a hand-held mandoline to slice them. It’s fairly easy, and a less bulky way to shred than using a food processor, however, it takes more time and is a little more…risky? Because the sprouts are small, be careful if using a mandoline.
- Finely slice with a knife. This is my least recommended way, because it’s difficult to get an even slice on the Brussels and is even quite riskier in terms of slicing a small veggie like that, and trying to do so thinly. Please be careful if slicing them with a knife!
Now, Sauteed Brussels Sprouts!
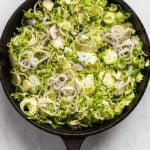
Start by heating olive oil in the skillet over medium-high heat. You could also use butter, just be sure to turn the temperature down a little so it doesn’t burn in the process.
Then add the shredded sprouts, spreading them in an even layer in the pan to help them cook evenly and crisp up. It’s important to use the largest skillet you have so they have room to properly crisp, instead of steam.
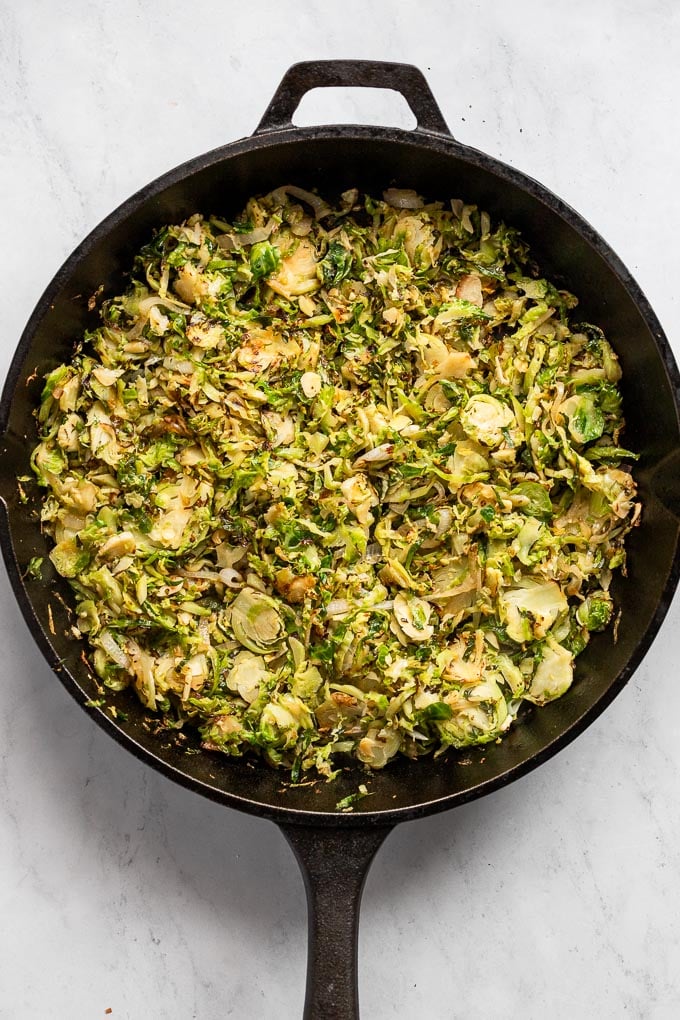
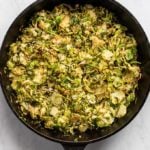
Let them sautee on their own – without stirring them – for several minutes to encourage more charring. The charring is what will caramelize the Brussels and bring out the flavor.
Also add in the shallot here, since it needs to get tender and caramelized, too.
Don’t forget a big pinch of salt! This will help layer flavor into the veggies.
Occasionally, as they brown, give them a stir. After about 5-6 minutes, add in the garlic. We are adding it towards the end so that it doesn’t burn; it needs less time to get tender and delicious! Stir it in and continue cooking until tender.
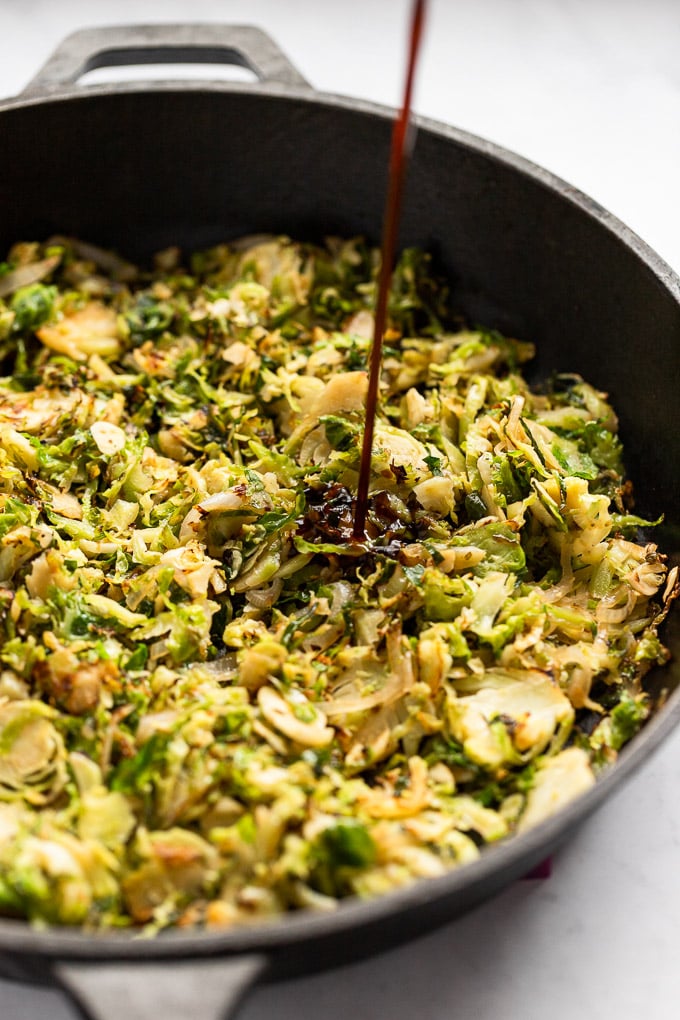
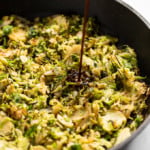
Once they’re done, add in the balsamic vinegar and maple syrup, if using, and garnish with shredded parmesan cheese.
Or, you know, whatever kind of garnish or sauce you’d like. You can also drizzle tahini herb sauce over them, or toss them with buffalo sauce with blue cheese or a side of blue cheese dressing for a game-day vibe, too.
How to Store Fresh Brussels Sprouts
It’s important to store your fresh Brussels sprouts properly before you’re ready to use them in a recipe so that they are still fresh as can be when it’s time to make this easy side dish!
Store them in a plastic bag in the crisper drawer of your fridge for up to 5 days. Be sure to remove any damaged leaves or ones that are wilted and yellow before storing. And do not wash the Brussels until you’re ready to use them. Any additional moisture will cause them to decay faster.
Brussels will tend to get a stronger, less sweet, flavor the longer they are stored, so it is best to use them within the first few days of purchasing, even though they will last in the fridge for sometimes up to a week.
Can I shred them ahead of time?
Yes, you can shred the sprouts ahead of time and then store them in an airtight container in the fridge. However, do this only 1 to 2 days in advance to keep them as fresh as possible. They’re best-stored whole, however, I won’t deny you an even easier weeknight dinner if you’ve shredded them in advance!
What do Brussels Sprouts Taste Like?
Brussels sprouts can vary in flavor depending on how you cook them. When they are cooked properly, they develop a nutty, savory flavor with a mix of both crispy and soft textures that’s a wonderful combination. If they don’t have time to properly caramelize, they can end up bitter and kind of soggy- which no one wants.
So moral of the story: be sure to let them caramelize and crisp up for the best flavor. No boiling here!
What to Serve with Shredded Brussels Sprouts
This side dish is excellent for busy weeknights when you need to get in some veggies, and fast! Serve them with tater tot hotdish, alongside pumpkin pasta, or parmesan rosemary fish. If you are a meat-eater, you can serve them alongside a meat main dish, too. If you go for that buffalo-blue-cheese combo, why not add in some chicken wings?
They are great served with other veggies, too. Carrots are a wonderful contrast with their bright color and sweet flavor. Try these easy Instant Pot steamed carrots or these roasted carrots with a creamy yogurt sauce.
Whichever way you serve them, you really cannot go wrong!
Did you make this recipe? Please leave a star rating and review in the form below. I appreciate your feedback, and it helps others, too!

Get the Recipe 15-Minute Sauteed Shredded Brussels Sprouts
Ingredients
- 1 pound fresh Brussels sprouts, ends trimmed
- 1 ½ tablespoons olive oil
- ⅓ cup shallot, thinly sliced (1 small)
- Salt and pepper, to taste
- 2 garlic cloves, finely chopped
- ½ tablespoon high-quality balsamic vinegar, optional
- 1 ½ tablespoons real maple syrup, optional
- ¼ cup Parmesan cheese*, shredded or slivered
Instructions
 Use a food processor with a shredding disc attachment to finely shred the Brussels sprouts. You can also use a hand-held mandoline.1 pound fresh Brussels sprouts
- In a large skillet, heat olive oil over medium-high heat. Add the shredded sprouts and thinly sliced shallot, with a generous pinch of salt and black pepper to taste, stirring to coat and combine. Then spread the veggies in an even layer. Let them cook and caramelize, only stirring very occasionally, to encourage crisping and caramelization, for about 6 minutes.1 ½ tablespoons olive oil, ⅓ cup shallot, Salt and pepper
- Stir in garlic, and continue to cook for 3-4 minutes.2 garlic cloves
- Remove from heat and stir in balsamic vinegar and maple syrup, if using. Taste test for salt and pepper levels. Garnish with parmesan cheese as desired.½ tablespoon high-quality balsamic vinegar, 1 ½ tablespoons real maple syrup, ¼ cup Parmesan cheese*
Notes
- Storage: store any leftovers in an airtight container in the fridge for up to 3-4 days. Reheat in the microwave or on the stovetop.
- Use fresh lemon juice in place of the balsamic vinegar and maple syrup for a different version.
- Vegan and Dairy-Free: omit the parmesan cheese. For vegetarians, make sure you’re using a vegetarian version of parmesan.


Yummy and very easy. Will definitely make again. Thank so much for sharing
I’m so glad you enjoyed! Thanks for your comment, Jan!
so yummy and doing the Brussels by hand was like a moving mediation lol! great flavour I could crush a whole plate!
Good for mind and body – I love it! 🙂 Thanks so much, Jessica, I’m so glad you enjoyed them!
This was so delicious! I think the combination of the balsamic vinegar and maple syrup was fabulous. This will be a new staple at our house!
I’m so glad to hear! Thanks so much!
I was a little skeptical at first (I’m from the roasted Brussels sprouts only club) BUT I am so happy I made this dish! It will now be in heavy rotation in my house 😉
Well, if that isn’t the best compliment! So excited to hear you gave them a try – and that you loved them! Thanks so much for sharing, Kim!
Made this tonight as I had some huge sprouts so didn’t want to do the usual roasted ones. Loved it and think I’ll be doing them this way often. I added a splash of siracha to give it a little kick and it was awesome.
Awesome, I’m so glad to hear you gave it a try! Thanks for your review, Nancy!!
This was so good. Ingredient list was simple so I had to try it. I added chopped bacon and a pinch of red pepper flakes. Thank you so much for the recipe. I will definitely make this again and again.
I’m so glad to hear! Thank you so much for your review!