
What’s sweet and buttery and rich and basically the most amazing thing you can imagine making at home for your coffee?! That’s right, homemade caramel syrup is what!
All run-on sentences and obvious statements aside, this caramel simple syrup is truly a thing of miracles. In fact, I didn’t think it could be done. I thought I would just have to have the store-bought variety if I wanted homemade caramel lattes.
Or homemade iced coffee with caramel. Or caramel cold brew. Or…you get the idea.
Since my world was rocked making homemade vanilla syrup for coffee, I knew I had to give a caramel version a try. And oh boy, my friends, our world was rocked then…get ready for this. World-shaking.
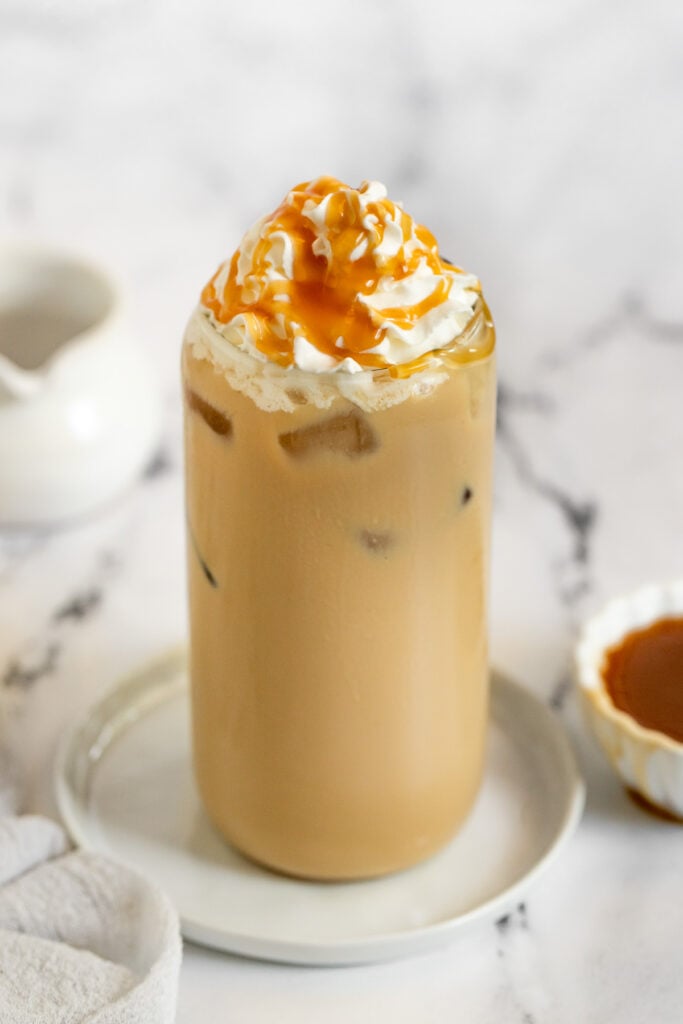
In fact, I made a friend an iced caramel latte and they said it was “great, it tasted just like it came from the place…Starbucks…but better.” And that was just the endorsement I needed. So let’s make it, and you, too, can have coffee-shop-worthy drinks right at home, without the price tag.
What is Simple Syrup?
Simple syrup is a liquid sweetener, generally made for use in beverages because it disperses the sweetness throughout the drink without any gritty texture you might get if you were to stir in granulated sugar. This is especially important when making iced drinks.
It’s typically a 1:1 ratio of water to sugar that is simmered until dissolved into a syrup. The ratio can be changed to make a thicker syrup consistency like maple syrup or corn syrup – for drizzling on yumminess like pancakes.
Simple Syrup can be flavored with a variety of fresh herbs, fruit, and spices – so many delicious options!
Making basic simple syrup is a quick and easy process, and while caramel simple syrup is relatively straightforward, it does require a careful eye and a little more patience, but I promise you it’s totally worth it.
What About Caramel Sauce vs. Caramel Syrup?
You might hear the two terms used interchangeably, but there is a difference and it’s especially important to note because it will change the outcome of your recipe depending on what you use.
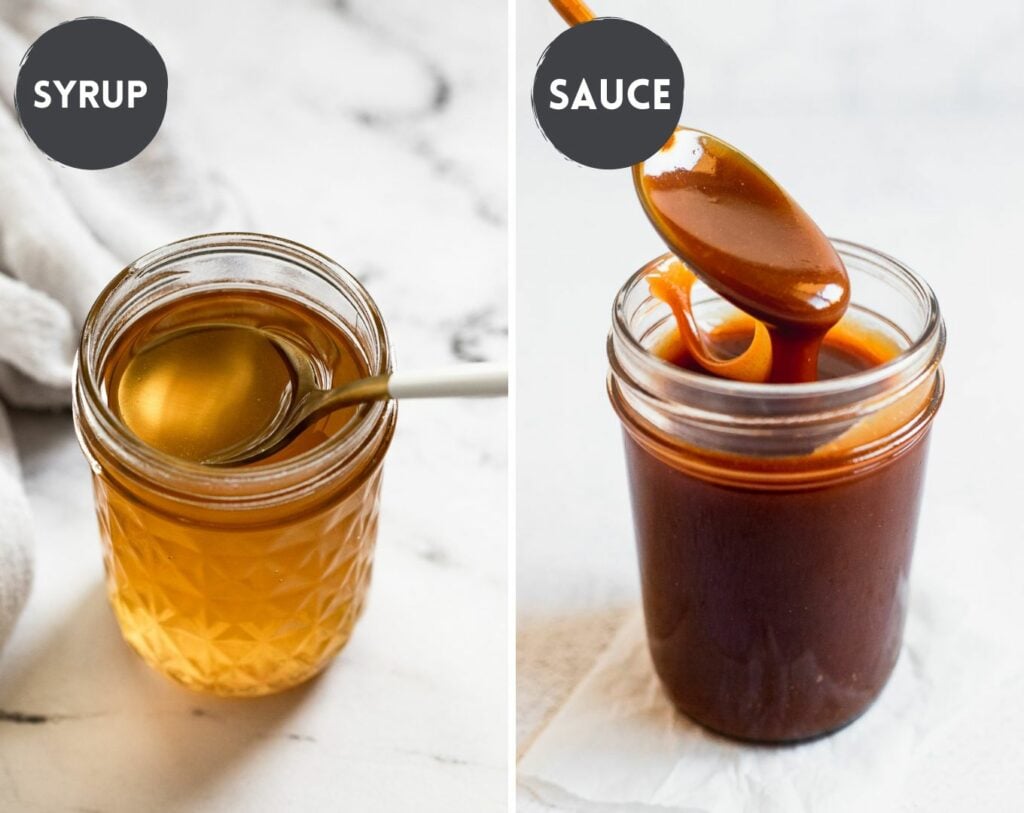
Caramel sauce is thick in texture with a rich flavor from added butter and/or cream. It’s what you’ll typically use to drizzle on ice cream or other desserts. Or hey, even pancakes! It’s also what you’ll want to use for a caramel drizzle on whipped cream (like in these whipped cream photos).
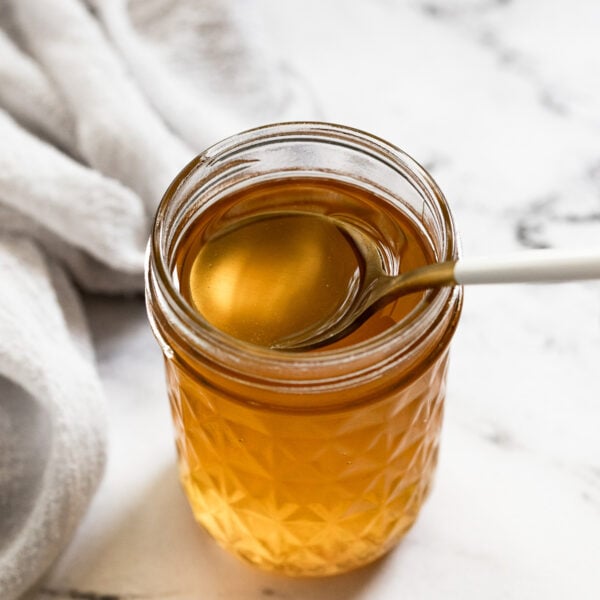
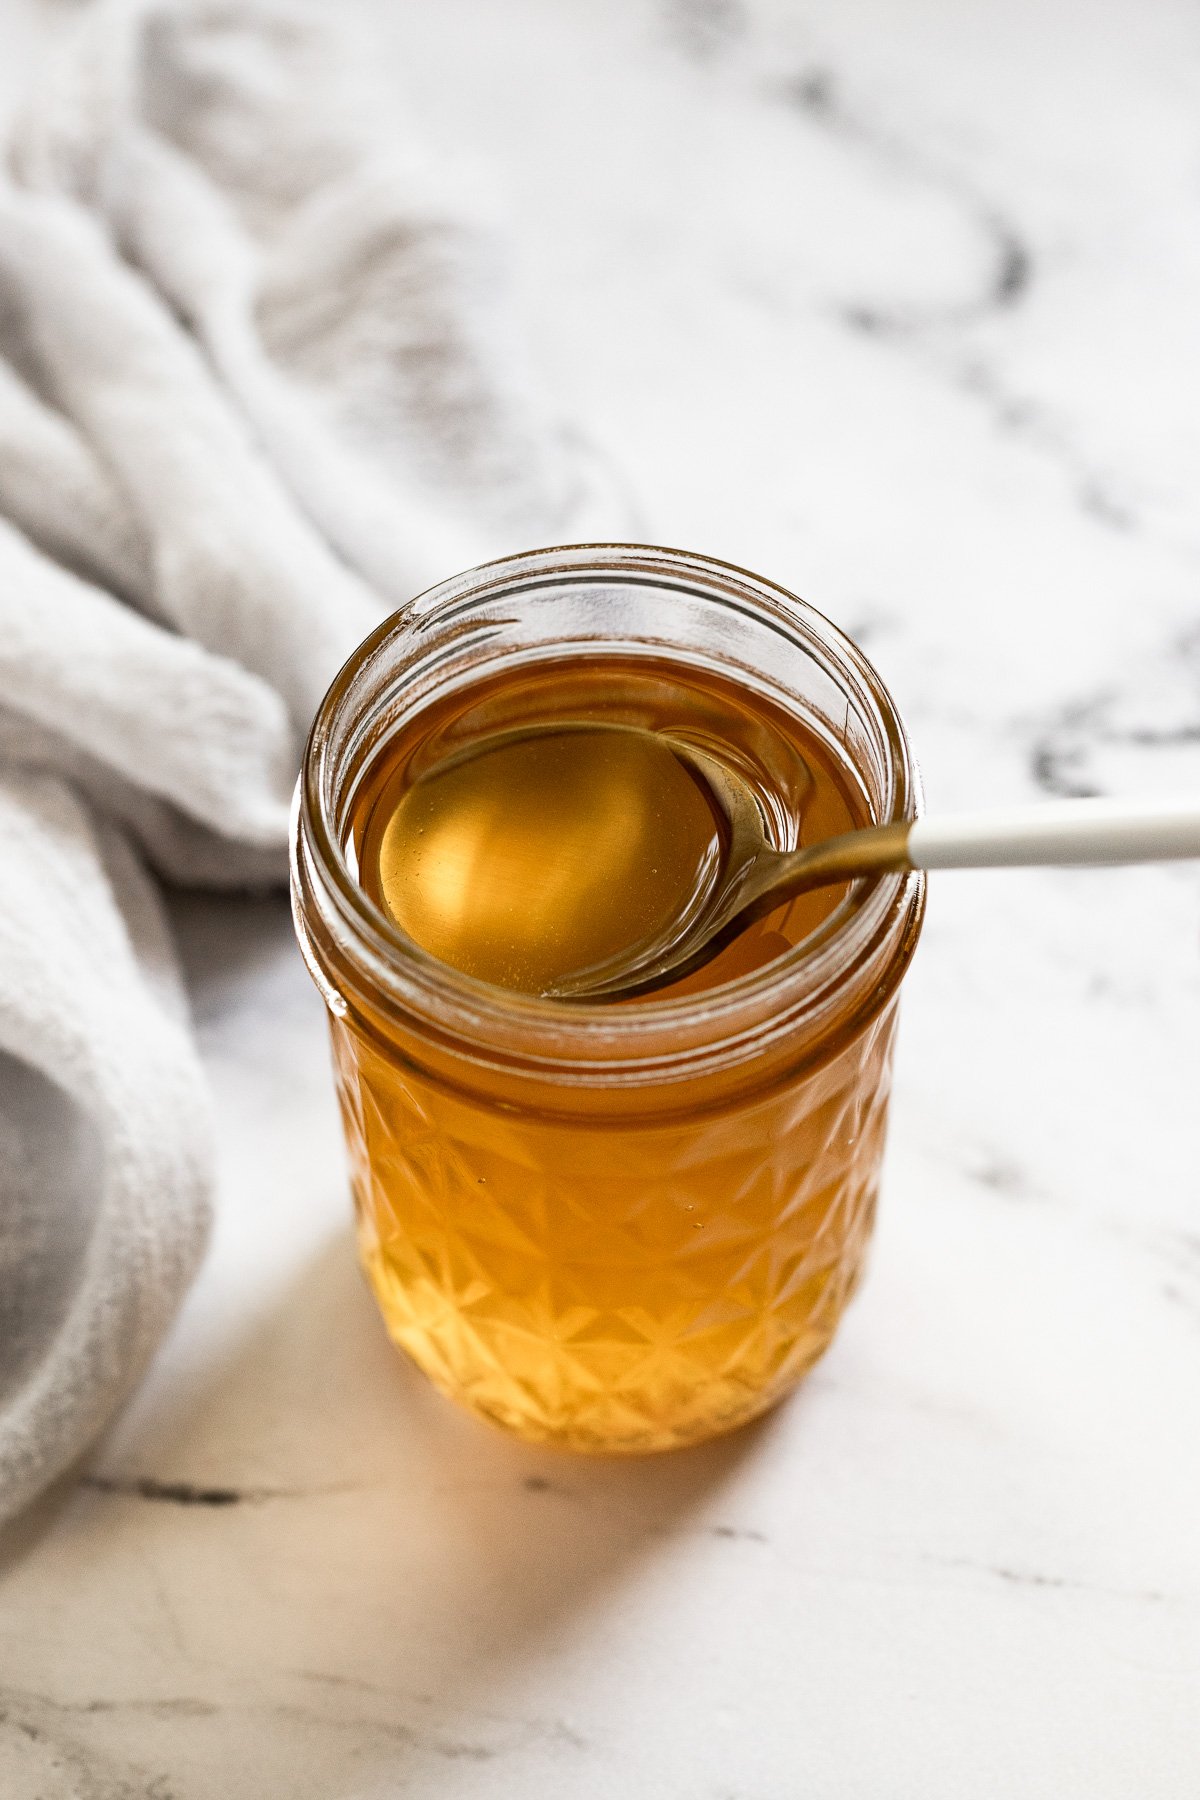
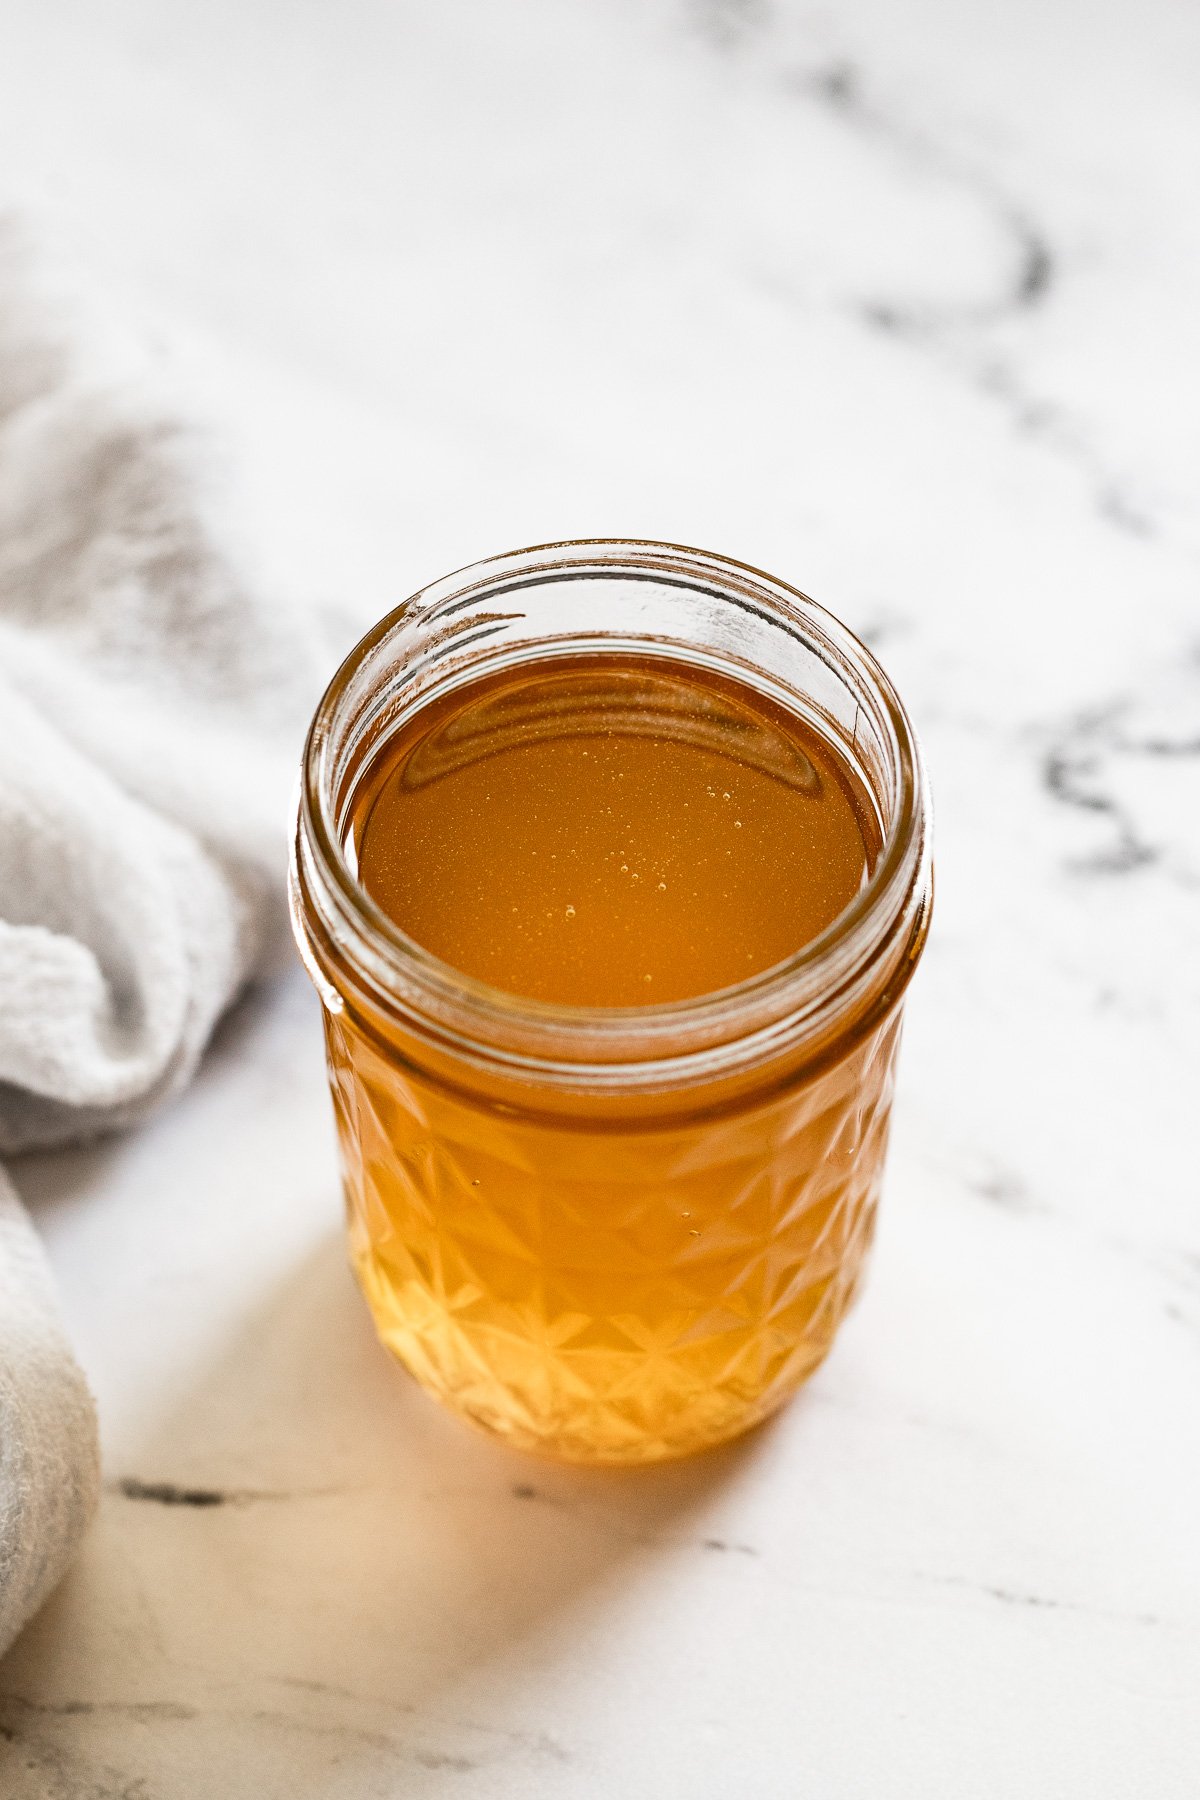
Caramel syrup is thinner and a little sweeter – less rich- than caramel sauce because it is made with just sugar and water. It doesn’t have the same richness because there is not butter or cream added. Its purpose is for drinks because it easily dissolves into coffee or tea, infusing your beverage with flavor.
What is Caramel Simple Syrup Made Of?
Ah, homemade caramel syrup is a thing of beauty and few ingredients, friends.
While those store-bought varieties might have added ingredients, artificial ingredients, or preservatives, making latte syrup at home only requires two ingredients (plus water).
It’s simple and you know exactly what’s going into it! Here’s what you’ll need:
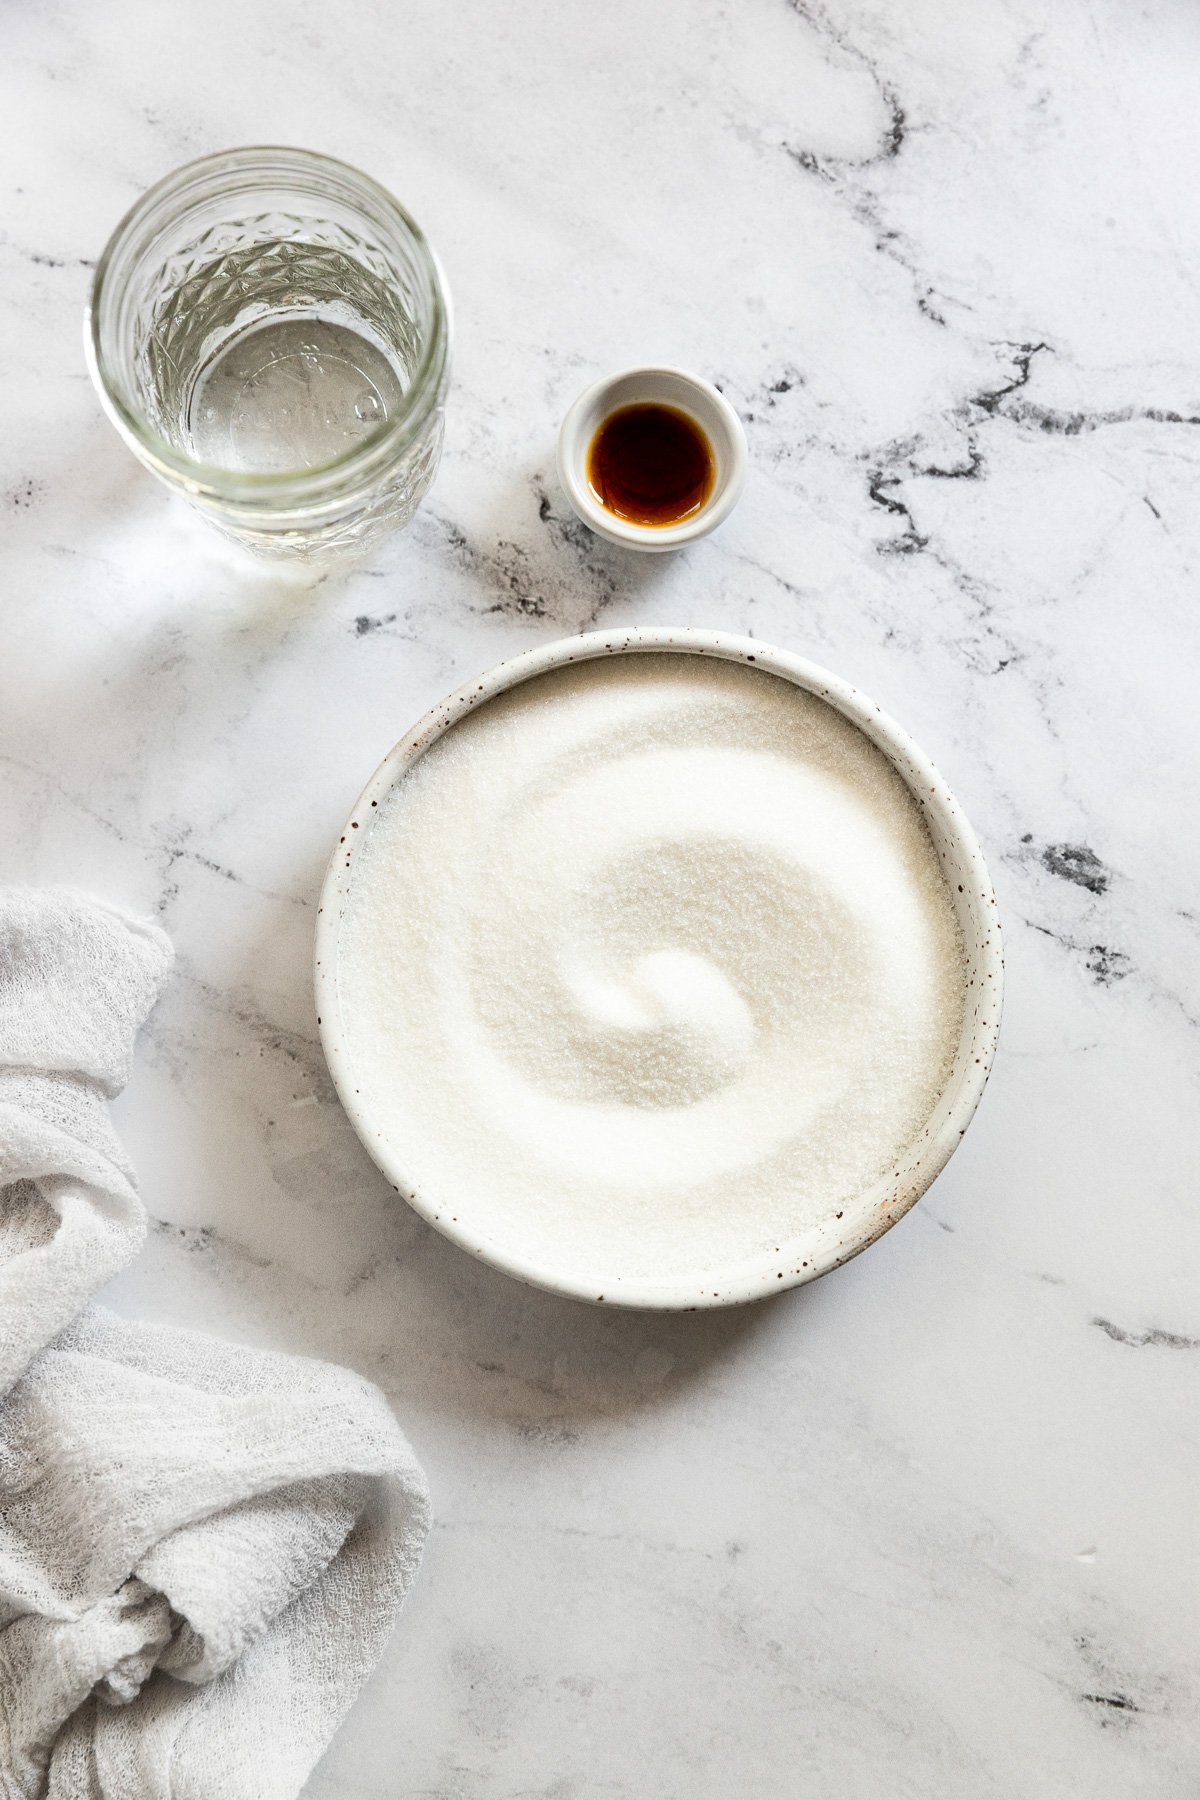
- Granulated Sugar: simple and straightforward!
- Water: this recipe uses a little more water than a typical 1:1 syrup ratio. This is to make sure that the caramel doesn’t actually thicken up too much once it cools, otherwise, it won’t be great for drinks.
- Vanilla Extract: I like adding a little vanilla extract to round out the flavors and give the syrup more depth. If you have it on hand (like, maybe from this caramel cream cheese dip?), use caramel extract for more of a deep caramel flavor. You can also leave it out if you prefer.
Sometimes when making caramel-based recipes (like caramel corn) corn syrup is added to prevent the sugars in the caramel from crystalizing, and keep the texture smooth. I haven’t found to need it in my many, many batches of caramel syrup making, but if you feel so inclined, add a little drizzle when you start the syrup.
How to Make Caramel Syrup
Typically, making caramel is one involved process, with a huge focus on temperature and time. Luckily, making caramel simple syrup is a little less precise with temperature and time, but it will require your attention so that it doesn’t burn.
Please see the full recipe card below for amounts and instructions.
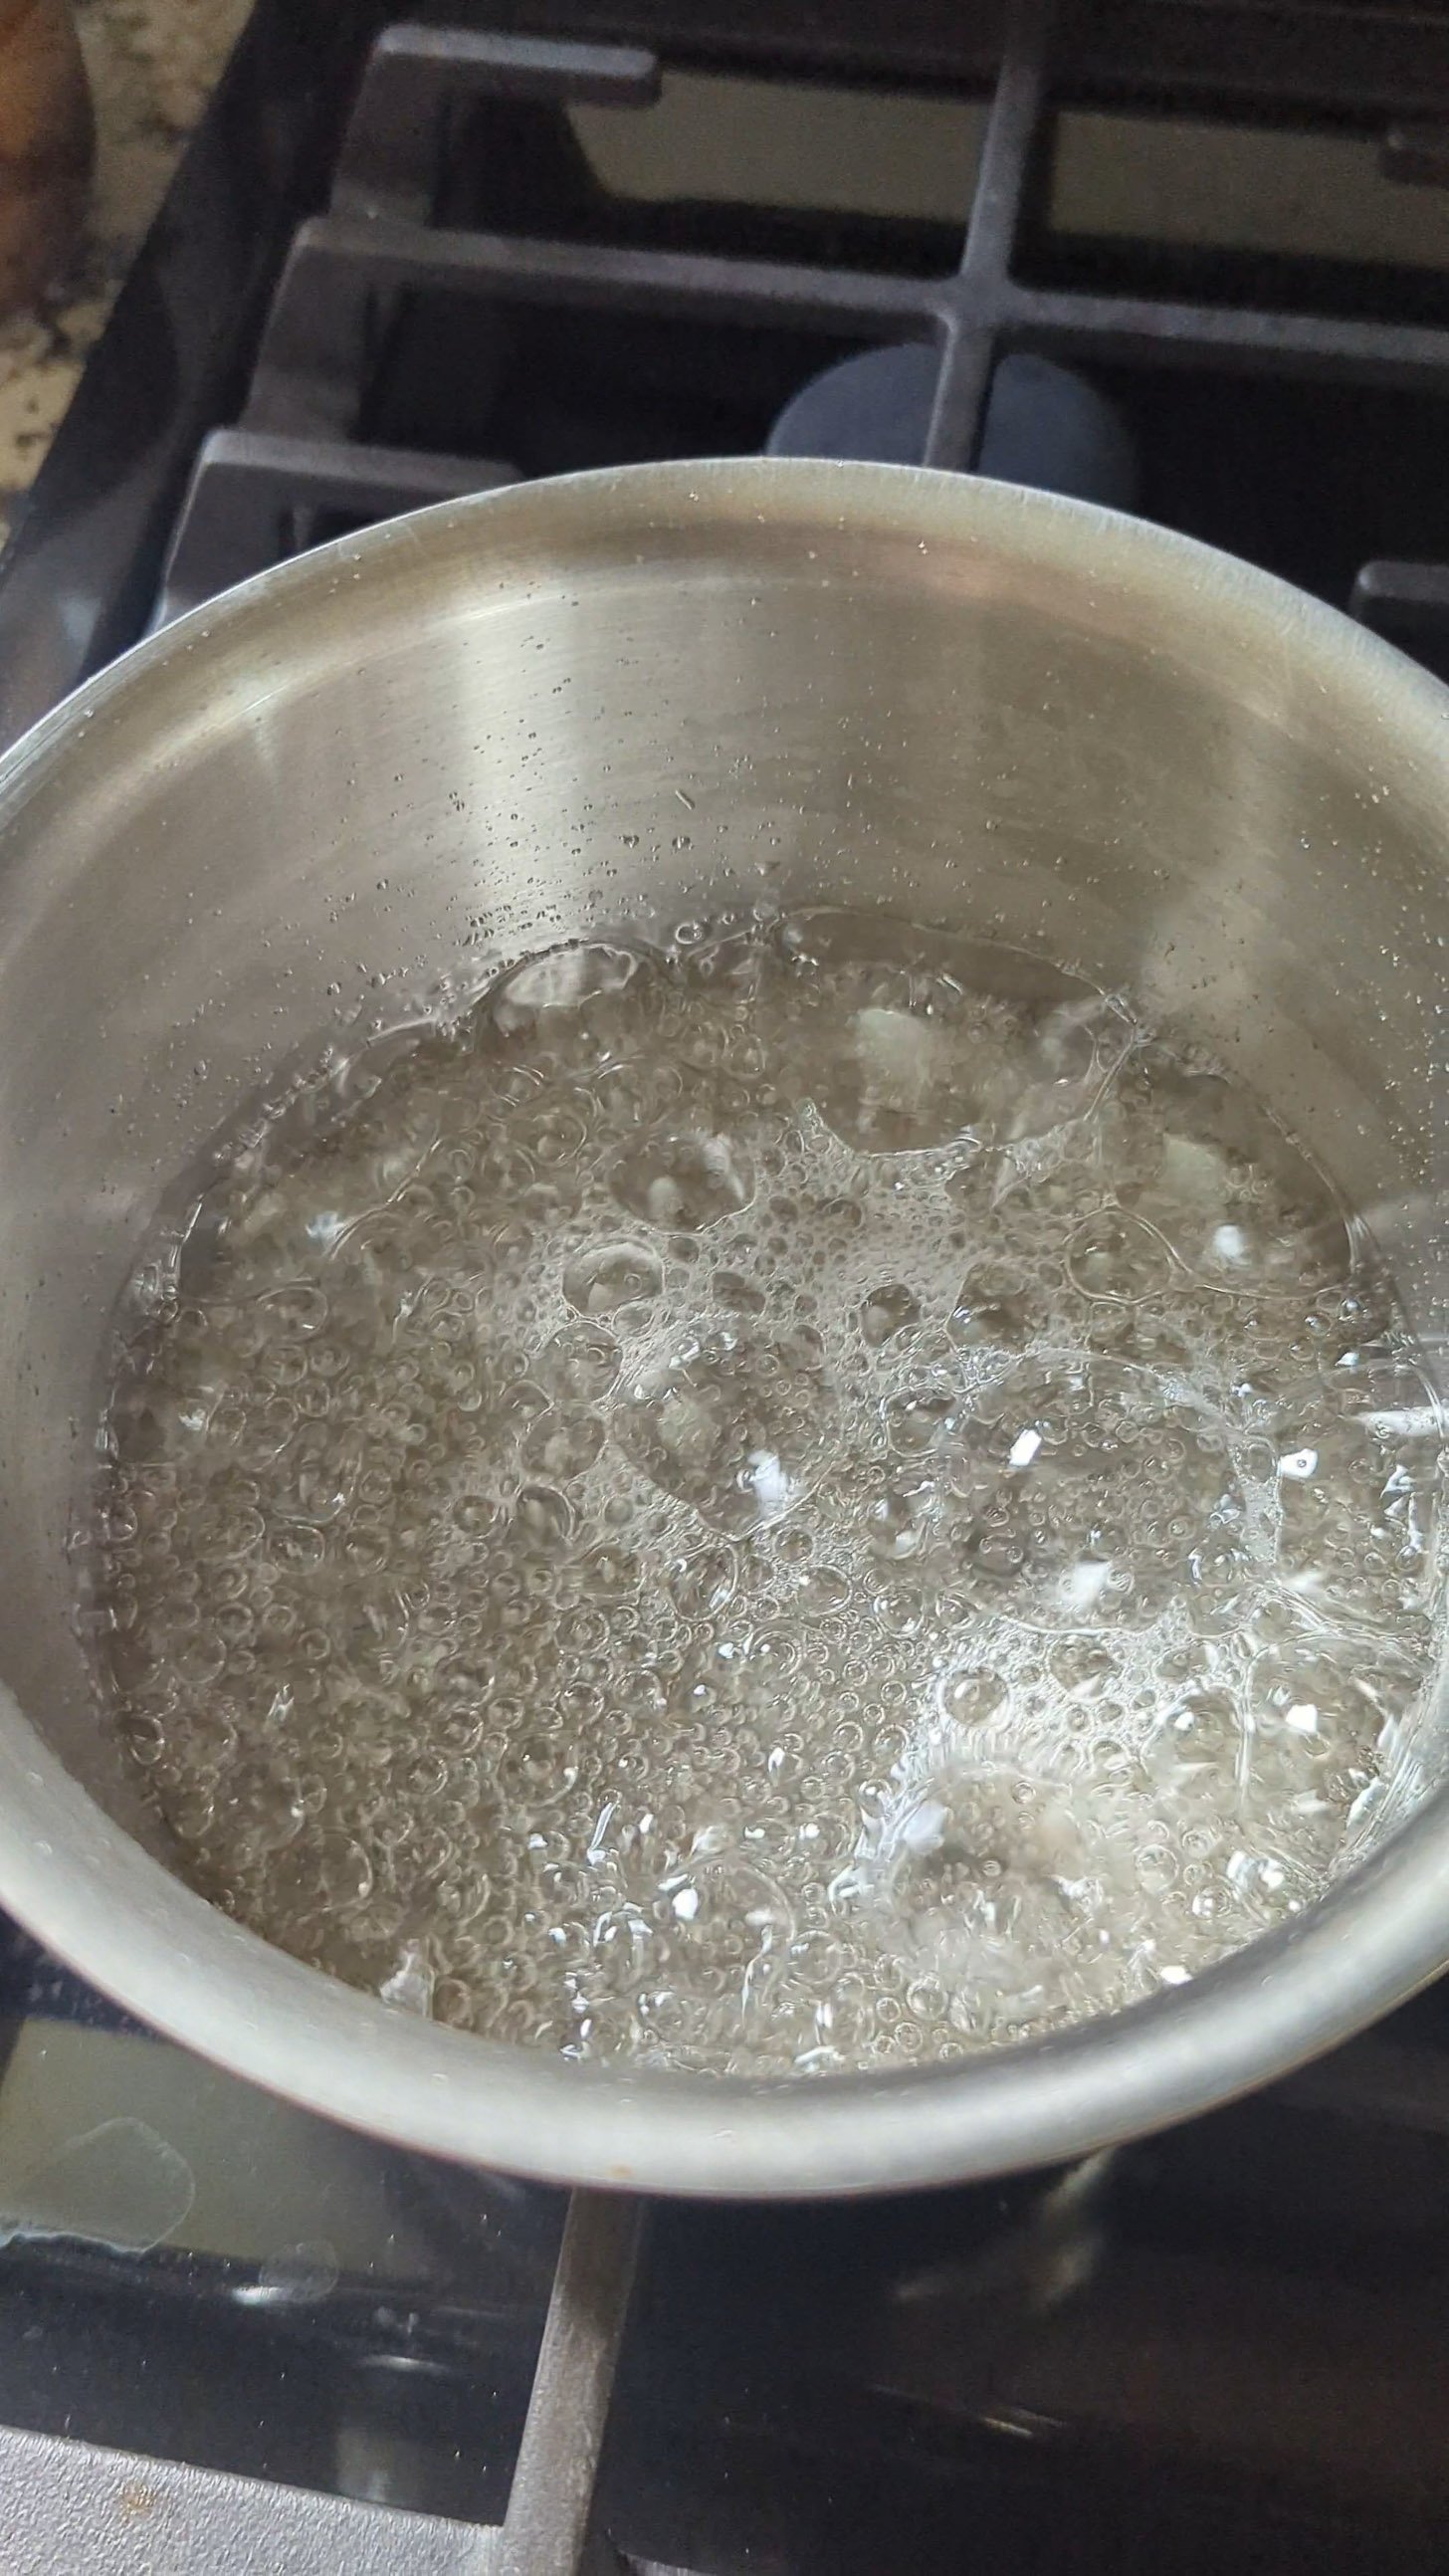
Dissolve the Sugar in Water & Swirl
Add half of the water and all of the sugar in a 1.5-quart saucepan. There is a higher ratio of sugar in the beginning of the recipe to allow for a nice caramelization.
Once the mixture begins to boil, there isn’t much of a need to stir it, because that can cause crystallization on the sides of the pan. Instead, a few swirls, if any, is all you’ll need to do.
Slowly Boil Until Golden Brown
This part makes caramel syrup a little more involved than regular simple syrup. You will need time for the sugars to caramelize. In a basic simple syrup recipe, the mixture is done and ready once the sugar is dissolved, which only takes a minute.

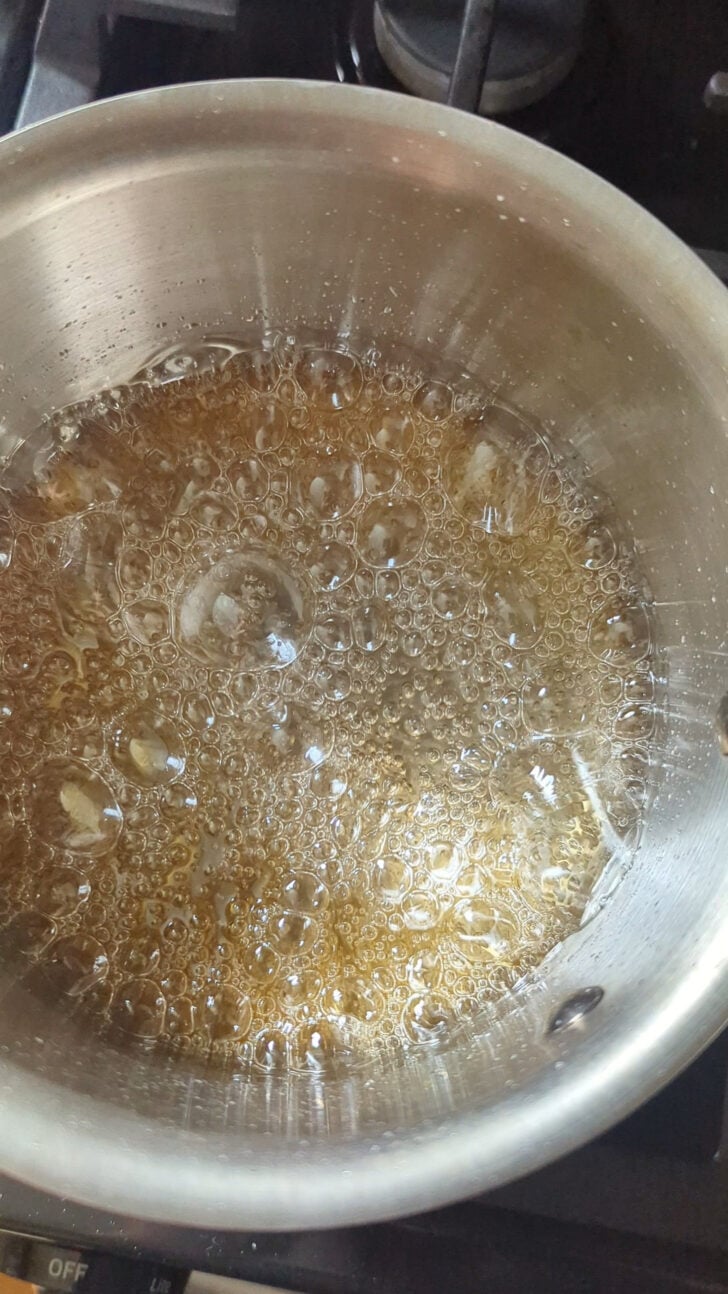
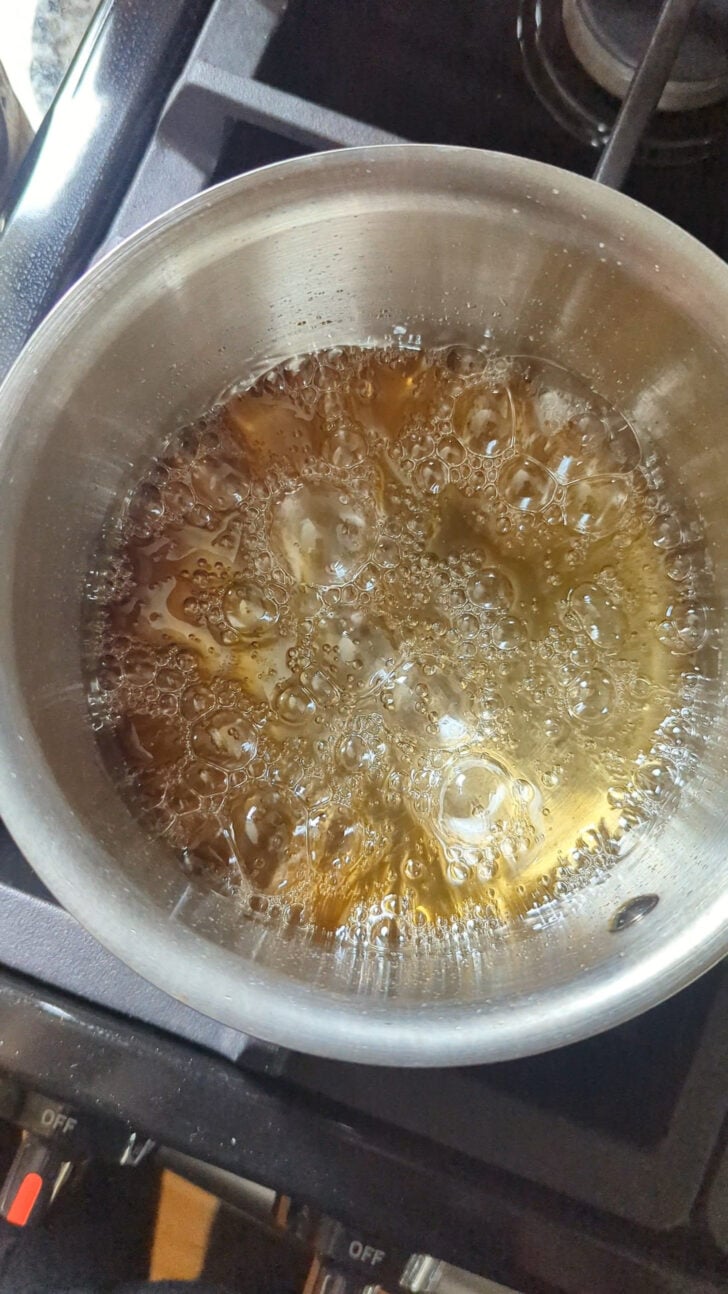
For caramel simple syrup, keep the mixture at a low boil for about 15-16 minutes from when it starts boiling. Throughout this time, the syrup will bubble and become thicker – this is exactly what we want! It will remain pretty clear until all of a sudden, the color turns amber rather quickly.
Once the syrup gets to the golden brown point, remove it from the heat, or it can become too bitter and burnt-tasting. Overcooking will also result in it hardening.
At about the 10-minute mark, the syrup will begin to thicken, at which point the boiling will slow even further. Increase the heat slightly as needed (especially on an electric stove) so it continues to boil as pictured above. See the recipe video at 2:25 for a visual.
It’s important to remove the pot from the heat once the color turns a light golden brown so it doesn’t continue to caramelize or burn. Since stovetop temperatures vary (especially gas vs. electric), as well as pan size and type, it’s more important to watch for the color change, rather than an exact minute.
Remove From Heat & Add More Water
Now, this is very important: heat the additional water before adding it to the caramel syrup.
This will reduce the splatter that comes from the syrup and make your life a whole lot easier. Just pop it in the microwave before you add it (do this while the syrup is cooking to make things even easier).
I also recommend wearing oven mitts just in case there is extra splatter because it will splatter some.
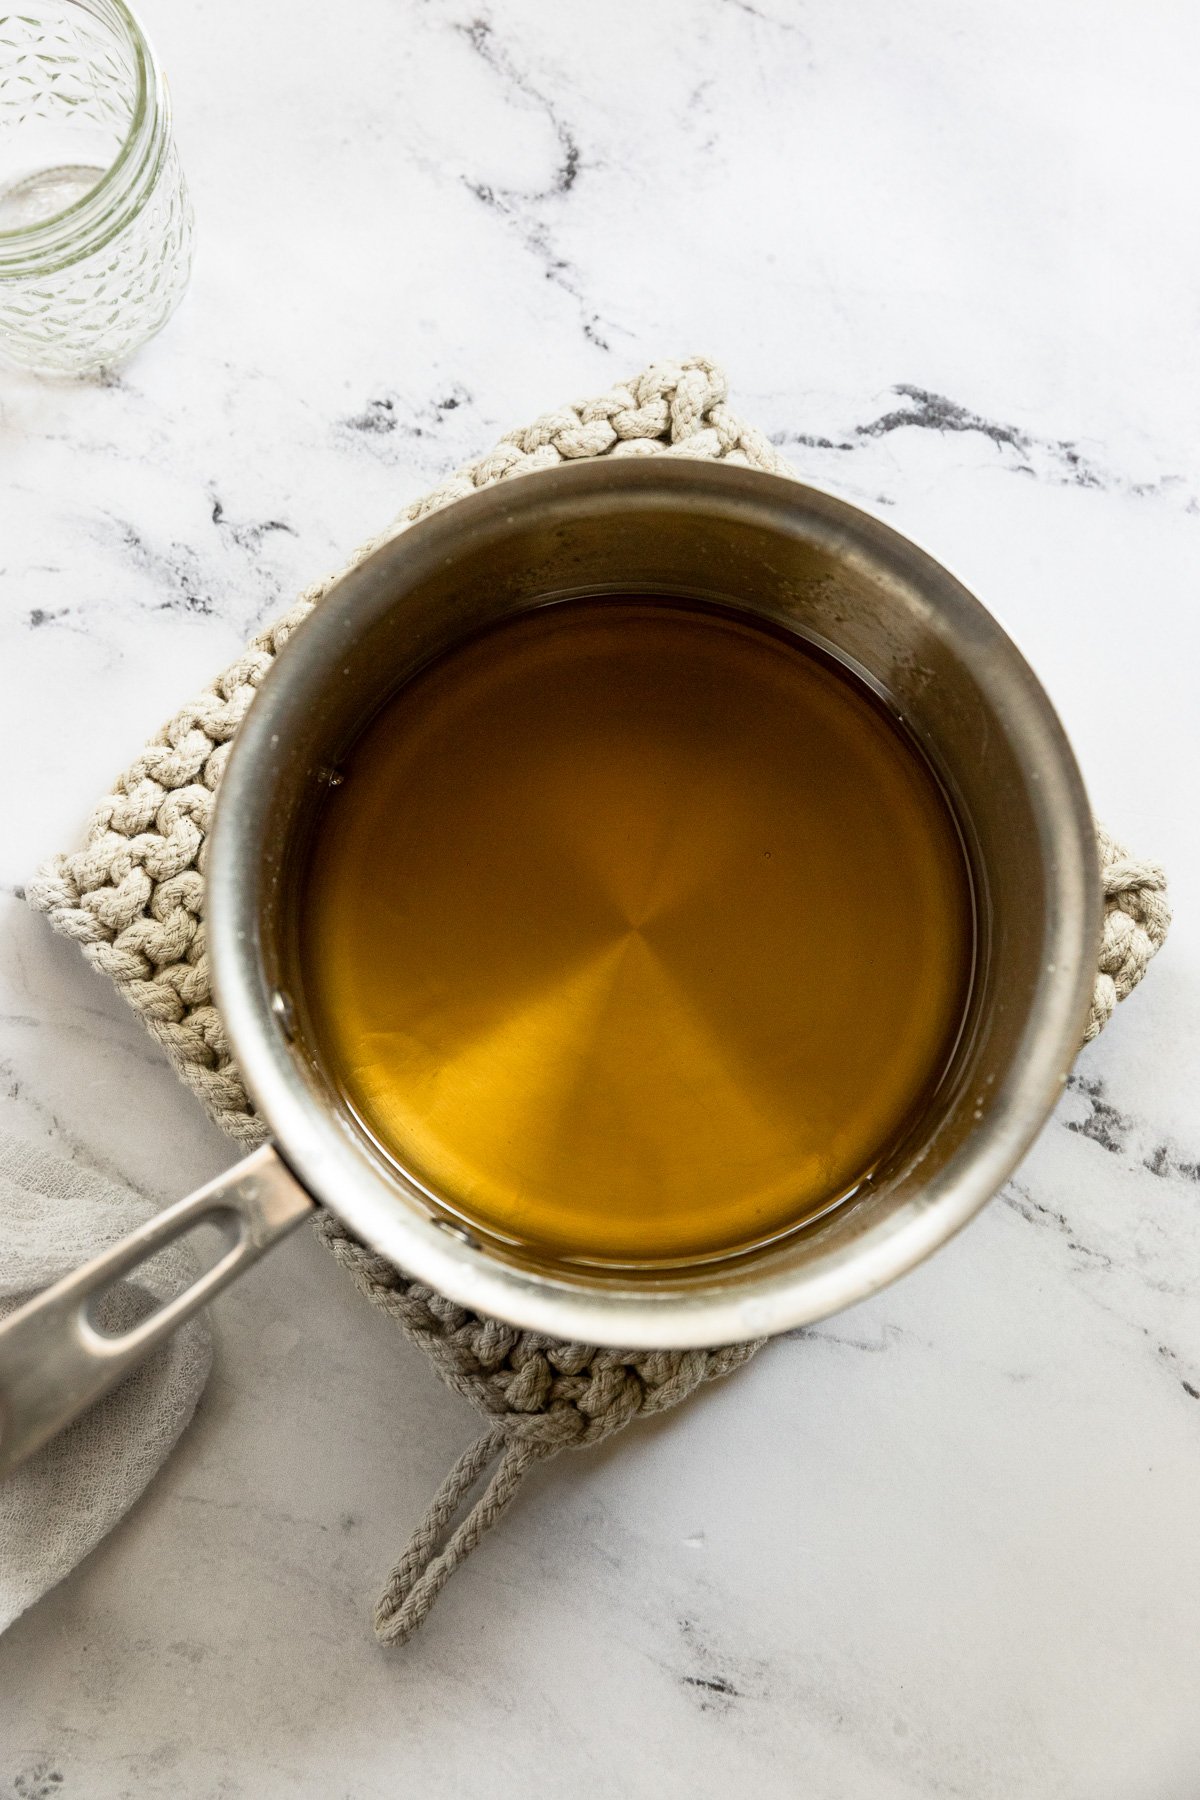
As you whisk in the heated water, the caramel may slightly harden in bits. If this happens, keep whisking, and if needed, place it back over low heat while whisking until it’s dissolved again.
Then, whisk in the vanilla extract and allow the syrup to cool completely.
Add approximately 2 tablespoons of syrup to your favorite drinks to enjoy!
Turn it Into Salted Caramel Syrup
If you are a fan of a little sweet and salty, then give salted caramel syrup a try.
Let the syrup cool slightly so it’s warm, but not too hot, and add salt to taste. Start with a little and continue tasting until it’s just salty enough for your preferences.
Storage Tips
Now that you have homemade caramel syrup, transfer it to an airtight container like a glass jar with a lid and let it cool completely. Store it in the fridge and it will be ready each morning for your coffee.
It will last up to 2 weeks in the fridge, sometimes longer. Flavored syrups spoil faster than regular simple syrup, but they still have a relatively significant shelf life. Check for any moldy spots or an off-smell if you are storing it for a long time.
It is not recommended to store homemade syrups at room temperature for longer than a day or two, as they have a higher chance of spoiling and/or crystallizing.
Additional Tips for Success
- Worth repeating: watch for the color to change so that you don’t boil it too long.
- Once it’s completely cooled, you can store it in a squeeze bottle (with a lid on the tip) to easily drizzle out the syrup into drinks.
- This syrup is both gluten-free and dairy-free (but as always, check your specific ingredients to be sure).
- Serving size will vary depending on how much syrup you use per drink, etc. This recipe yields a little more than 3/4 cup of syrup.
- Also worth repeating: adding hot water will greatly reduce the splatter!
Ways to Use Caramel Syrup
Ah, let me count the ways to use this incredible syrup. Of course, it’s mainly for drinks but there are a few unexpected ways you can use it, too!
- Hot Caramel Latte or an Iced Caramel Latte
- You can also use it in iced coffee or cold brew drinks
- Stir it in tea, or make a tea latte
- Use it in cocktails – it’s especially excellent in bourbon or whiskey-based cocktails.
- Add it to hot (or cold) apple cider.
- Stir it in warm or cool milk for a kid-friendly drink
- Toss it with mixed berries, drizzle on yogurt with granola, or add it to a smoothie
- Brush on a freshly baked cake for extra flavor
More Coffee Syrup Recipes to Try
- Vanilla Bean Syrup
- Lavender Syrup
- Mint Syrup
- Autumn Spice Syrup (like pumpkin spice, but butter)
Need more? Check out our collection of latte syrup recipes!
Did you make this recipe? Please leave a star rating and review in the form below. I appreciate your feedback, and it helps others, too!

Get the Recipe Homemade Caramel Simple Syrup
Ingredients
- ¾ cup granulated sugar
- 1 cup water, divided
- ½ teaspoon vanilla extract
Equipment
- Mason Jar for storage
Instructions
- In a medium saucepan, add the sugar and ½ cup water (optional to whisk together). Heat over medium-high heat until it begins to boil.¾ cup granulated sugar
- Once the sugar is completely dissolved, reduce the heat slightly, to around medium or medium-low on a gas stove, and medium or still medium-high on electric. Continue to adjust the temperature as needed to keep the mixture at a low boil with bubbles continuously rising to the surface. Please see the video for additional visual guidance if necessary.
- Continue to low boil for approximately 15-18 minutes until a light golden amber color appears. If around the 10-minute mark the boiling slows down, increase the heat. You do not need to stir it, but the pot can be swirled occasionally by gently lifting and turning it in a circular motion.
- While the mixture is simmering, heat the remaining 1/2 cup of water in the microwave or in a small saucepan. Using hot water for the next step will reduce splatters.
- Once the light golden color appears just around the edges of the liquid, remove the saucepan from the heat. It may be hard to see depending on the pan you use and the lighting. Note: do not allow the mixture to continue to boil or it can become too thick or burn quickly – keep your eyes on it!
- Wearing oven mitts, carefully whisk in the remaining (hot) water into the caramel syrup; it will splatter, so be careful. If any syrup hardens, continue whisking and return to heat until it's dissolved again. Stir in the vanilla extract.½ teaspoon vanilla extract
- Allow to cool before transferring to an airtight container. You can use it immediately if needed, but it will heat up iced beverages so mix it with milk or espresso first, before the ice. Store in the fridge for up to 2 weeks and use in your favorite beverages or recipes as desired. Enjoy!
Notes
- Yield: This recipe makes just over 3/4 cups of syrup.
- Salted Caramel: allow syrup to cool to warm and stir in desired amount of salt; I like to start with 1/4 teaspoon of fine sea salt and add more as needed.
- Electric vs Gas Stove: as of 4/11/2024 I have updated the recipe with additional notes for heating using either stove. In numerous tests on both gas and electric stovetops, as long as the syrup continued to boil properly, it was ready right around the 16 mark. Keep an eye on the rate of boiling and adjust your temperature as needed.


This is just the yummiest ever!!!!!
I’m so glad you love it!! Thanks for taking the time to comment, Laura!
Im always worried about products having “natural” flavorings being gluten free, with this recipe I am SURE it gluten and dairy free! It smelled like fresh caramel corn when it was almost done!I boiled mine on med low and it took a good 20 minutes but the plus is you really don’t have to stir but 3 or 4 times. This going in my caramel apple cider martini!!
Yay!! Agree – so good to not have to worry about ingredients. And a caramel apple cider martini…I’m getting on that ASAP! 🙂
Mine has been boiling for close to 30 minutes and still no color change
Sorry to hear it’s taking longer for you, Crystal. Please refer to the Youtube video in the recipe card which shows a detail step by step of the recipe and how the color changes. The time may be affected by pan type and how hot your stove gets, too.
Hi Becca! TYSM for sharing this recipe, just tried it and love it.
FYI in case you want to add a note to your recipe regarding the issue a couple people had with the sugar not caramelizing – that is simply because of the degrees – not necessarily the amount of time. Sugar caramelizes at 320 degrees. When I made your recipe I noticed it didn’t caramelize as fast as yours while it was on a simmer so I just turned up the heat and it came out beautifully. I’m sure that’s all it is!
Thanks again.
Thank you so much, Taffy! I think that’s a really important note about temperature and I appreciate you mentioning it.
I was skeptical of this recipe but WOW!!! Blew my socks off!! I had to omit the vanilla because I don’t have any but the flavor is still very good and caramel-y. Taste almost like caramel corn when I added the sprinkle of salt. 2tbsp in my Iced Coffee and I have my iced caramel coffee. 10/10
This made my day! I’m so glad you gave it a try and so excited to hear you loved it! Thanks so much for taking the time to leave your review, Elise!
I wasn’t sure if mine would turn out because it was really hard to tell in my kitchen if it had turned an amber color – but it turned out great! I’m enjoying the best caramel latte I’ve had in a long time! I don’t like Starbucks’ hot coffees – they leave a gross aftertaste imo. So I’m glad to have a cheaper alternative!!
This makes me so happy to hear! There’s nothing better than a delicious homemade caramel latte IMO! 🙂 Thanks so much for giving it a try and taking the time to leave a review, Katherine, I really appreciate it!
I had an issue with mine not turning amber color any tips ?
Hi Laura – you likely need to increase the temperature or consider using a larger saucepan. Have you had a chance to watch the video? Also, out of curiosity, are you using a gas or electric stove?
Hi! I want to make this to brush on my cake layers instead of using a simple syrup. How’s the consistency? Will it be runny enough?
Hi! Sounds yummy 🙂 Yes, it has the consistency of regular simple syrup so it should work well. If you take a look at the video in the post you can see the runny consistency, which might give you a visual. Hope that helps!
Thanks! I just made it and it’s delicious. Can’t wait to use it for my birthday cake tomorrow!
Yay! I’m so glad to hear! Happy birthday!!
not sure what I did wrong but I had the sugar and water in my stove for 40 min simmering and the color never changed. therefor I ended up making simple syrup that took 40 min. I’m not sure how I could’ve done it wrong when i followed the recipe exactly and my syrup never changed color :((
Hi Chloe, I’m so sorry to hear you had this experience. The only thing I can think of is it sounds like maybe all of the water was added to start; it wouldn’t turn to golden in that case. I appreciate you giving it a try.
I had the same experience as Chloe. I pride myself in being a good cook, and surely know I did nothing wrong. I used 1/2 cup of water. Not the entire cup. I cooked it for about 25-30 mins. It did thicken, but never did it reach a golden color or even close to it. Ugh.
I’m really sorry to hear you had this experience, I know it’s frustrating to try a recipe and not have it turn out. Many others and myself have made it many times with success so I’d really like to figure out what is happening. Have you watched the video to see if yours is simmering the same? Are you using a gas or electric stove?
Hi! Have you tried this with coconut sugar by chance? I’m wondering if it would work just the same.
Hi! Unfortunately I haven’t. Would love to hear if you try it!
Hi! Wouldn’t doubling be ¾ + ¾ cup sugar and 2 cups water? I want to double it and not mess it up! 😝
Hi! Yes, so sorry for the typo in the body of the post. So you would have 1 1/2 cups sugar, and 2 cups water if doubling it.
Hi I tried it. It didnt taste Carmelie enough. Should I brown longer??
Yeah, you might have needed to simmer a bit longer. It’s hard to tell without seeing it, but it should be golden brown in color. The vanilla helps accentuate the flavor, too.
So good. However I do have sugar stucked to the pot. I’m pretty sure I boiled it for too long. Any suggestions on getting it out?
Best recipe yet!! I’ve made lots of simple syrup recipes, but none came even close to this one! Even the Salted caramel version is perfect! Thanks a million x 10! I boiled mine & simmered the mixture for a longer time to thicken the syrup & added the vanilla at the 14 minute mark…
This made my day! Thank you so much for sharing, I’m so glad you love it!
Hello. I’m attempting to making this on an electric stove and it’s clear not turning amber and it’s been 20 min. I did the 3/4 cup sugar and 1/2 cup water. Has this recipe turned out the same on an electric stove as on a gas? Would you know? Thank you!
Hi Audrey – great question. I’ve actually only made it on a gas stove. You may need to use a higher heat with electric; was it simmering?
Yes it was.
Ok, you may need to increase the heat so it boils more aggressively to caramelize. Hope this helps!
I’m not sure what I’m doing wrong but I’ve tried this recipe twice now, and it never turned to the amber color. I put in the 3/4 cup sugar and 1/2 cup water both times (on a gas stove) and let both go for 30+ mins. It definitely simmered and the second time around I tried increasing the heat but then it just crystallized. Any tips? Thank you!
Hi Aurea – I’m really sorry to hear you had this experience. I just tested it again and it turned color right at 16 minutes. I use a 1.5 quart saucepan. I recorded a more in-depth second video that will hopefully help clear up any confusion. I will link it for you later today or tomorrow once it’s posted, but in the meantime I’d recommend checking the video linked in the post and recipe card for reference. Crystallization can happen with stirring; the mixture doesn’t need stirring really once the sugar is dissolved, and even then, I just whisk it a couple of times.
Hi Aurea – an update that I’ve posted the more “minute by minute” video for your reference. It’s in the recipe card, following the instructions. You can also find it here: https://youtu.be/KHU64WBxnNM. I hope this helps!
How can I make this last longer? Will freezing it into silicone molds make it last longer? Or if I made a lot at once and froze the extra bottles, would they defrost okay and be good to use?
Hi Alissa – I haven’t frozen this caramel simple syrup, but I have frozen others and it works out just fine. I do recommend silicone molds or an ice cube tray as opposed to bottles so it’s easier to thaw smaller portions to use. Enjoy!
I just made this and it was PERFECT! Your instructions were very clear and easy to follow. My husband and I just had the best iced caramel lattes. Thank you for sharing your wonderful recipe.
Oh I am so glad to hear! Thanks so much for taking the time to leave your review, Britt.
ok so I followed the recipe and it does not look like carmel nor does it smell like carmel. I came back to look here and in the photos it shows waiting until the sugar looks like carmel but in the derictions I printed from here it says to take it off the burner as soon as it looks light amber. Hummm if you are reading this before making you know what to do. If not well your luck is the same as mine phifff. I will try it againg and I have a feeling it will turn out the way it’s supposed to. Have a beautiful day!
Hi Melvin – the light amber color is what I use to describe turning more “caramel color”. I’m glad you were able to use the process shots in the recipe for reference, as they are there to help you have success with the recipe before you make it.
Disregard about the sugar being stuck to the pot because I got it out. I should have boiled a little longer after I added the additional one water. Again so yummy
Ok great, thanks for the update! I’m so glad you enjoy it! Thank you for your review!!
hi thanks for the recipe.haven’t read all the comments JIC i will add that using metal utensils might be a good idea.i made pecan brittel recently (similiar recipe no water) and had my expensive plastic /silicon spatula literally bloom from blue to navy blue in spots. i threw the whole thing out .sugar gets really hot. happy cooking to all.
Thanks for the note!
My God this is good. Is it possible to double or triple the recipe? Or will that end in disaster?
Hi Sam – I’m so glad to hear you love it! I haven’t tried doubling it myself; if you do, I’d recommend a using a larger saucepan and it may take longer. I wouldn’t recommend tripling it.
Hi! Thanks for the recipe. I’m having the same problem as others which is that mine is taking wayyy longer to turn that light amber color. My guess is it’s because of my stove (electric). I bumped up the heat after looking through comments and looked away for a minute too long because it burned 🙁 totally my fault. I’m going to start over and keep the heat up with a close eye and see if I have any success.
Thanks for sharing, Rachael. I hope the second time went better! I’ll be diving into testing on an electric stove to see if I can get to the exact difference.
I tried making this on my electric stove and it turned out PERFECT! I’ve been adding it to my morning coffee and it is so delicious. The instructions were super clear and easy to follow too.
I’m so glad to hear this! Thanks so much for sharing, Steven!