

Vegetable stock (or broth as it’s also known as, but more on that in a minute) is an ingredient I use all the time, and not just in vegetarian soup recipes either, even though we all know that’s one of the most wonderful ways to use vegetable stock.
It infuses gnocchi with flavor in this one-pot gnocchi recipe, adding depth to the sauce, too. It’s what risotto soaks up – again, getting all that flavor – resulting in a luxurious dinner. It’s used to make rice and is a wonderful substitute for vegetarians when a recipe calls for chicken stock.
There are endless ways to use this wonderful soup, and once you make it at home you’ll love how easy and cheap it is to do. Keep it in the freezer and you’ll always have it on hand!
Vegetable Broth vs. Vegetable Stock
Let’s clear this up first thing because you will see the two terms used interchangeably, so what is the true difference?
They are basically the same, considering their similar ingredients and preparation. When referring to chicken or beef stock vs. broth, stock is made with the bones, whereas broth is made with the meat. Stock therefore, because of the gelatin in the bones, has a more viscous texture.
But what about when we’re just talking about vegetables?! When it comes to vegetable stock vs. vegetable broth, they are essentially the same thing, because vegetables don’t contain gelatin and therefore the texture of the soup will not change. The only difference is that vegetable broth usually has added salt, whereas vegetable stock does not.
So, should I add salt to my homemade stock?
This is up to you! I like to add a little bit just to help bring out the flavors in the vegetables. Because you’re making it yourself, you are able to control the amount you use, and therefore will be able to keep that in mind when you are using it in recipes.
If you are using storebought stock/broth, do note the salt levels while you cook. If I’m using storebought, I try to use stock because it doesn’t have added salt, and I can then add my own to the recipe without worrying that it will be too salty.
Note that if you don’t add salt you definitely don’t want to be sipping on this broth as it will lack flavor because it’s not intended to be sipped on its own. The purpose is to use it in other recipes, where the vegetable stock will infuse flavor, and the salt in the recipe will help bring out those flavors.
Ingredients You’ll Need
There are two ways to make homemade vegetable broth. The first is to use fresh vegetables, and the other is to use scraps from vegetables (an excellent way to prevent food waste!). Of course, you can also combine the two, as I do often when I don’t have enough scraps to make stock but need to replenish my stock (hah, sorry, I had to).
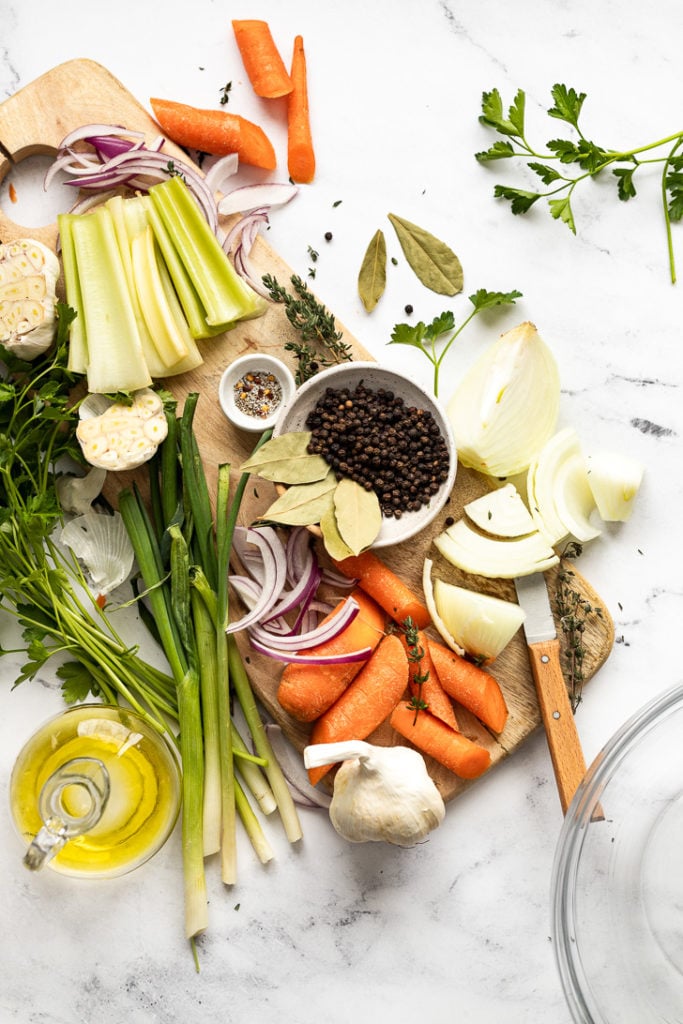
A base of aromatics adds a whole lot of flavor to the stock. Here are the most common veggies – both fresh and from scraps – that are used:
- Onion – any variety, including shallots
- Garlic
- Celery
- Carrots – including carrot tops
- Leek tops
- Herbs – thyme, parsley, rosemary
- Dried spices and herbs like bay leaves, peppercorns, and…salt!
Making it from Vegetable Scraps
What about the scraps though? Well, as you’re chopping carrots, onion, celery…any of the veggies listed above, save the scraps. Wash them well, then freeze them in a large bag or container until you have enough to make stock (or would like to supplement with fresh).
Here are the most common scraps I save:
- Onion ends, and the peels (washed)
- Garlic skins after they’ve been pressed through the garlic press (you know how there’s always leftover garlic in there too – keep that flavor!)
- Carrot ends, those ones you chop off and the green carrot stems if you don’t use them.
- Same with celery ends, both the leafy tops and the base. Just be sure to wash the base out to remove any dirt and sand.
- The tops of leeks…so much goodness there, don’t let it go to waste!
- Fresh herbs that are on their last leg…don’t throw them out!
- Green onions (scallions) – save bottom roots and any leftovers!
- Mushroom stems – I don’t use these often, but you can.
What NOT to put in Vegetable Broth
Yes, there are a few vegetables you should not be putting in homemade stock, so keep these in mind!
- Cruciferous vegetables like broccoli, cabbage, and cauliflower. They can make your stock bitter, so it’s best to leave them out. This also includes green beans and zucchini, which can turn bitter if simmered too long.
- Starchy vegetables like potato and turnips can make stock gummy and cloudy.
- Beets are too overpowering for stock.
How to Make Vegetable Stock
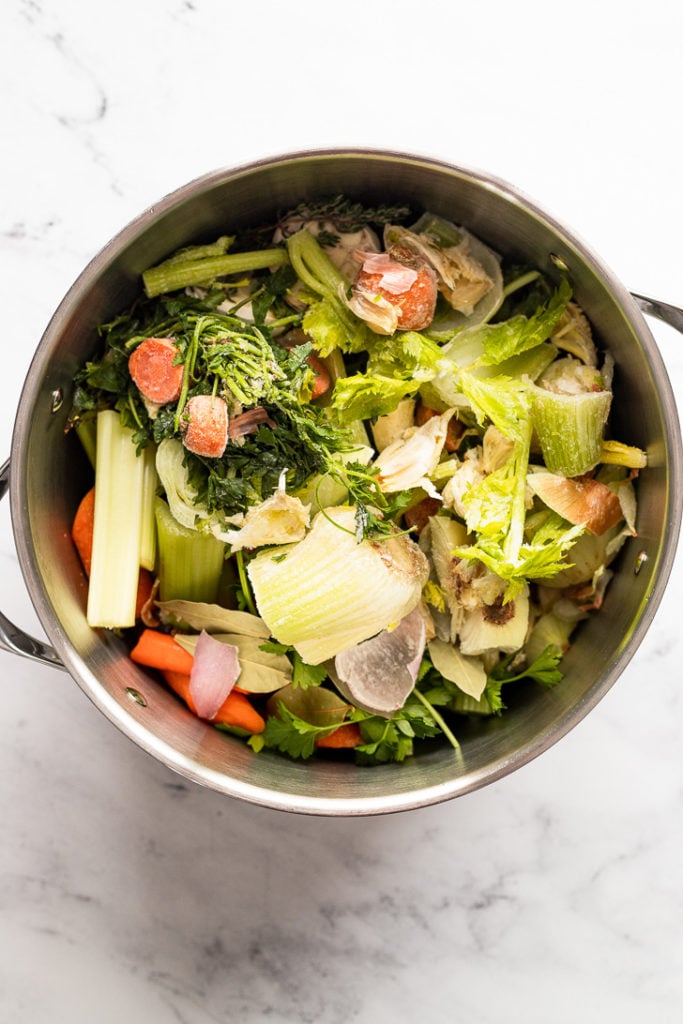
Now that you have your veggies and any veggie scraps, it’s simply time to throw it all together, let it simmer with water, and then strain and enjoy in recipes! Ok, there are a few more tips we’ll go through, but it’s really very easy and can all be done in an hour, unless you want to let it simmer even longer.
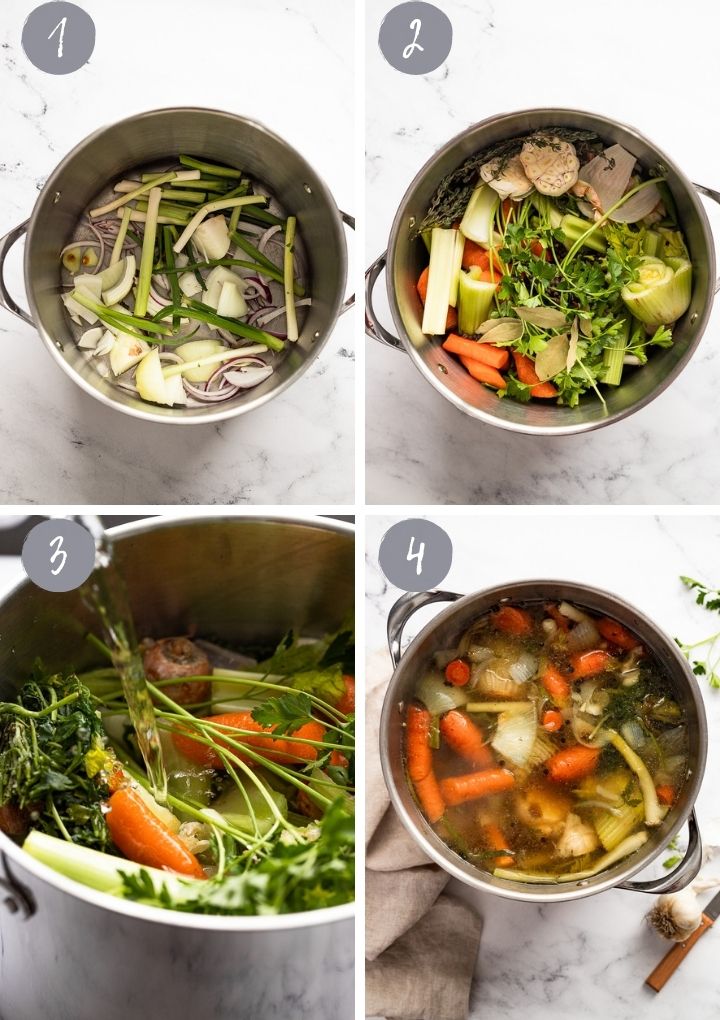
- Wash the veggies. If you’re using fresh, dunk them in a bowl of water, swirl, and rinse off any excess dirt or sand. This also goes for veggie scraps you’ll freeze; wash them before freezing to make your life easier!
- Sweat the aromatics. This is optional, but starting with onions and garlic, allowing them to heat up and “sweat” releases more of their flavor.
- Add all the veggies and herbs to a large pot. And I mean large…use the biggest stock pot you have. Also add in black peppercorns, a large pinch of salt (if you’d like), and bay leaves for flavor.
- Pour in the water. The beauty of making this at home is you can honestly make as much as your pot will hold, just add a few more veggies if it’s more than what I’ve written below.
- Simmer…for a while. I recommend simmering until the liquid has reduced noticably. This will ensure that lots of the flavor has been extracted from the veggies. Usually an hour is good, but you can always go longer as needed.
- Strain out the liquid. I recommend using a fine mesh strainer lined with cheesecloth to catch any small particles in the stock. Then, discard the remaining veggie scraps…composting would be fabulous if you have access!
- Use immediately or store it for a later time!

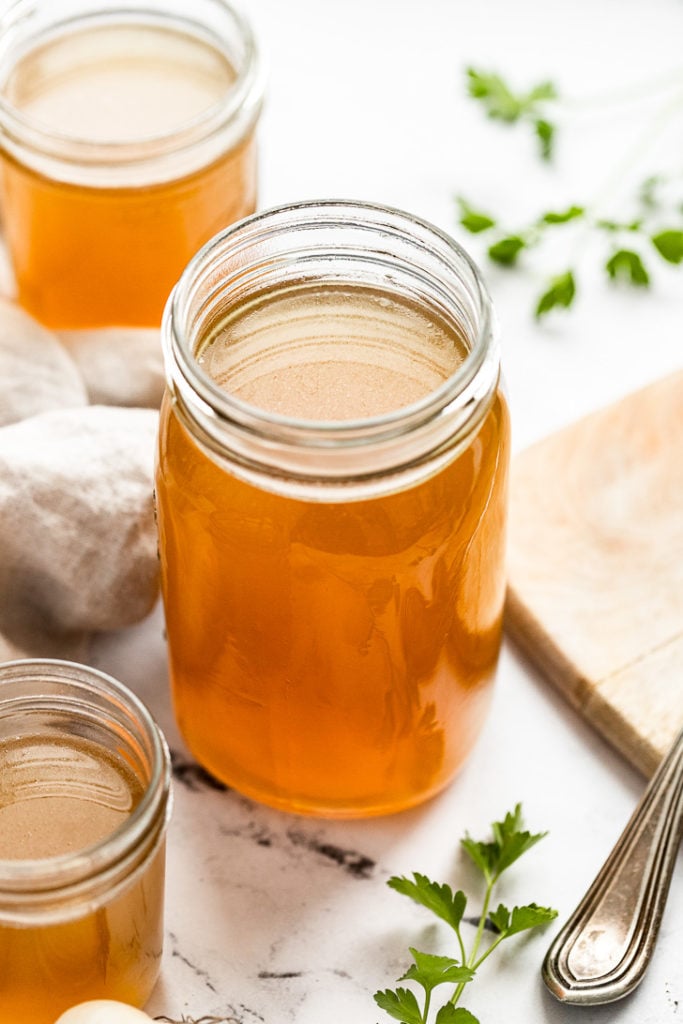
Stoarge and Freezing
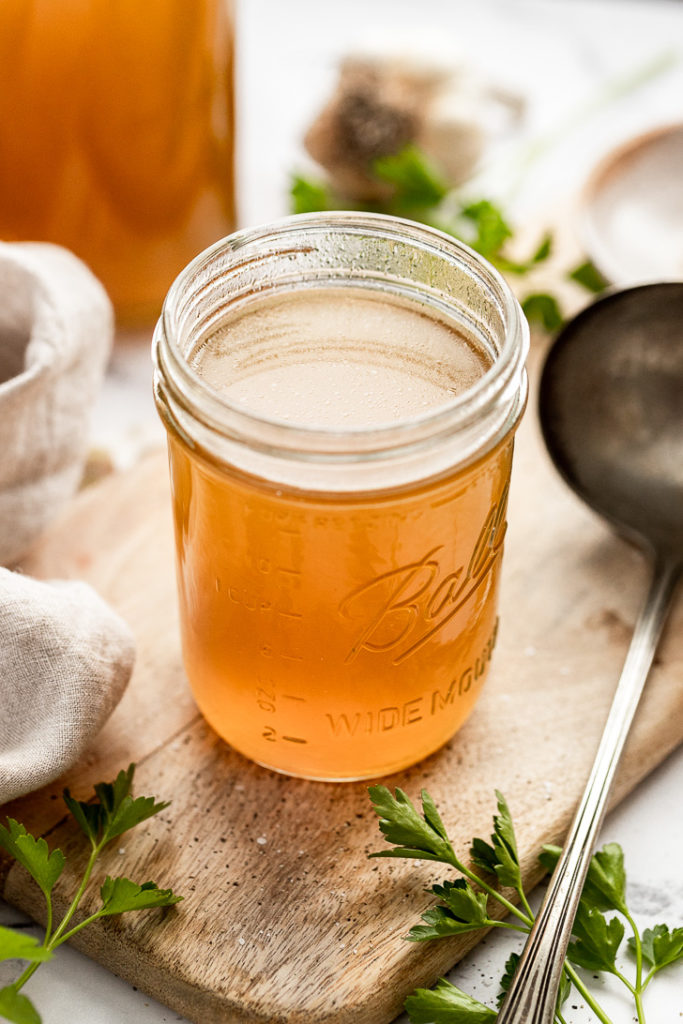
I recommend storing stock in mason jars for easy use, especially if you’ll be storing them in the fridge. Homemade stock will last in the fridge for up to 5 days.
If freezing, be sure to let cool completely and leave room for expansion if using a jar. I also absolutely love freezing stock in Souper Cubes; they’re premeasured, in various sizes, too, and once frozen they can be transferred to a bag for easy storage.
Having vegetable stock on hand in the freezer means you can have this super cheap version whenever you need to make homemade soups or use it in a recipe. Just thaw it in the microwave or on the stove for immediate use, or thaw in the fridge overnight.
My Favorite Recipes that use Vegetable Stock
As I mentioned, this broth/stock is meant to be used in recipes, most commonly soup recipes, not enjoyed on its own. Here are some of my favorite recipes that use stock. You can also feel free to swap this in for any recipe that calls for chicken stock, too.
- Spring Vegetable Risotto (ok, or any risotto!)
- Vegetarian Pot Pies
- Tomato Spinach Gnocchi
- Vegetable Lentil Soup
- One Pot Parmesan Orzo

Get the Recipe Easy Homemade Vegetable Stock
Ingredients
- 2 onions, quartered
- 4 celery stalks, roughly chopped
- 4 whole carrots, roughly chopped
- 4 leek tops, roughly chopped
- 1-2 garlic bulbs, halved
- 3-4 bay leaves
- 1 large bunch fresh parsley
- 1 bunch fresh thyme, 10-12 sprigs, approximately
- 1 Tablespoon black peppercorns
- 1 Tablespoon kosher salt, optional
- 4 quarts cool water, 16 cups
Equipment
- Souper Cubes for freezing
Instructions
- Add the onions and allow them to sweat for approximately 3-4 minutes. Then add the remaining vegetables, herbs, and spices.
- Add the water, and bring to a boil over medium-high heat. Once boiling, reduce to a simmer and continue to simmer, uncovered, for about an hour, until the liquid has somewhat reduced.
- Strain the broth through a fine-mesh strainer lined with cheesecloth, pressing any liquid out of the vegetables. I like to strain it into a large bowl first, before transferring into jars or storage containers, but do what works best with your setup.
- Store in an airtight container in the fridge for approximately 5 days, or let cool completely, then freeze. Be sure to leave at least 1-inch of room at the top for expansion if freezing in a glass jar or another container.
Notes
- Don’t forget that you can make this recipe all your own, using whatever scraps you’ve saved! Add additional green onions, garlic peels after pressing, carrot and celery tops, etc.
- You don’t have to sweat the onions, you can just throw everything in and bring to a simmer if you prefer.
- Refrain from adding any cruciferous vegetables (broccoli, cauliflower, cabbage), beets, or starchy veggies like potatoes and turnips.
- The greater the surface area of the vegetables, the more flavor will come from them, so chop them into smaller chunks, a few inches is great.


Loved using up my “scraps”!
Yay! Such a good way to reduce food waste!