

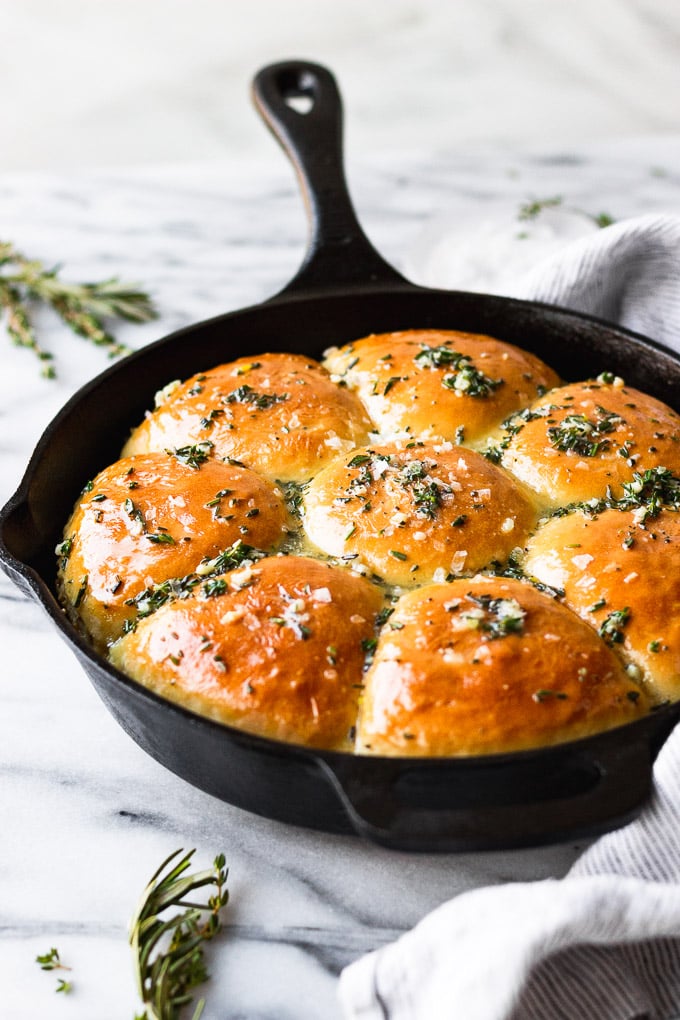
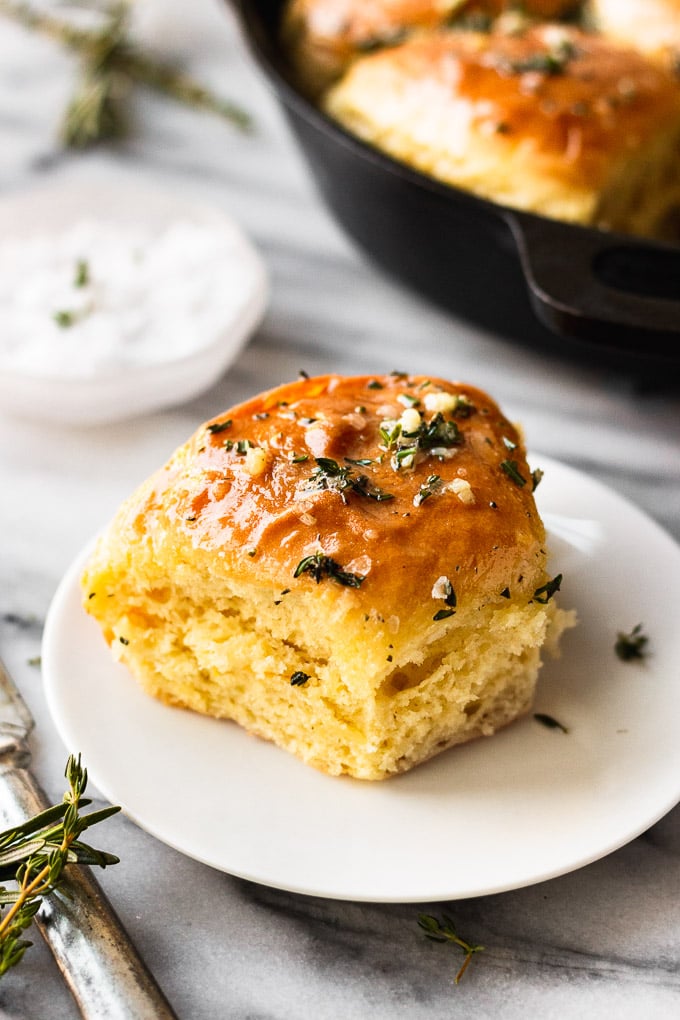
Homemade Garlic Herb Dinner Rolls are soft and fluffy. Brushed with garlic and fresh herb mixture hot out of the oven, they are completely irresistible! They’re easier to make than you might think, and are perfect for special dinners or anytime you need a delicious bread roll as a side!
If you are looking for the most delicious, irresistible homemade dinner roll recipe, then you are in the right place. These garlic rolls are bursting with flavor, and you’re definitely going to fall head-over-heels with their soft, light, fluffy texture (I know we have in my household!).
I love working with
You’ll love how these pillowy rolls are topped with a melted butter mixture full of garlic, rosemary, and thyme for the ultimate garlic herb roll experience. It’s like a dream come true. And while dinner rolls often make an appearance at holiday tables like Thanksgiving, they’re absolutely worthy of showing up at Sunday dinners, or even when you want a little something *extra* during a weeknight.
What You’ll Need (the ingredients)
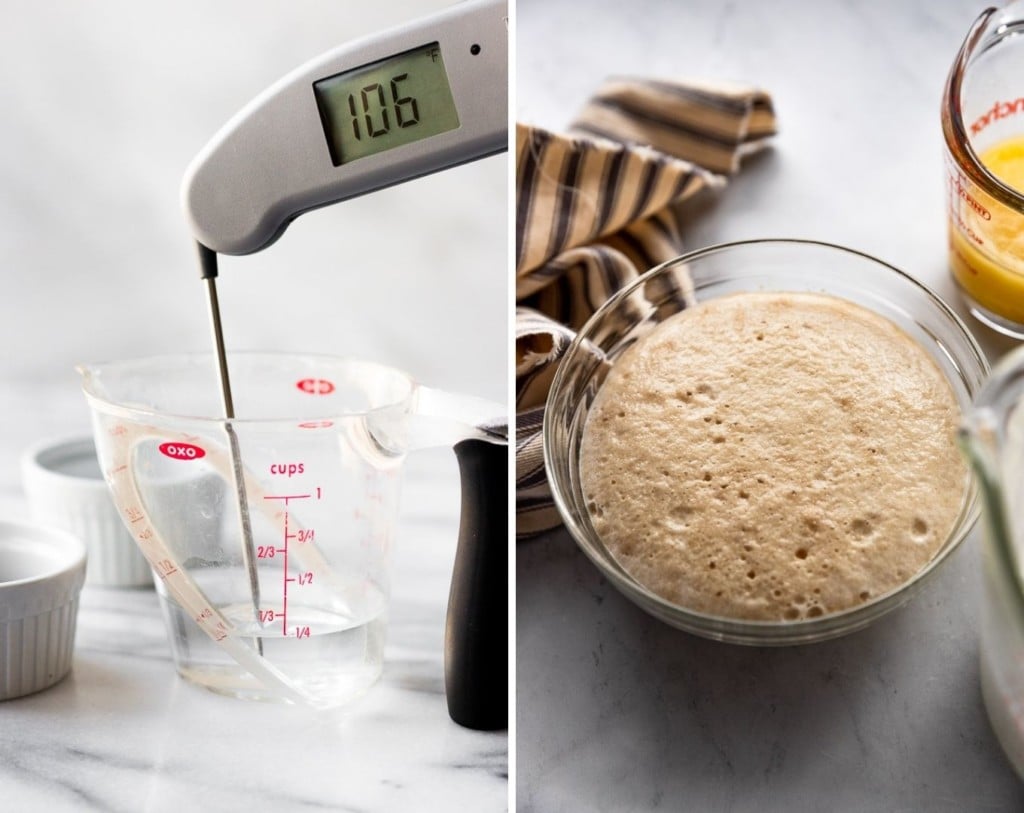
- Warm Water: it’s important to have water that’s around 105°-110°F to activate the yeast.
- Sugar: a little bit of sugar feeds the yeast and helps it proof (a fancy way to say it gets foamy and preps the yeast for helping the dough rise).
- Active Dry Yeast: active dry yeast will need to be activated with water and sugar, which is what makes it different than instant dry yeast. You technically can use both interchangeably, just know that if you do use instant, you will likely need less time for the rise. This recipe was written using active dry yeast.
- Unsalted Butter: used in both the bread dough and for topping. I recommend unsalted so you can control the amount of salt you use in the recipe, otherwise, it’s too unknown from brand to brand to bake with salted butter.
- Milk: use whole milk for a rich dough, although 2% will also work. I’d shy away from using low-fat or fat-free, though.
- Egg: helps to bind everything together.
- Salt: aha, our flavor enhancer. Go ahead and top the rolls with flakey sea salt, too. Trust me, you won’t regret it!
- All-Purpose Flour: I’ve said it before and I’ll say it again – be sure to properly measure out your flour! Baking bread – or rolls – is an art and a science, so you will have to use your judgement and feel for how much flour the dough needs given your location, the humidity, etc, but ensuring it’s weighed properly is the first step!
- Garlic: ah, a must for these rolls! Because I am an uber garlic lover, the butter mix that goes on top of these rolls uses raw garlic, however, if you’d like a little *less* of a garlic punch, substitute with garlic powder.
- Rosemary & Thyme: these fresh herbs are a match made in heaven, and give these rolls over-the-top flavor. Be sure to chop them finely to get a little bit in each bite. Can you use dried herbs? Yes, you can, but let them soak in a butter a little bit before topping, because they can be a little…dry. 😉
How To Make Homemade Dinner Rolls
I must say…they’re pretty easy. These homemade rolls do, however, require two rises to get the soft, pillowy texture we all LOVE.
First proof the yeast by combining warm water, sugar, and the active yeast. Let it sit for 5-10 minutes until foamy.
Meanwhile, melt 2 tablespoons of the butter and combine it with the milk. Make sure the milk is lukewarm or room temperature, to keep the yeast happy, active, and ready to rise. Add the egg and make sure all the liquids are combined.
Combine the liquids in the bowl of a stand mixer with a bread hook. Using a stand mixer is by far the easiest way to make these rolls.
Then, with the liquids combined, add the salt and flour, running the mixer on medium speed until the dough has formed into a ball. It should be slightly sticky when touched quickly, but your finger should not be coated with dough. If it is, add additional flour until the texture is just slightly sticky and soft.
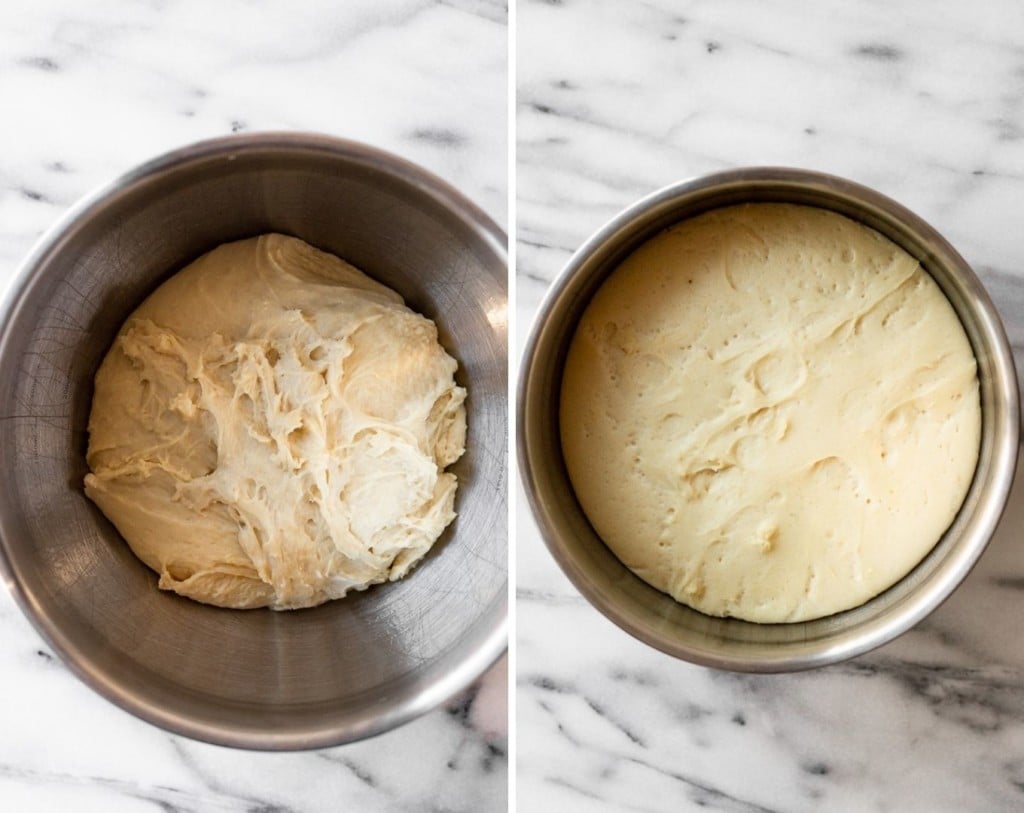
Transfer the dough to a bowl and cover with a tea towel. Let it rise in a warm place for about an hour, until the dough has about doubled in size.
To speed up the rise, or if you don’t have a warm environment for the dough to hang out in, warm the oven to 175-200°, then turn it off. Let the bowl of dough sit in the warm – but TURNED OFF – oven.
Once the dough has had its time to rise, the next step is to shape the rolls.
Transfer the dough to a lightly floured surface, and knead it for a few minutes, moving quickly so it doesn’t stick. You can add more flour to the surface if needed.
Creating Rolls from the Dough
To make the most evenly sized rolls, it’s helpful to use a kitchen scale rather than eyeballing their size. Making sure they are equal in size ensures they will cook evenly and prevents one roll from being underdone, while another is overdone.
Weigh the dough to get the full amount. Then, divide that number by 8 (or more if you’d like to make more, but smaller, rolls). That number is what you will aim for when you weigh each individual dough ball. It doesn’t haven’t to be perfectly exact, however, within a few grams of each other is ideal.
Use a bench scraper for ease, or a knife, and cut the dough ball in half, then fourths. I eyeball it at first and then adjust using the kitchen scale as needed until the rolls are about equal in size.
Once they are weighed out, it’s time to roll and shape them. Fold the edges of the dough down to create a ball. Then place the seam side down on the counter. Cup your hand around the ball and rotate quickly in a circle, and as the dough moves around, it gets shaped into a ball even more. This is similar to how I form the dough for rosemary bagels (video there!).
The Second Rise
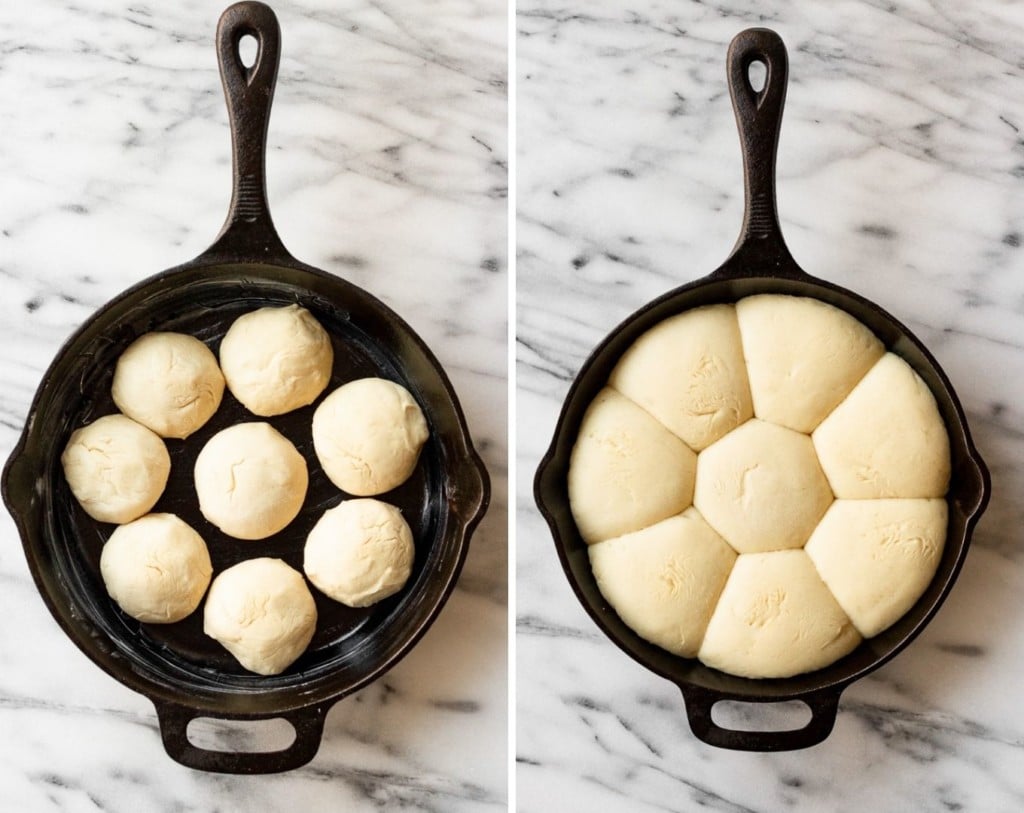
Once you’ve shaped a roll, place it into a 10-inch cast-iron skillet or round pan, leaving space around each roll so it can properly rise. Let the rolls rise for about another hour until they’ve doubled in size. After that, it’s time to bake!
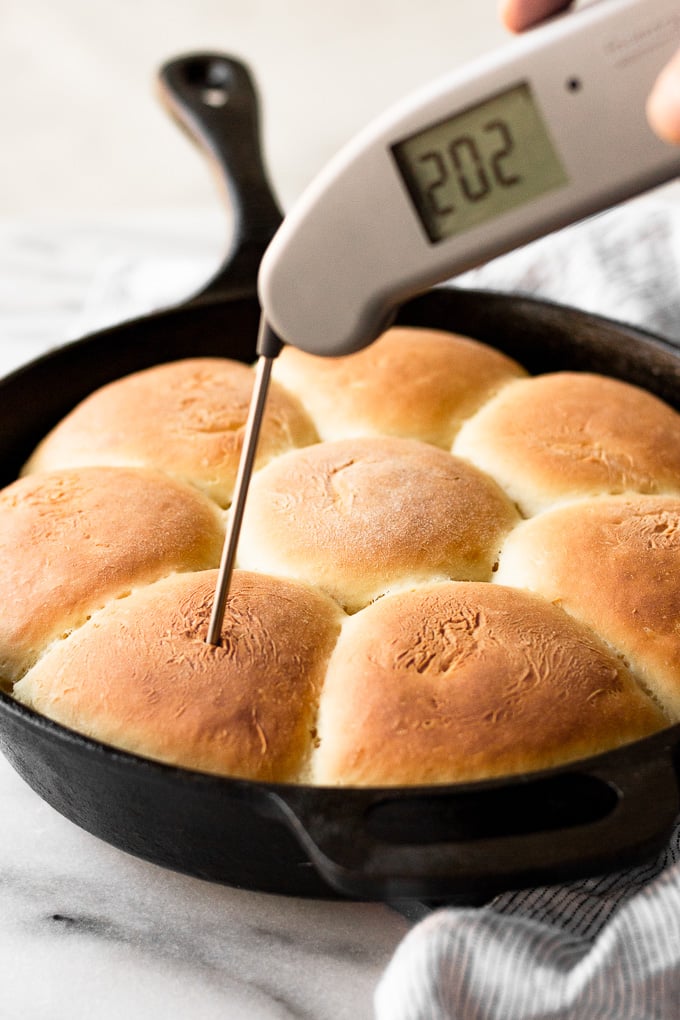
Bake the rolls until their tops are a deep golden brown and sound hollow when tapped. And of course, you can use your thermometer to check the internal temperature and make sure they’re totally done!
Garlic Herb Butter
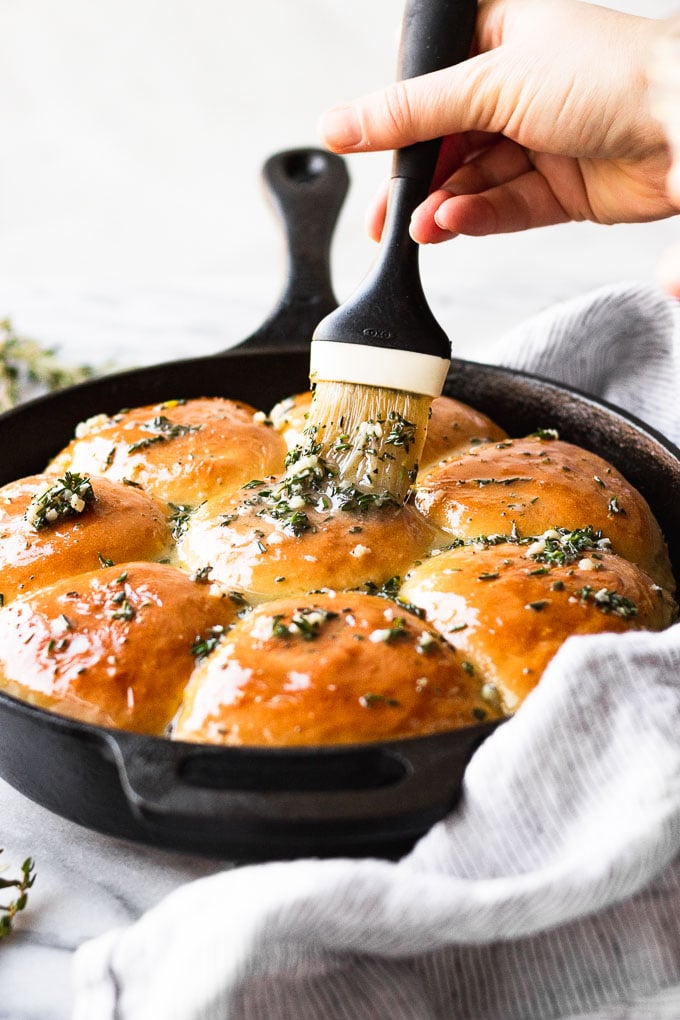
Now, just because the rolls have baked does not mean we’re done. We cannot forget the most important part: garlic butter. This mixture is going on top of the baked rolls – while they’re hot – as it melts into the rolls and creates a delicious, rich, flavorful topping.
Once you pop the rolls into the oven, soften the butter and combine it with the garlic and herbs. Let it sit while the flavors infuse into the butter as the rolls bake. Then, use a pastry brush to spread the mixture on top of the finished rolls, coating each and every nook and cranny.
Use fresh minced garlic for a much more pronounced garlic flavor, and a little bit in each bite. Otherwise, you can smash the garlic, let the cloves infuse into the butter, and remove the smashed cloves before serving. Alternatively, you can use garlic powder, too.
Tips for Homemade Garlic Rolls
- Make sure your warmed water is heated to about 105°F to optimally proof the yeast! This instant read thermometer is KEY!
- Don’t overknead the dough or you run the risk of tough dough.
- Use a food scale to both measure the flour and to make sure your rolls are evenly sized. When rolling the rolls, I first weigh the entire dough ball, then divide by 8 to determine the weight of each roll.
- Again, the Thermapen comes in
clutch to determine the doneness of the rolls (or hello any baked good – consistency is key!). Once the rolls have an internal temperature between 200 and 205°F, you’ll know they’re done without question!
What to Serve with Garlic Herb Rolls
Oh, how the possibilities are endless! Garlic Herb Dinner Rolls really do pair with so many meals and are an elegant addition to dinnertime. Be sure to serve them warm, regardless of what you serve them with, for best results!
You’ll often find homemade dinner rolls on holiday tables like Thanksgiving, Christmas, and Easter. But it doesn’t stop at the holidays, they’re delicious with just about any meal you can imagine.
They’re excellent with whole roasted cauliflower, vegetarian meatballs, rosemary salmon, or basically any kind of meat if you are a meat-eater. And of course, they’re absolutely delicious with homemade soup. They’re a delicious side of carbs to pair with roasted broccolini or green beans almondine.
Did you make this recipe? Please leave a star rating and review in the form below. I appreciate your feedback, and it helps others, too!
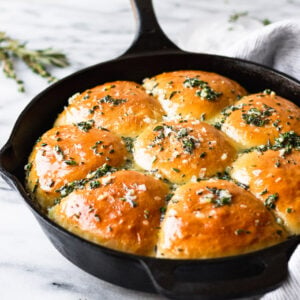
Get the Recipe Garlic Herb Dinner Rolls
Ingredients
- 1/4 cup warm water, heated to ~105°F
- 1 1/2 Tablespoons granulated sugar
- 1 Tablespoon active dry yeast
- 4 Tablespoons unsalted butter, divided
- 2/3 cup whole milk
- 1 egg, room temperature and lightly whisked
- 1 1/4 tsp fine sea salt
- 2 cups (260 grams) + 2 TBSP all-purpose flour, additional 2 TBSP as needed
- 1-2 garlic cloves, minced, or 1 teaspoon garlic powder
- 1 teaspoon fresh rosemary, finely chopped
- 1 teaspoon fresh thyme, finely chopped
- Salt flakes, to taste
Instructions
- In the bowl of a stand mixer with a bread hook, combine warmed water, sugar, and yeast. Let stand for 5-10 minutes until foamy.
- Melt 2 tablespoons of the butter and combine it with lukewarm milk (microwave it for 30-60 seconds or let sit out while prepping the yeast). Add the milk mixture to the yeast in the stand mixer, along with the lightly whisked egg, and stir to combine. Add the salt and flour, mixing on medium speed until the dough is formed into a ball. The dough should be slightly sticky to the touch, but if your finger pulls away covered in dough, add an additional 2-4 tablespoons of flour in invervals, until incorporated (being careful to not add too much).
- Lightly grease a large bowl and transfer the dough to it. Cover the bowl with a tea towel and let the dough rise in a warm area for 1 hour.
- Once the dough has risen, dump onto a well-floured surface and knead for 2-3 minutes, moving quickly so the dough doesn't stick.
- Use a kitchen scale to weigh the dough, then divide weight 8 to determine the weight of each individual roll (if you don't have a scale, cut dough into 8 evenly sized sections).
- Take each section and pull down on the sides to create a ball, with the seam at the bottom. Then, seam side down, place the ball on the counter and cup your hand over the top. Move quickly in a circle to form a ball. Transfer the ball to around a cast-iron skillet (or a greased 10-inch circle pan). Cover with the tea towel again and let rise for another hour, until about doubled in size.
- After rolls have risen for 30 minutes, begin preheating the oven to 375°F, while the dough continues to rise for the remainder of the time.
- Remove the tea towel and bake for 20-25 minutes until golden brown on top and the internal temperature of the rolls reaches 200-205°F.
- While the rolls bake, prepare the garlic herb butter by melting the remaining 2 tablespoons of butter in a small saucepan or microwave-safe bowl with the garlic. Stir in the herbs. Set aside to allow the flavors to infuse.
- Once the rolls are done, brush the butter mixture on top of the hot rolls. Sprinkle with flakey sea salt. Let them rest for about 10 minutes, and serve warm.
Notes
- Warm Environment: To speed up the rising process, heat the oven to 200°F, turn it off once it’s preheated, and set the bowl inside the oven to rise.
- Garlic: for the most pronounced garlic flavor, use freshly minced garlic (really, do it yourself, not out of the jar, for the most flavor!). For a more mellow garlic flavor, smash the peeled cloves and let the flavor infuse in the butter; remove when serving. Or, use garlic powder.
- Storage: store any leftovers covered at room temperature for up to 3 days. Reheat in the microwave or a warm oven.


Girl I am seriously drooling over here! Homemade rolls are literally my favorite side dish 😉 I’m whipping up a batch of sourdough rolls this year for Christmas Eve dinner, but I may just have to add this garlic herb butter topping for them!!
Homemade rolls truly are the absolute best! Your sourdough version sounds delish and you can’t ever go wrong with garlic, herbs, and butter! 🙂
This is my second time baking these. They were a hit the first time around. just had to add 4tbsp of extra flour. 🙂 Might be cause of the extra humidity from living in the tropics but they still came out fluffy and soft with a light flaky crust on top. Thanks for sharing this!
I’m so glad you enjoyed! The humidity will definitely affect baking, but I’m happy to hear it all worked out! Thanks for making them and commenting.
Thanks for bringing that to my attention, Linda! It’s updated now. Hope you enjoyed!
Becca, Thank you for posting this recipe. It was just perfect, so soft and delicious too!!!
I’m so glad to hear you enjoyed them! Thank you so much for commenting!
I’ve made this several times and always get great compliments. One thing I do differently is use the “rapid rise” yeast. Just sprinkle it into the dry ingredients and omit the water or it will be very soupy and you will need more flour. Also made these by adding a few herbs into the dough and let it sit overnight in the fridge before baking. Great tasting herb rolls!
Thanks so much for sharing, Kim!
Just made these dinner rolls and they are perfection! Super soft and garlic topping is a must. Will definitely make again!
So great to hear! Thanks, Elizabeth!
I’m doing something wrong. Or missing a step. My dough is like soup. I added 3/4 cup additional flour and it’s still a VERY wet/sticky dough.
Using baker’s math, 260g flour and 222 g liquid (1/4 cup water to activate yeast plus the 2/3 cup milk), this recipe is nearly 100% hydration.
What am I missing? I’m having a blonde moment and feel like I’m missing something obvious. 😂
Hi Allison – I’m really sorry to hear you had this experience. The dough is slightly wet and sticky (see the video at 16 seconds) but it should not be so wet it’s like soup. I’m not sure what went wrong; I’ll retest again and see if I can help troubleshoot more.