

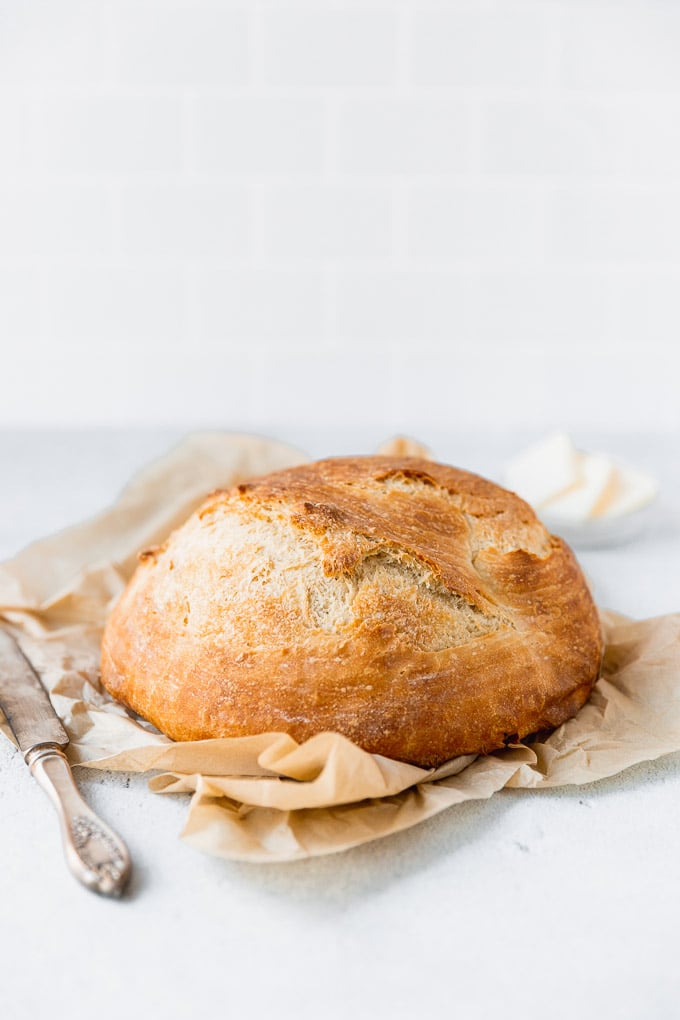
Pain Français – French Bread.
A homemade bread recipe in the middle of June? One that takes basically an entire day to make, and requires baking in a 475°F oven? Have I lost it, you may be wondering?
I have been known to have a “wild” side, but this is different. The bread had to be here, at this time, for this story.
This is a story about learning to slow down. It’s a story about learning to listen. A story about patience, and intuition, and delicious bread.
The Art of Slowing Down
As you may know, just over two and a half months ago I was diagnosed with Mono. Now, it’s not the worst thing you can be diagnosed with, and I’m grateful for that, but it definitely took a toll on me and my constantly working lifestyle.
Two recipe posts a week? Hosting my first cooking class? Teaching first graders at my regular full-time job? Even just editing photos while laying on the couch? Forget about it. It took everything I had, especially that first week, to even get out of bed. The exhaustion was (and surprisingly sometimes still is) unreal. But the message was clear: SLOW DOWN.
Slow down. Take time for yourself. Listen to your body, to your intuition, and show yourself some love. Real self-love. Not eat a cookie and have a glass of wine on a Friday night kind of self-love (although that’s great too).
The self-love that listens when your body nudges “I’m tired”, so you take a nap. The kind of self-love that says I’m going to feed you green juice and extra vitamins in order to heal. The self-love that pays attention.
It’s a lesson that’s all too hard to learn most of the time, this true self-love, self-care thing. Until something forces our hand into it.
While I absolutely love this online world and sharing recipes with you that come alive in your kitchens, I had no choice but to slow down. That was part of the self-love slow-down lesson.
Just like the process of baking bread requires us to slow down, sometimes our bodies slap us silly until we’re forced to listen. At least that’s what happened here. So today, Pain Français is helping to teach us these lessons: slow down, have patience, and follow your intuition.
THINGS I LEARNED FROM MONO AND BREAD MAKING
- You might have a plan, but that doesn’t mean that’s what’s going to happen.
- It’s OK – and necessary – to slow down.
- Good things take time.
- Take time to rest, and you will rise.
In this season of life, I have undoubtedly learned the lesson of slowing down, taking time to rest, and appreciating the time I do have. I’ve learned that taking time to rest actually makes me more productive (yes, seriously!). Not only that, taking time to rest has made me feel more balanced and happy (surprise? I think not).
Instead of rushing through this summer, let’s all make a pact? Ok, ready? Let’s plan to not plan. At least not in an overly obsessive, every-minute-is-booked kind of plan. Let’s make sure we slow down to smell the flowers, slow down to listen to the laughs of children, slow down to watch the thunderstorm, and slow down to feel the warmth on our faces.
Let’s take time to rest. To rest and rejuvenate in whatever way is best for our own bodies. That way we can rise to be the best versions of ourselves.
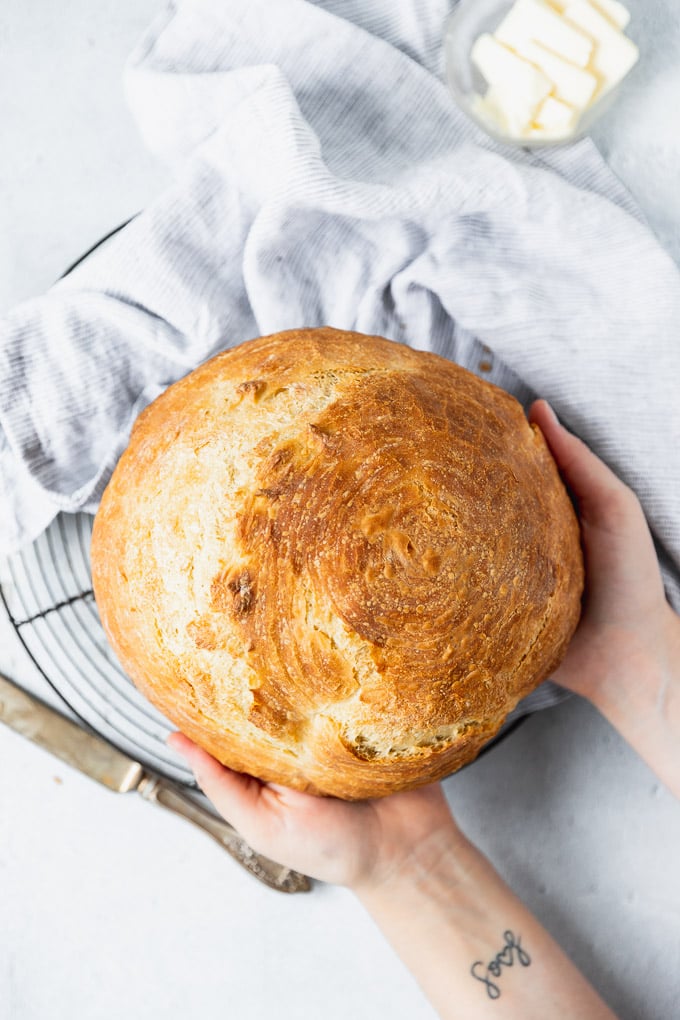
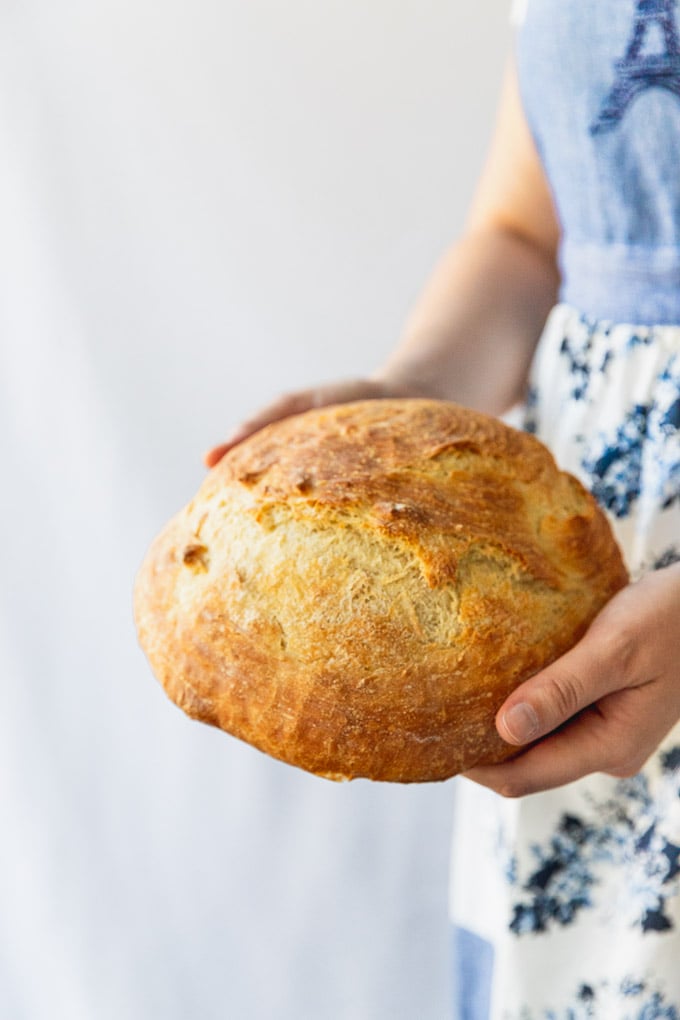
Let’s slow down and bake; because everyone loves a fresh loaf of homemade bread.
HOMEMADE PAIN FRANÇAIS (PLAIN FRENCH BREAD)
First things first: this is a very basic French loaf recipe, and it’s adapted from none other than Julia Child’s recipe book.
While the French don’t usually bake bread at home – why would you when you have a boulangerie on every corner? – I appreciate the art of bread making and it’s the perfect process for this season of slowing down.
It’s also the most fitting recipe I could think of sharing before I leave for France, and continue my season of slowing down. When I left for The Grand Adventure two summers ago, I worked my butt off scheduling out recipes. Not this time.
Maybe it’s because I’m getting old, maybe it’s because I really did learn how to slow down, and focus on what’s most important.
What’s most important over the next two and a half weeks is eating all the baguettes, cheese, and croissants I can alongside a glass bottle of wine and my mom.
This time is going to be incredibly precious, and I will be fully present. I know you understand. So here I leave you, with a homemade bread recipe to perfect over the next few weeks (ahem, see the bread lessons, it’s not a perfect science, it’s an art).
If you are interested in real-time travel adventures, however, I’ll be sharing all the BTS over on Instagram!
Onto the bread!
STEPS FOR MAKING HOMEMADE BREAD
I should say, this very brief overview of the steps, because it’s actually quite detailed and in the recipe card, and there’s a video to show you how I fold after each rise, so basically this right here is like the syllabus of baking bread. You’ve gotta read the textbook for more.
- Mix the dough and knead the bread. Using a pastry scraper at this time is incredibly helpful since the dough is quite soft, it helps you knead efficiently.
- First rise: 3 ½ -5 ½ hours.
- Deflate the dough, and shape it again.
- Second rise: 1 ½ – 2 hours.
- Form the dough into a loaf. This is where I’ve found having a banneton is so nice. It’s not essential, but it really helps the loaf hold its shape since it bakes free-standing.
- Third (and final!) rise: 1 ½ – 2 ½ hours.
- Slashing the loaf – using a sharp knife or a bread lame.
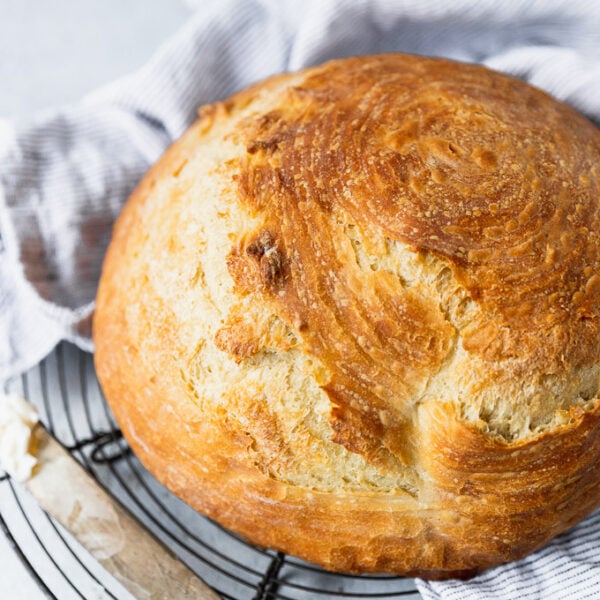
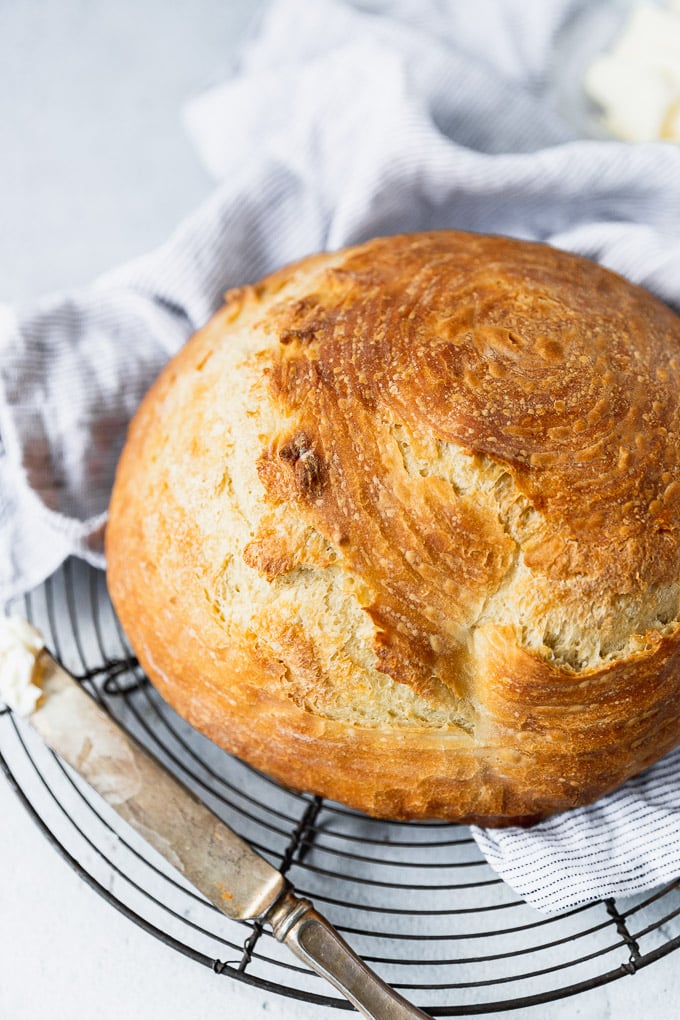
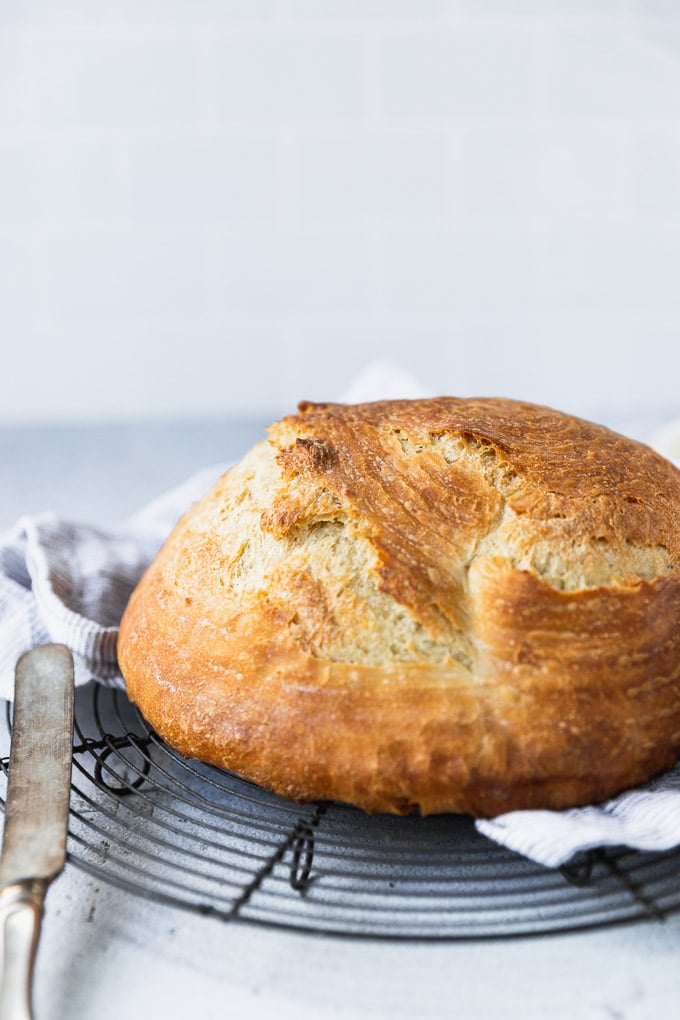
- Baking – the quickest step – 25-35 minutes. I found the easiest way to simulate a “bakers oven” was to use a hot pizza stone. I followed Julia’s tip about brushing the loaf with cold water before baking, and then again every 3 minutes, 3 times. I really noticed a difference in the bread’s golden brown color and crispness!
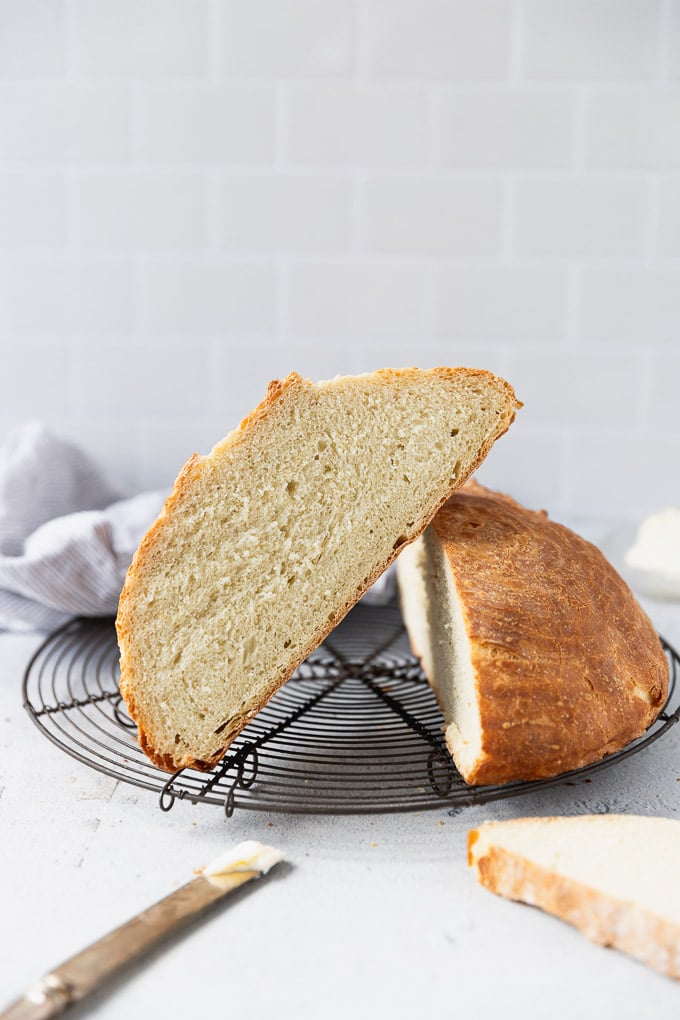
- Let cool – the flavors will develop if you let it properly cool for a couple of hours (I know !!! the anticipation).
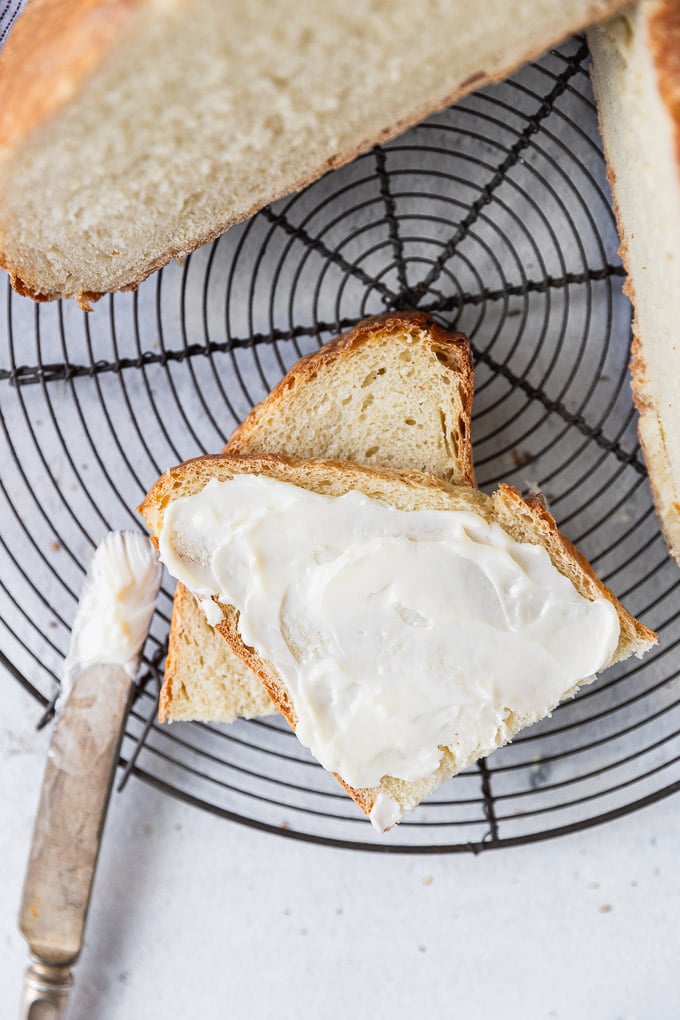
- Slice it up and slather on the salted butter or jam.
As I said, this bread recipe is an art. Every time I make it, it gets a little bit better each time. So remember: slow down, rest, and enjoy the process.

Get the Recipe Pain Français - French Bread
Ingredients
- 1 packet of active dry yeast
- 1/3 cup warm water, 95-100°F
- 3 1/2 cups all-purpose flour
- 2 1/4 teaspoon salt
- 1 1/4 cups cool water, 70-75°F
Instructions
- Stir the yeast into 1/3 cup warm water and set aside. Measure flour and salt into a mixing bowl; once the yeast is liquified in the water, pour it and the additional cool water into the flour. Using a firm rubber spatula, stir and cut the liquids into the flour, pressing firmly as needed to form the dough. Turn the dough onto a lightly floured kneading surface, making sure all the dough is scraped from the bowl, and let it rest for 2-3 minutes. Either wash and dry the bowl you were using or get a new mixing bowl for the rise.
- Use one hand to knead the dough, and the other to hold the pastry scraper (or a firm rubber spatula) to lift the edges of the dough. Lift the near edge of the dough using the pastry scraper, push it down, and press with the heel of your hand. Continue flipping with the scraper, and pushing with your hand for 4-5 minutes until the dough continues to come together. You may need to add a few dustings of flour if it is too sticky. The dough will stick less the faster you knead. Let the dough rest for 3-4 minutes, then knead again for 1 minute. The surface will look smooth, and the dough will be less sticky but still soft.
- The first rise. Determine what approximately 10 1/2 cups looks like in the bowl you're using (and use one with more upright sides). Measure either by using measurements in the bowl or by placing 10 1/2 cups of water in the bowl and marking how high it goes (then dump out the water and dry the bowl). This is how high your bread will rise before it's ready to move onto the next step. Place the dough into the bowl, cover with plastic wrap (or a plastic alternative!), and place a folded towel on top. Let the dough rise in a warm room, around 70-75°F. When it has fully risen, it will be slightly domed shaped, tripled in size, and light and spongy.
- The second rise: use a rubber spatula to dislodge the dough from the bowl, turning it out onto a lightly floured surface. Make sure you scrape the bowl clean. If the dough is too sticky, sprinkle lightly with flour; also flour your hands. Lift the corner of the dough closest to you and flip it down to the other side. Do the same with the left, then right side, and flip the near side again. The dough will look like a rounded cushion. Gently pick it up and return it to the bowl. Cover and let it rise again, not quite tripled, for 1 1/2 to 2 hours.
- Once the dough has risen for the second time, release it from the bowl again, onto a lightly floured surface. Let rest for 5 minutes. Prepare a banneton or canvas with flour for the final rise. Next, you will create the final shape for the rounded loaf and create the surface tension in the dough. Start by lifting the left side of the dough and flipping it over to the right. Then, scoop up the right side and flip it over to the left. Turn the dough a quarter turn clockwise and repeat this flip movement 8-10 times, rotating a quarter turn each time. Turn the dough smooth side up and begin turning the ball between your hands, tucking a bit of dough down under the ball as you rotate it. After about 12 turns, place the dough in the banneton smooth side down, and gently pinch the extra dough together. Lightly flour and cover. Let rise for 1 1/2 to 2 1/2 hours.
- Approximately 30 minutes before baking, preheat the oven to 475°F with a pizza stone inside. Flip the dough onto the heated baking sheet (flipping it allows the top to stay moist and therefore rise more while baking). Using a baking lame or sharp knife, slash a half moon on one side of the dough. Brush with ice water and place in oven. The bread will cook for 25-30 minutes until the crust is golden brown and hollow sounding when thumped. After the first three minutes, quickly brush ice water on the loaf, this will help the crust become golden brown and create steam. Do this again three minutes later, and a final time three minutes after.
- Once the bread is fully baked, let cool on a cooling rack for 2-3 hours. It is best eaten the day of, since it has no fats or preservatives. Store it wrapped airtight in the fridge if you plan on eating it a day or two later, but it does best if frozen. To thaw and reheat, turn the oven to 425°F. Quickly run the dough under a slow stream of water, and place the frozen bread inside. The water will help the crust to crisp up.
Notes
This post contains Amazon Affiliate links, which means if you purchase an item from a link FITK will receive a small commission at no extra cost to you. Thank you for your continued support!


