
What is it about snacking that is the most fun way to eat?! It doesn’t matter if it’s a breakfast board, a date night cheese board, or a dessert board, I am 100% ALL IN and ready to devour.
This is precisely why we’re diving into a vegetarian charcuterie board today…because it only seemed right to outline how to make a simple veg-friendly board because my idea of the perfect dinner or way to start a party is with a bunch of delicious eats I can nosh on indefinitely. You too? Great, let’s go!
What is a Vegetarian Charcuterie Board?
Charcuterie (pronounced shaar·koo·tr·ee) is a French term for a type of meal or snack made with prepared meat products, delicatessen, or deli-style cuts. So, a true charcuterie board consists of a variety of cured meats such as salami, prosciutto, sausages, and more.
Yet, as cheese boards have gained popularity over the past few years, it seems they have become synonymous with the term charcuterie board – at least here in America – whether or not they actually have any meat on them.
Many refer to any kind of snack board as a charcuterie board these days.
This means that this vegetarian “charcuterie” board fits into this expanded version of charcuterie, with all the same favorite elements of a snack board, without the meat.
What goes on a Vegetarian Charcuterie Board?
Let’s go over the basics for creating an easy vegetarian charcuterie board. Of course, there is no limit to how fancy you can go, but for these purposes, we are sticking with easy. Simple. A board that comes together quickly, is budget-friendly, and one that everyone will love.
First things first, take stock of your own cupboards and fridge before even creating your shopping list.
The easiest way to keep a vegetarian board both simple and affordable to make is to use what you have already! Filling the board with little bits of snacks spread around makes it both beautiful and crowd-pleasing.
This means you don’t have to go out and buy a whole new portion of this-and-that. It’s the perfect excuse to use the last little bit of trail mix you have in the cupboard, or dried fruit that you just don’t seem to eat on its own.
Here are the key elements that make up a vegetarian cheese board. Again, this is totally customizable (YES to that!), so I will give you several ideas around the main components, but of course, feel free to adjust to your specific tastes.
The main components for a simple vegetarian board, and what you should add to your shopping list can be broken into these categories:
- Cheeses
- Savory, Umami-Packed Goodies
- Crunchy and Salty
- Fresh Fruits and Veggies
- Dips, Spreads, and Jams (sweet and savory!)
- The Vehicles – crackers, bread, etc.
1. Cheese Varieties
One of the foundational items on a vegetarian board is the cheese selection. Each cheese creates a lovely base and pairs with the other items.
Before selecting your cheeses, keep in mind that not all cheeses are vegetarian. If you need a specifically vegetarian board, look for cheeses that are either labeled vegetarian or check the ingredient list for microbial enzymes instead of animal rennet.
I recommend 2-3 cheeses for 2-4 people, which is what I’m showcasing here. Keep in mind you can buy smaller portions of cheese, or always store the remainder for the next time your snack craving strikes. My motto is it’s always better to have extra than not enough.
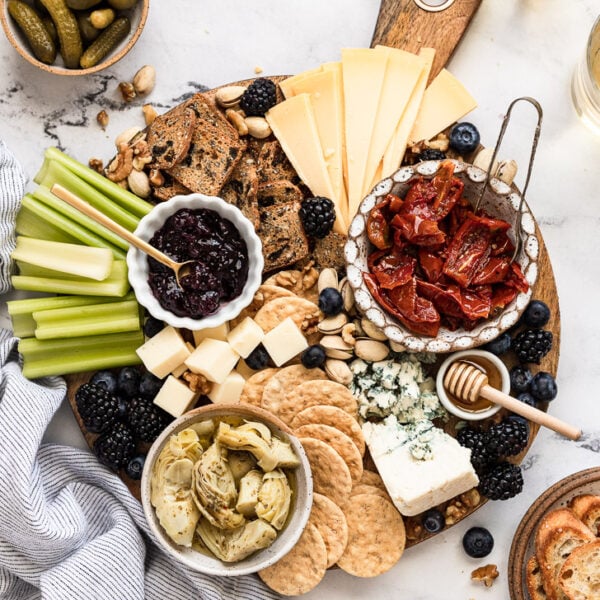
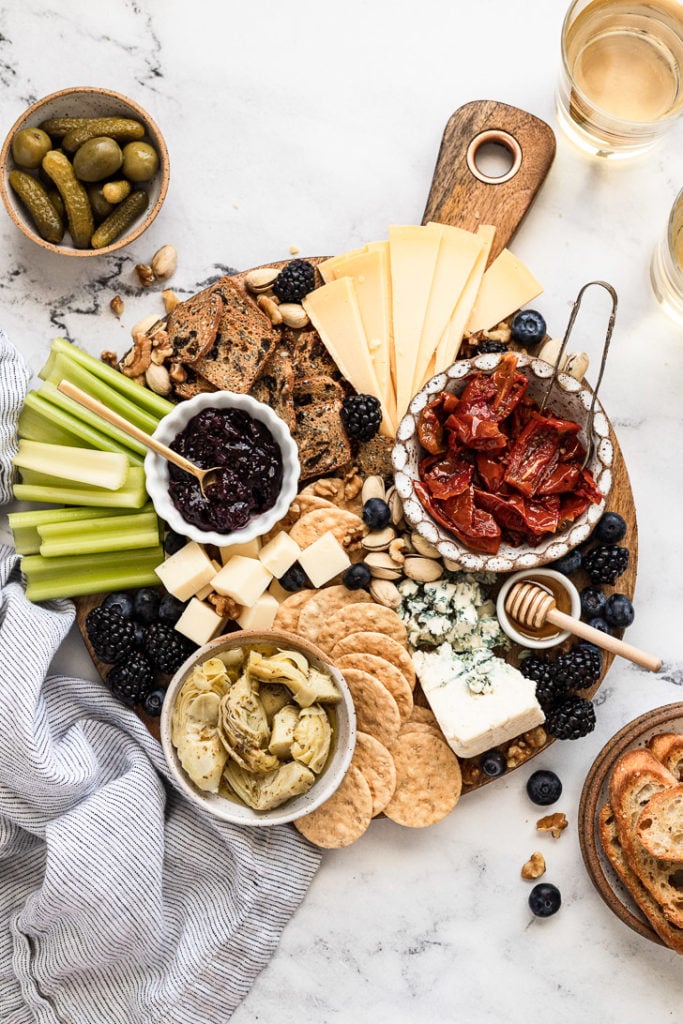
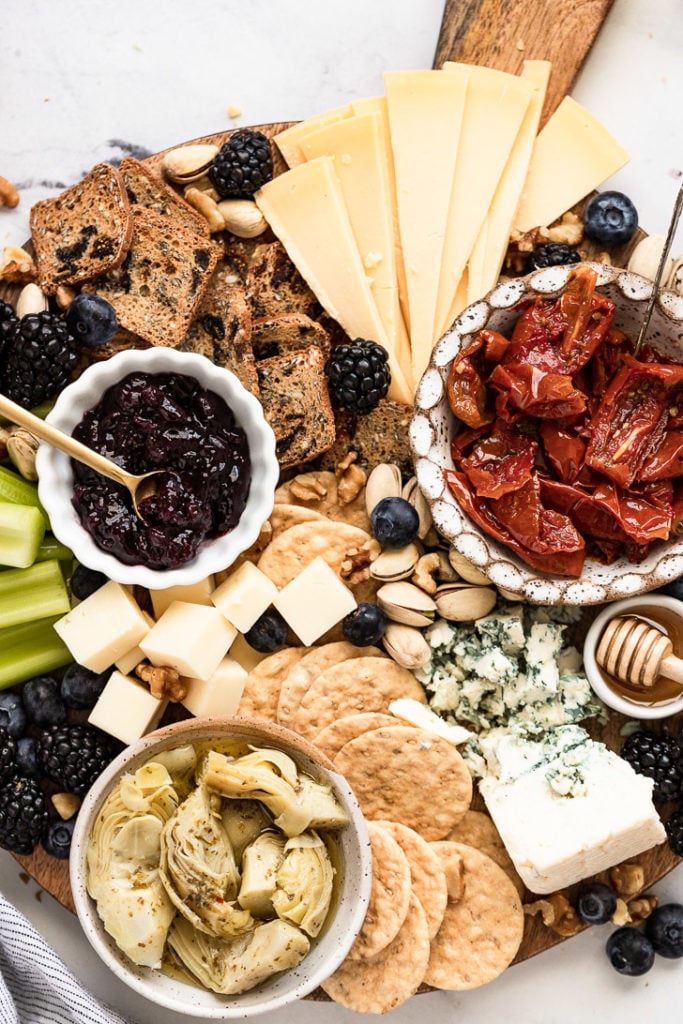
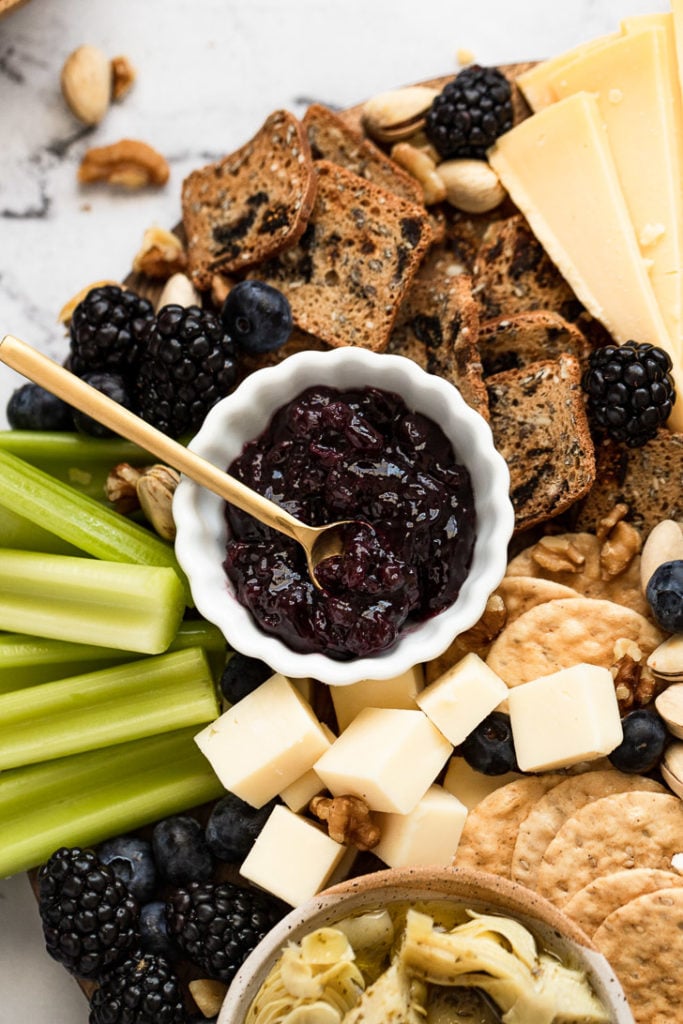
Have a variety of textured cheeses. Pictured here we have cubed aged cheddar, a triple creme gouda, and blue cheese.
Trader Joe’s, and ALDI are excellent grocery stores to find affordable vegetarian-friendly cheeses, as well as Whole Foods.
2. Savory Umami-Packed Components
Now, usually on a charcuterie board, cured meats deliver the savory, umami component. However, on a vegetarian cheese board, we’re going to go a different route. And I’m not talking meat replacements, either (although you could add some if you’d like).
Natural umami flavor is described as that “meaty”, “savory”, or just indescribable deliciousness. It’s the fifth taste in addition to sweet, salty, bitter, and sour.
One of the best umami additions on this vegetarian board is roasted tomatoes.
According to the Science of Cooking, tomatoes are high in the free form of glutamate, which provides a natural umami flavor. Roasted tomatoes have an intense flavor and they pair so well with cheeses and other goodies on this board.
The roasted tomatoes on this board were purchased from Whole Foods’ olive bar and I’ve got to say…they are amazing. You can also make your own as featured on our breakfast board.
To incorporate other tomato-based components, try traditional tomato bruschetta, roasted tomato jam, or red pepper and tomato spread.
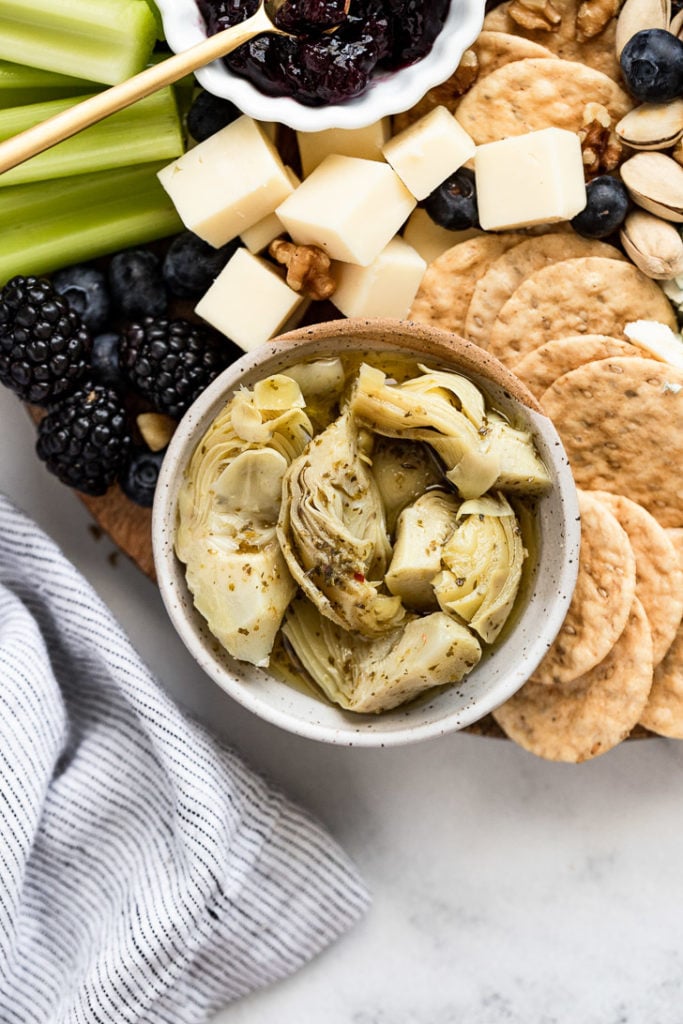
Another delicious option would be to add roasted mushrooms or mushroom bruschetta. Marinated artichokes are great, too!
2. Crunchy and Salty
…ok, and maybe a little sour? There are a lot of items that can fall into this category. Adding a variety of textures keeps it interesting!
- Nuts – go for almonds, walnuts, pistachios, cashews, and Marcona almonds…honestly, whatever you like and have on hand works!
- Pickles and olives – marinated olives or straight out of the jar – are a wonderful addition, bringing in their saltiness and tang.
3. There’s gotta be something fresh…
Fresh items are a must on a cheese board, too. They’re bright and colorful, and balance out the other deep flavors. Here we have fresh celery sticks (the crunch!), as well as blueberries and blackberries for sweetness.
Other items that are delicious:
- red or green grapes
- apple slices
- orange wedges
- raspberries or strawberries
- cucumber slices
- carrot sticks
4. Something to Dip or Spread
This can go sweet or savory, too. I actually highly recommend you include one of each for the ultimate experience.
- Jam and Honey – both balance out savory cheeses. Here I have blueberry jam, but raspberry jam or another fun variety will totally work.
- Cheese Dips: whipped ricotta or whipped feta are impressive and easy.
- Tapenades – add an olive tapenade or artichoke tapenade.
- Romesco Sauce – bold and flavorful, this dip packs umami flavors, too!
You don’t have to make it complicated and make several spreads yourself, go ahead and buy a storebought dip and make your life easier!
5. Crackers, Bread, or Crostini
Or all three! A charcuterie board most definitely needs a vehicle of choice to pile high with cheese, roasted tomatoes, and a yummy spread.
I like to have at least 2-3 varieties of crackers or bread on the board.
A good crisp cracker with dried fruits pairs well with cheeses, an everyday plain cracker is an all-around good option. A side of crostini makes for a hearty addition, or simply add baguette slices.
Of course, easily swap gluten-free crackers if needed.
How to Assemble a Beautiful Cheese Board
It takes a little bit of art when it comes to assembling a charcuterie board and making it beautiful…but with a few key tips to keep in mind, you’ll have it down in no time! Remember, there are no real rules, so take the pressure off first!
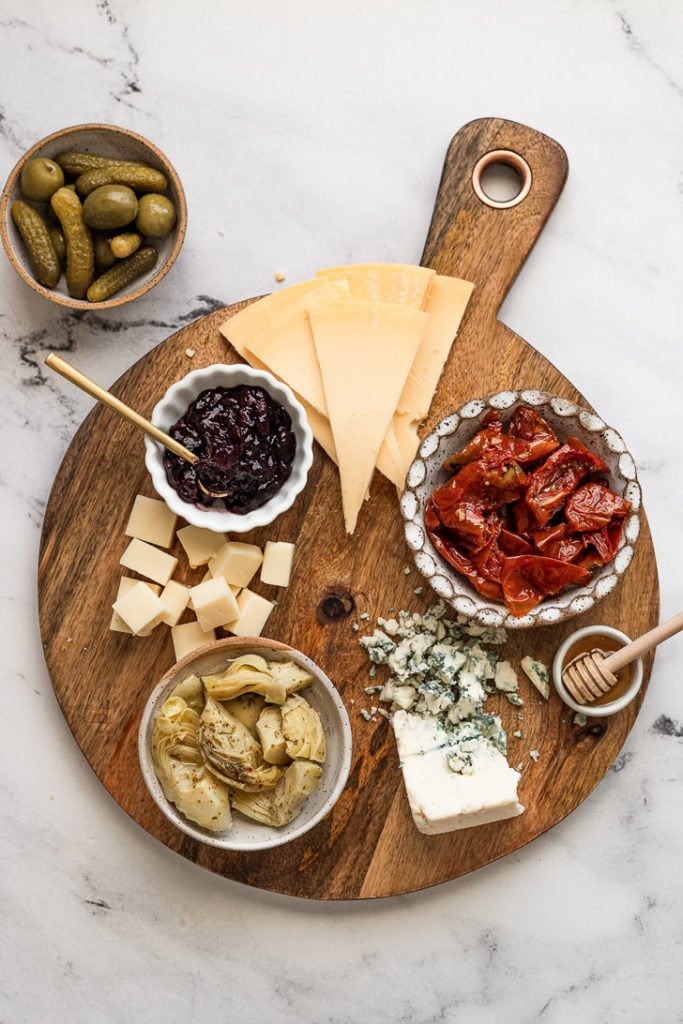
First, place any small bowls that will be on the board. These are our “anchor” points. No bowls? The cheese will be our anchors, too.
The bowls may hold some of the umami components – like marinated artichokes, roasted tomatoes, pickles, olives, etc. Or you might want to place your jams on the board in small bowls.

I recommend 3 bowls, placed in a spread-out triangle on the board.
This will be visually appealing once the board comes together. As you can see, I ended up having another bowl, so I decided to place the pickles to the side – this is another option, too. Not everything has to end up on the board.
Next, add the cheeses in a similar triangle fashion. If you have 2 kinds of cheese, simply place them across from each other on the board.
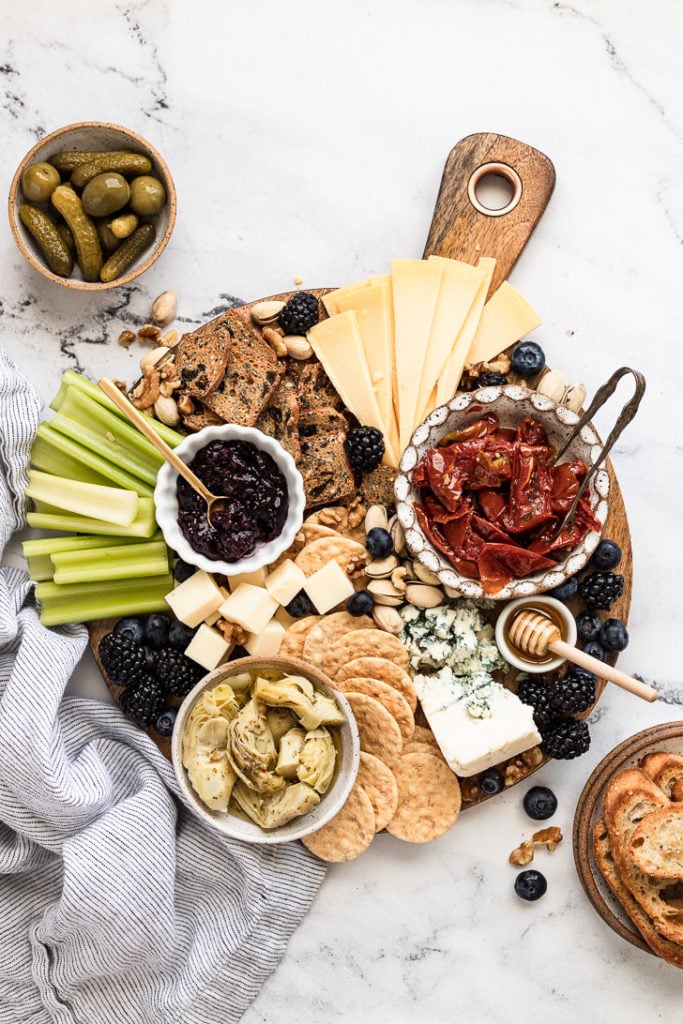
The best way to assemble the board is to add the biggest components first.
Slice, chop or crumble the cheese depending on the kind, and place it on the board so that it’s inviting for guests, and they can easily grab what they want.
And finally, add the crackers, and any other larger items, then fill the remaining spaces with the smaller items.
You can have fun adding crackers to the board, creating a fun S shape with them, and visually creating lines with them which will inevitably make your board that much more beautiful and visually appealing.
Once they’re placed, add the rest of the items in empty spaces. Place nuts and fruit – dried or fresh berries – in the empty spaces on the board. As you place them, do so in different parts of the board.
Now that the board is filled, it’s time to open the wine and enjoy!
What kind of board should I use?
Use a wood serving tray to assemble the dessert board on; I like using round boards, but honestly whatever you have on hand will work. If you don’t have a food-safe wooden board, a ceramic serving tray will work too. You need something that is flat to spread the items on.
Rectangle boards are good too, to spread items out along a table, and will work especially well to place items in multiple locations throughout the board.
You can vary the size of the board depending on how many people you’ll be serving. That’s the beauty of making a charcuterie board at home – it’s completely flexible and customizable!
Pictured is a 12-inch board; it’s the perfect size to serve 2 for a snacky dinner or 4 for an appetizer. For a hungry crowd of 4 to 6 people, I’d recommend sizing up the board to a 15-16 inch board.
If you’re looking for a similar board to mine, this board and this board are very comparable.
Tips to Keep in Mind
- There’s no pressure!
- I get it, it might seem overwhelming to try to create a beautiful board, but honestly, take that pressure off of yourself. Following the simple steps for assembly, and go with the flow. The more messy and haphazard it is honestly when it turns out the most beautiful.
- Don’t put everything out at once! This will overwhelm the board. Instead, keep the extras in a convenient place so you can continue to replenish the board as time goes on.
- Keep a color scheme in mind.
- For this board, I was focused on what I had on hand, and incorporated the umami components. If I wanted to stick with a color theme focused on blues and light greens…I would’ve left the tomatoes out.
- On that note, you can theme the board colors for holidays.
- 4th of July Board: use primarily red, white, and blue colors
- Game Day or Super Bowl: use or the colors of your favorite teams for game day, or all green for a St. Patrick’s Day board.
- Turn it into a fall charcuterie board.
Did you make this recipe? Please leave a star rating and review in the form below. I appreciate your feedback, and it helps others, too!
Get the Recipe Simple Vegetarian Charcuterie Board
Ingredients
*Ingredients listed are featured in the photos, see post for a variety of ideas.
Cheese**
- 8 ounces aged cheddar cheese, cubed
- 8 ounces gouda, sliced; or another soft or semi-soft cheese
- 4 ounces blue cheese, crumbled as needed
Savory
- ½ cup olives, use your favorite!
- ¼ cup mini cornichons
- ½ cup mixed nuts
- 1 cup roasted tomatoes
- 1 cup marinated artichokes
Fresh Produce
- 4 celery stalks, cut into 2-3 inch pieces
- 1 cup fresh blueberries and blackberries
SPREADS & DIPS
- ¼ cup blueberry jam
- 2 Tablespoons honey
CRACKERS
- Cracker Crisps
- Water Crackers
- Crostini
Equipment
Instructions
- Start by placing any items that will be in bowls on the board, in a spread-out triangle shape. I recommend placing dips or jams in bowls, as well as anything too "wet" like the roasted tomatoes and marinated artichokes. You can also set a bowl off to the side if needed, as I did with the pickles and olives.
- Next, add in the cheeses, already cut into serving portions, with the exception of blue cheese, which you can start the crumble on the board (or a triple creme that people can spread themselves). Place them in a triangle around the board, too, to make it the most visually appealing.
- Now, add in any other bigger components like veggie slices and crackers (in my board's case), and then continue to fill in smaller remaining spaces with smaller items like berries, nuts, olives, etc. Place them sporadically around the board for the most interest.
- Don't put everything out at once! This will overwhelm the board. Instead, keep the extras in a convenient place so you can continue to replenish the board as time goes on.
Notes
- Take this as a guide and use what you already have on hand to create a beautiful board, following the guidance in the post for how to assemble the board.
- There are a variety of dips and jams you can include on the board; see the post for more ideas.
- **Look for cheese specifically labeled vegetarian (or microbial enzymes), if needed.
- Whole Foods, Trader Joe’s, and ALDI have a great selection.
- Old Amsterdam makes a delicious vegetarian Gouda.


great article- thank u! as a side note, the very light orange words r very difficult to read as r the light grey letters in this comment section
Thanks for letting me know, Alicia, I’ll look into adjusting them.