


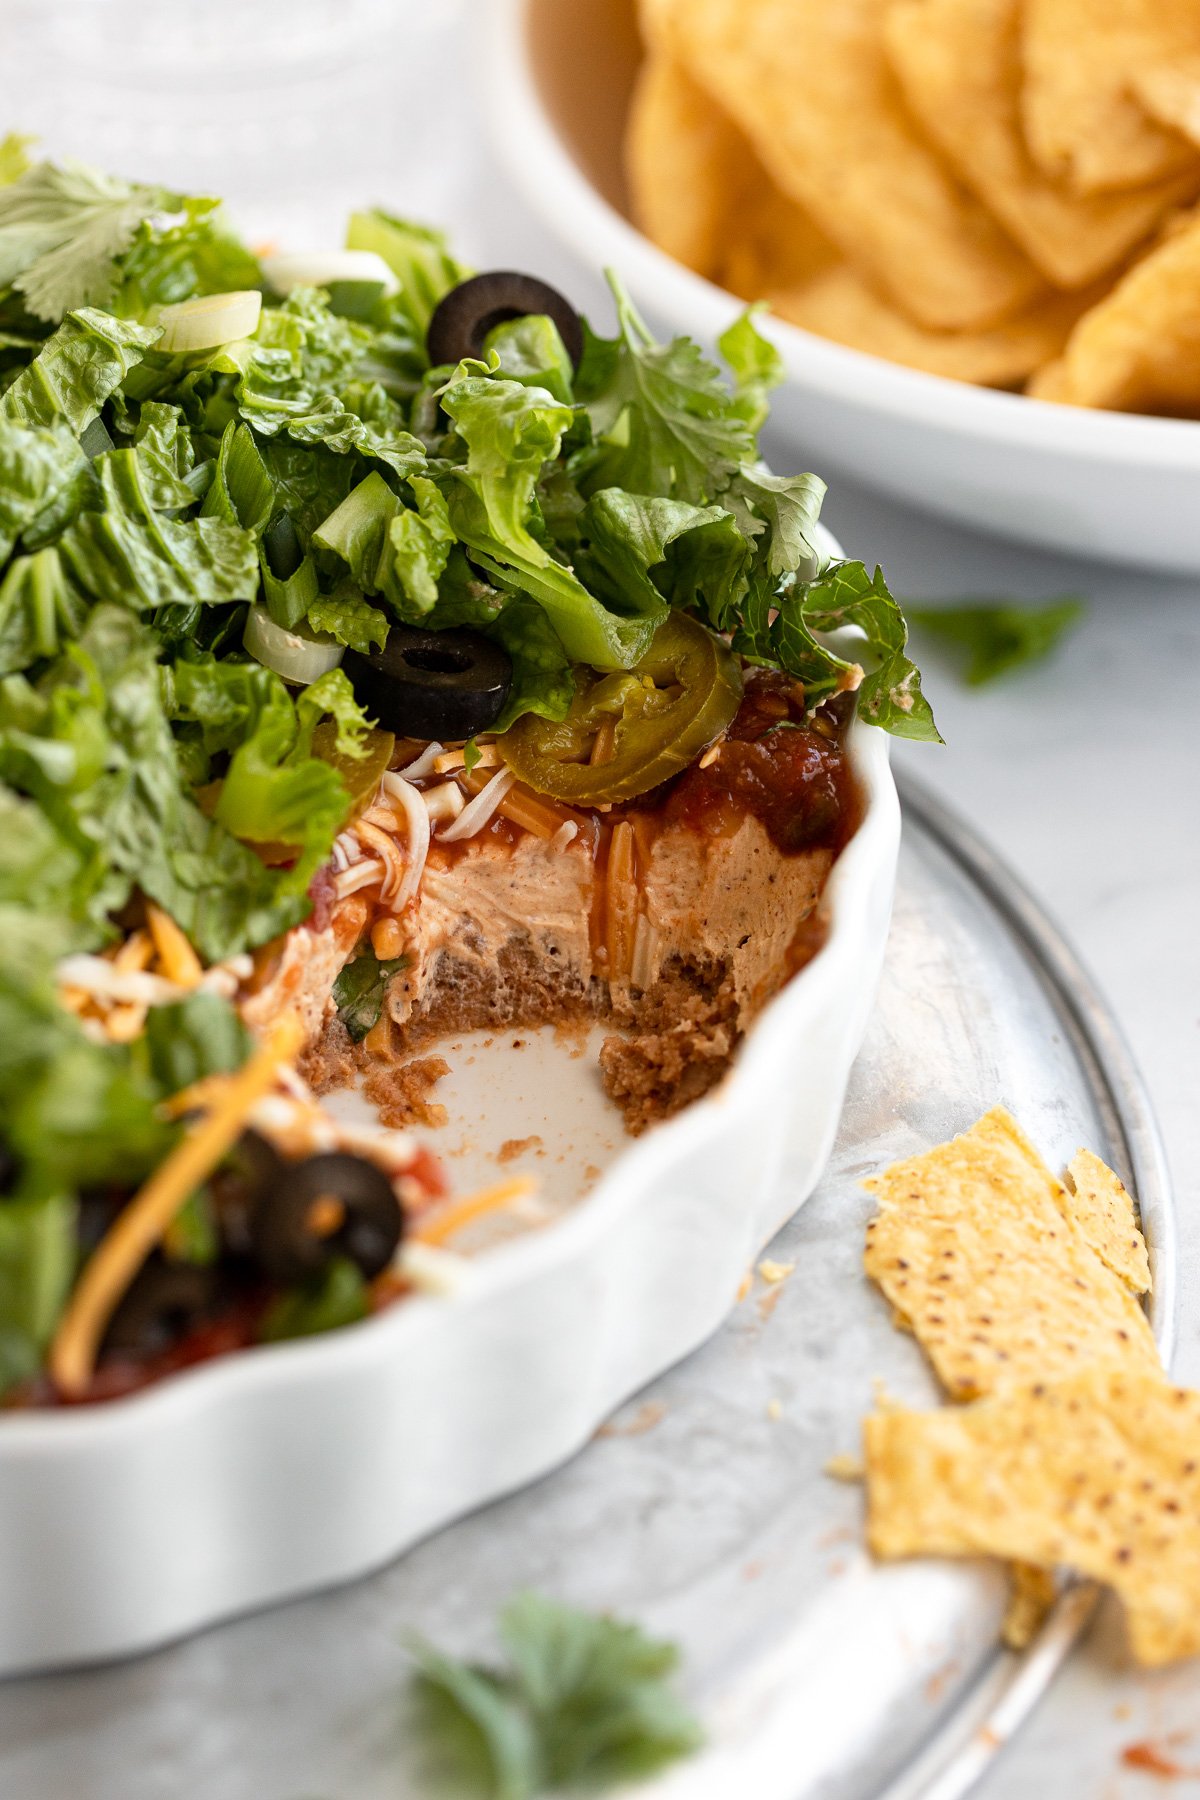
It could be a 5-layer dip…or a 7-layer taco dip…because when it comes to homemade dip recipes, there are no limits.
There are definitely no limits when it comes to our collection of Mexican-inspired appetizers. Fork in the Kitchen readers absolutely love our easy queso recipe (over 100 5-star reviews!) and our homemade elote corn dip. Yet it doesn’t stop there with game-day appetizers either, and this vegetarian buffalo dip with jackfruit wins out over its chicken counterpart time and time again.
But back to this meatless taco dip. It’s so easy to make, and thanks to salt free taco seasoning, both the cream cheese layer and the refried bean layer are extra flavorful. Mix them ahead of time to let the flavors meld together (the best!), then serve cold with your favorite tortilla chips.
Ingredient Spotlight
As I mentioned, the top layers of this dip are super customizable depending on your preferences, so don’t let it hold you back if you want to add, say, guacamole…
Here’s what you’ll need to make this vegetarian taco dip with refried beans, and check out the variation ideas following. As always, be sure to see the full recipe card below for amounts!
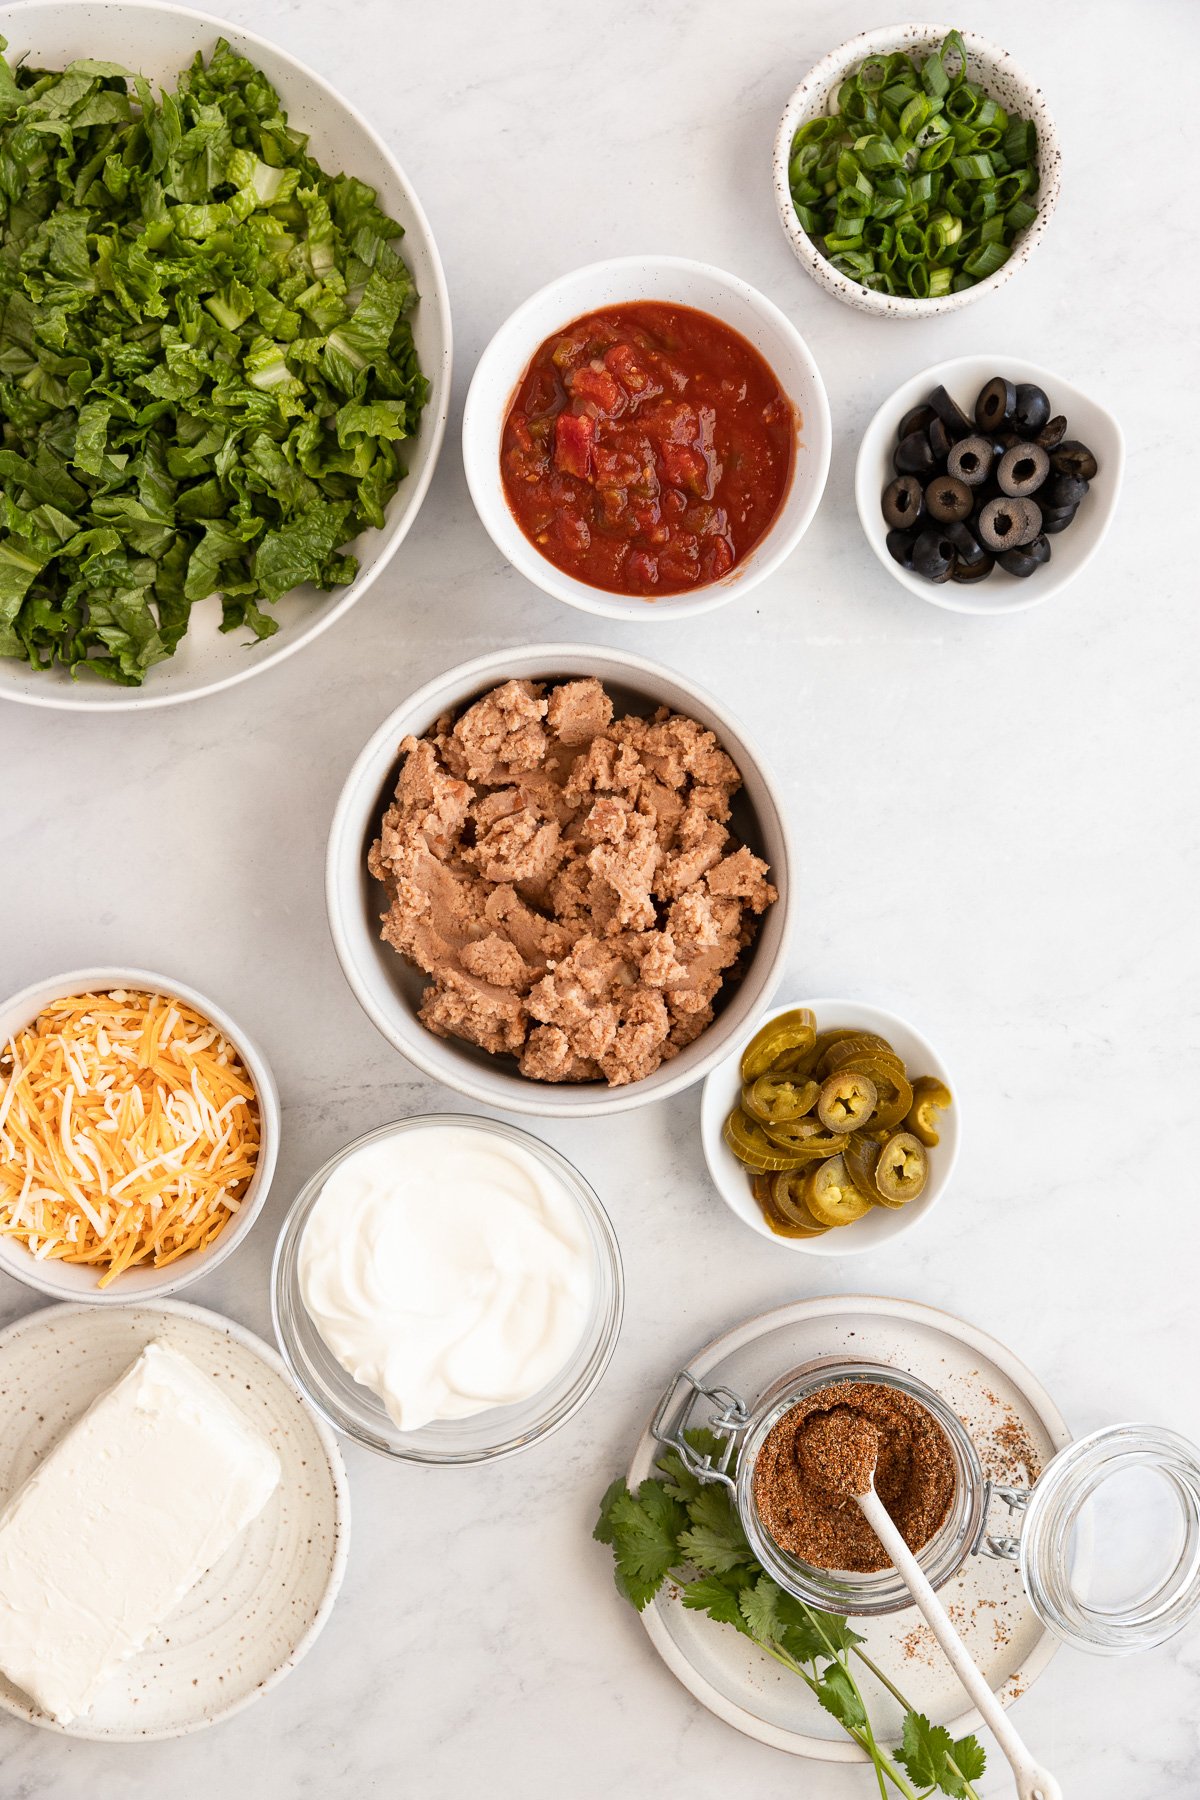
- Taco Seasoning: while you can use a storebought packet of taco seasoning, I highly recommend using my no-salt homemade version, so that you can season the layers exactly to your liking!
- Refried Beans: make sure they’re vegetarian if needed. Use store-bought for ease or try these homemade Instant Pot refried beans!
- Sour Cream and Cream Cheese: the two combine with seasoning to make a creamy, irresistible seasoned sour cream layer.
- Salsa: your favorite salsa will work for this layer.
- Shredded Cheese: again, no hard and fast rules for this one either. I like to use the “Mexican-style” pre-shredded cheese for ease, but cheddar or pepper jack would also be delish!
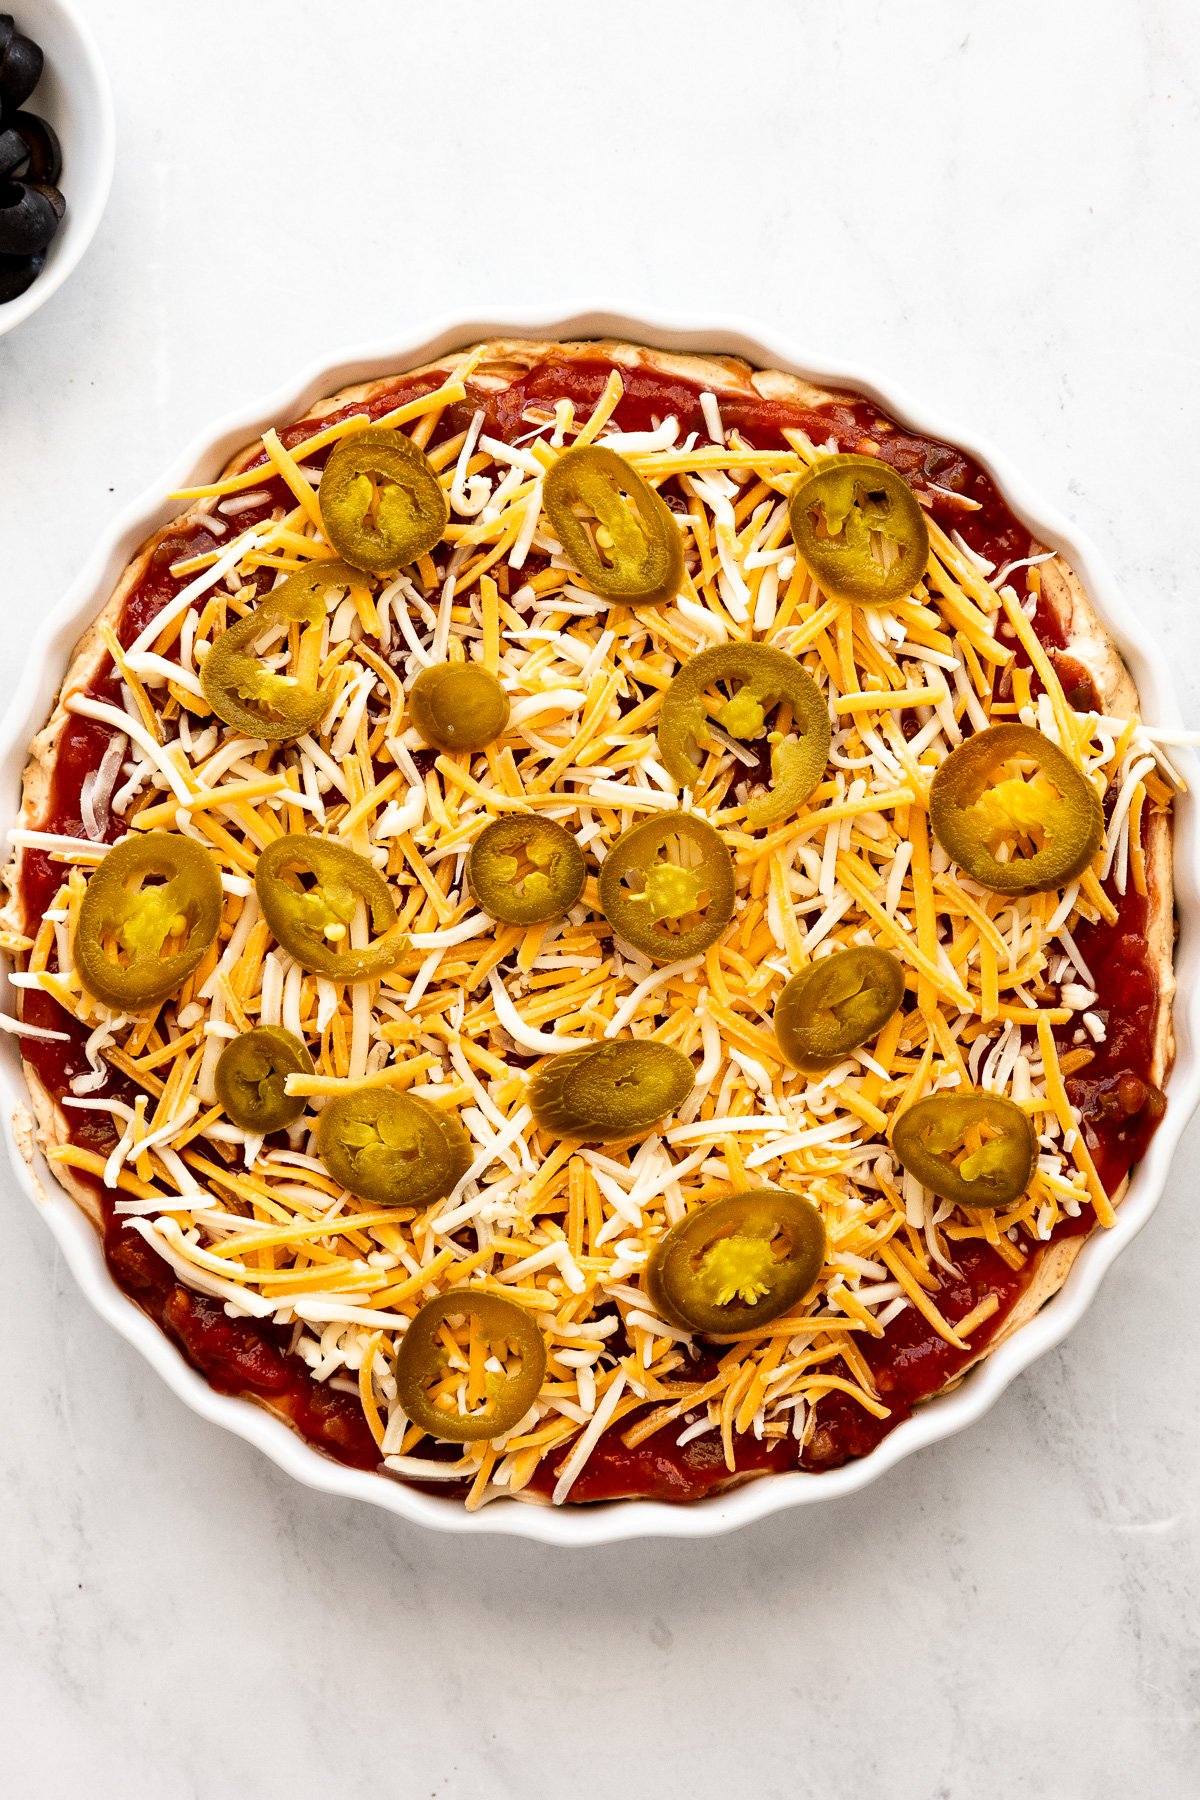
- Pickled Jalapenos: for a little heat but not too much, I like to use pickled jalapenos. Take it up a notch with fresh, but I recommend testing out your pepper first – some can be extra spicy!
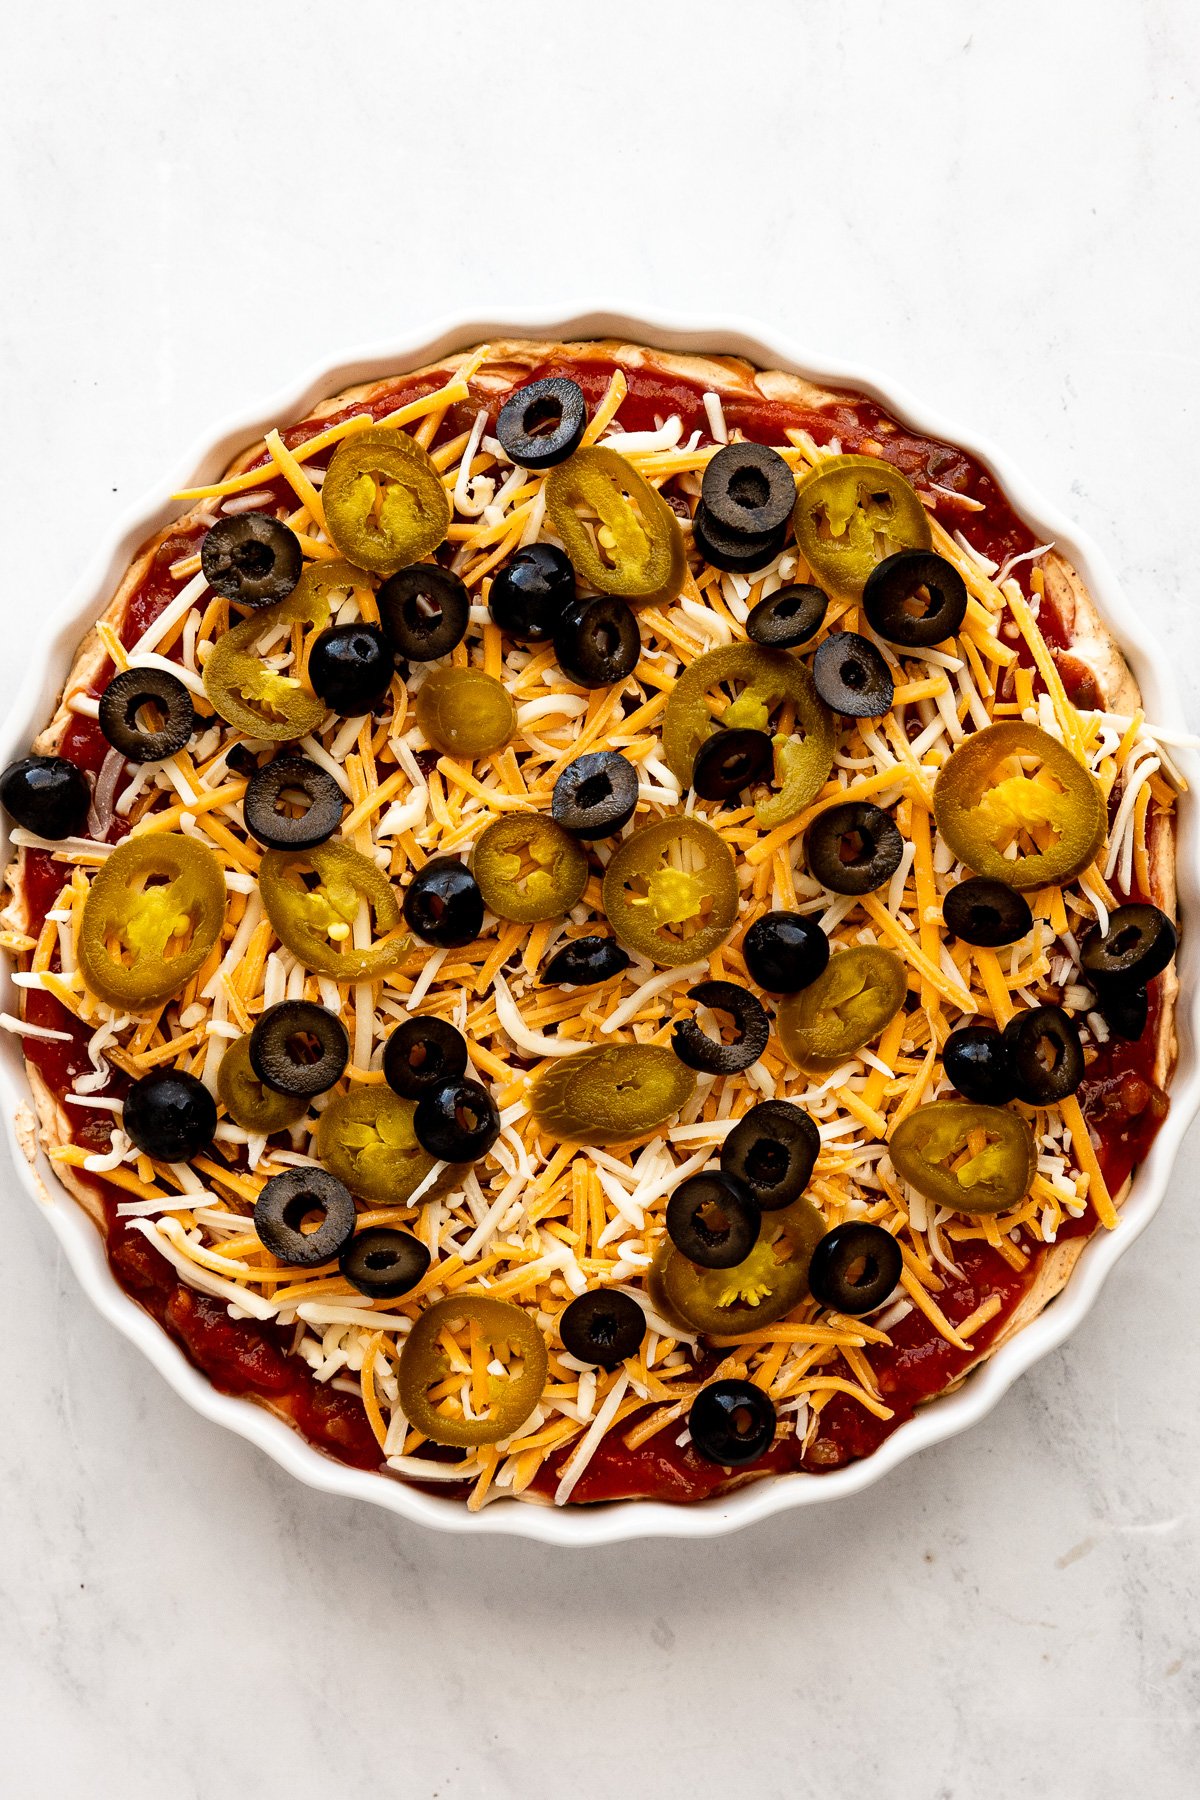
- Black Olives: why is it that nachos and taco dips just gotta have black olives? Not sure but they work! Simply leave them off if you’re not a fan.
- Romaine Lettuce: just like nachos, I love getting my greens in on top. Something about it just makes it feel more like a full meal (and of course, I have this dip as a full meal).
- Green Onions: I like to use both the white and green parts in place of a chopped red onion because it’s milder and super crowd-friendly. Plus, the fresh, brightness they add is a win!
- Cilantro: I cannot have a taco-anything without fresh cilantro. If you’re an unfortunate soul for whom it tastes like soap, I’m oh so sorry. Just leave it off.
Try these, too!
So you’ve got questions about layers and ingredients and I’m here to assure you that there is no box. There is no right or wrong, and this recipe is quite customizable.
Here are some additional ideas or substitutions.
- Pico de gallo in place of salsa, or as an additional layer on its own.
- On that note, you can also add diced cherry tomatoes as their own layer with the jalapenos.
- Use finely chopped red onion in place of green onion for an extra bite.
- Guacamole! Add it as its own layer, or add a layer of diced avocado along with the olives. Or, keep it really easy and spread a layer of 3-ingredient avocado spread.
- Keep in mind it will brown, especially if the avocados are chopped instead of a layer of guac. Toss them with lime juice to help preserve their color a little longer.
- Use all sour cream instead of the mixture with cream cheese.
- Try refried black beans in place of the traditional variety.
- Replace the sour cream layer with queso dip (gasp!). It’s quite delicious served cold, too, which means it would be an irresistible layer.
- Corn or a fire-roasted elote layer for added veggies.
How to Layer Cold Taco Dip
The biggest task of all: layering the taco dip! Lucky for us, this is quite easy, so your game day snacks will be ready in no time!
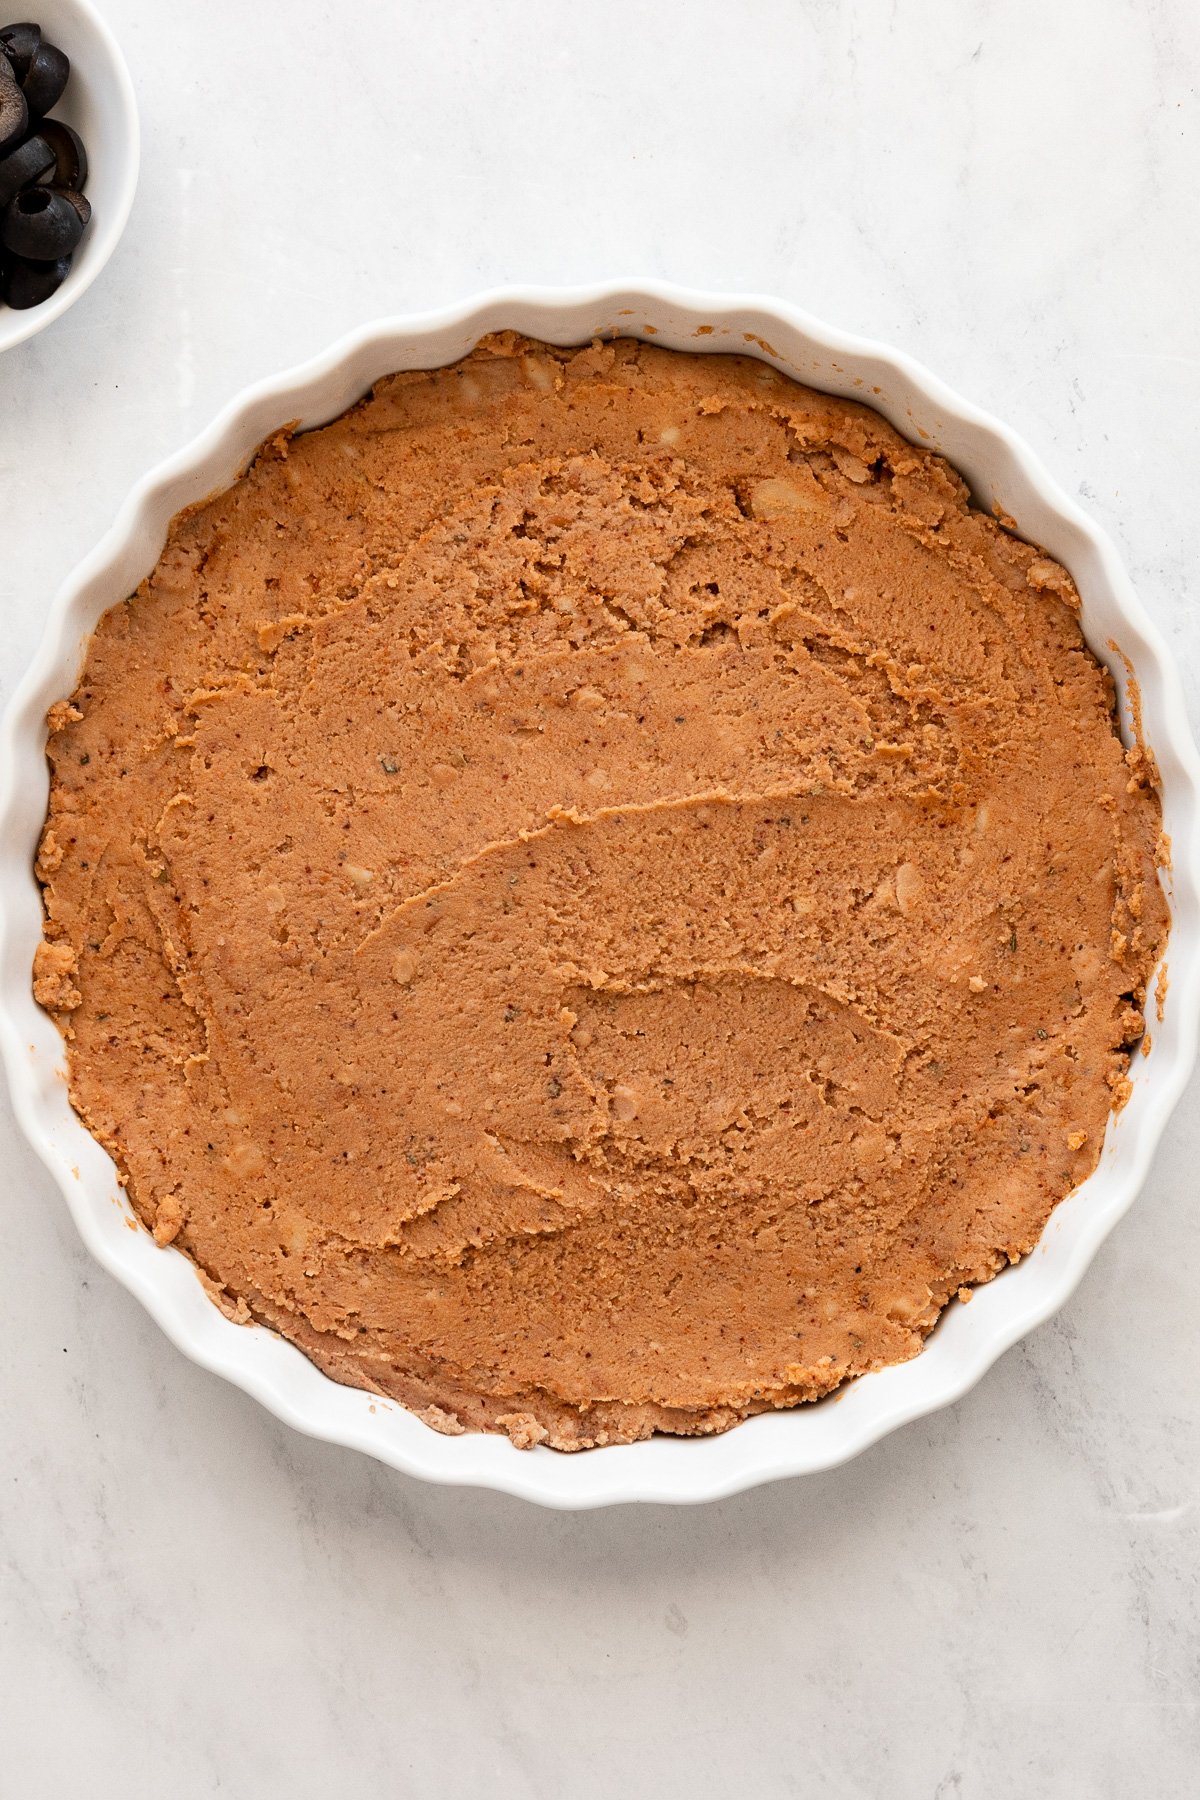
1. Refried Beans
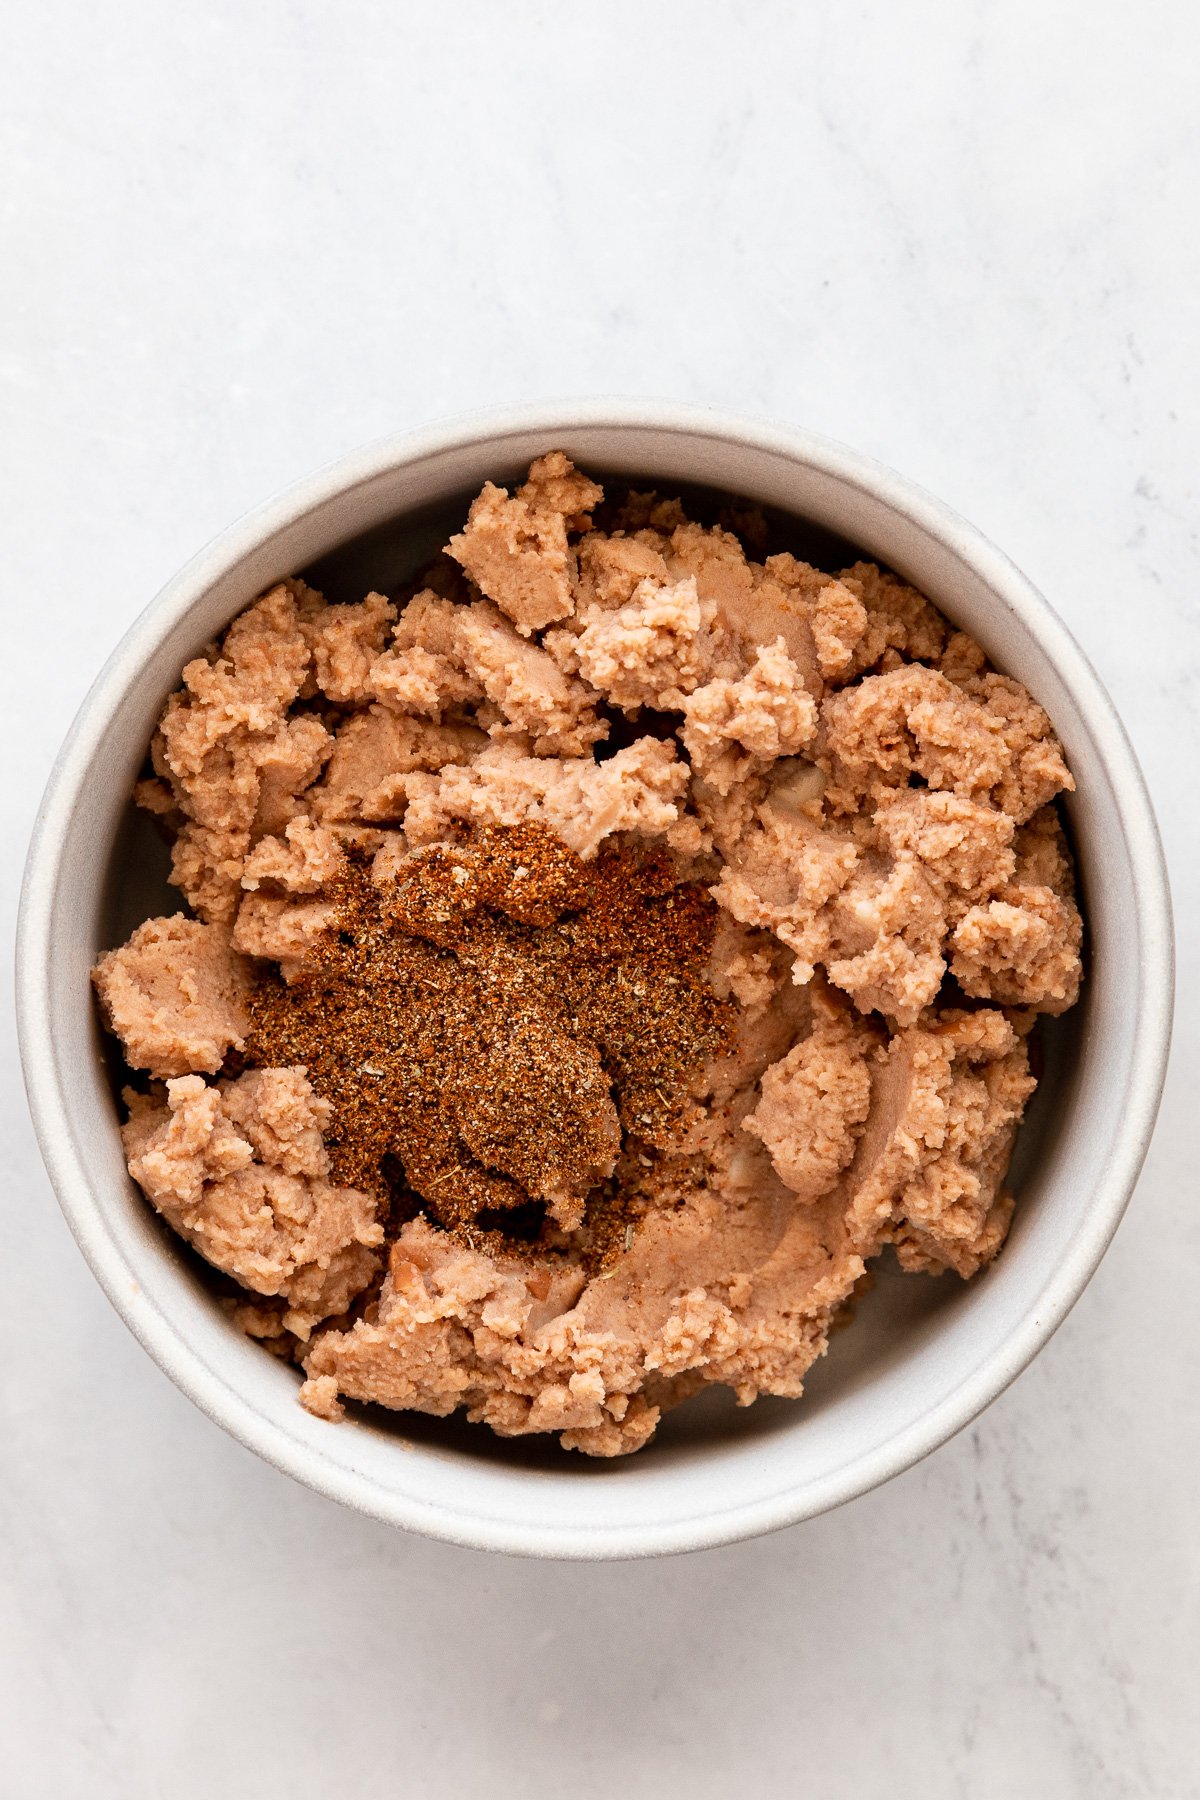
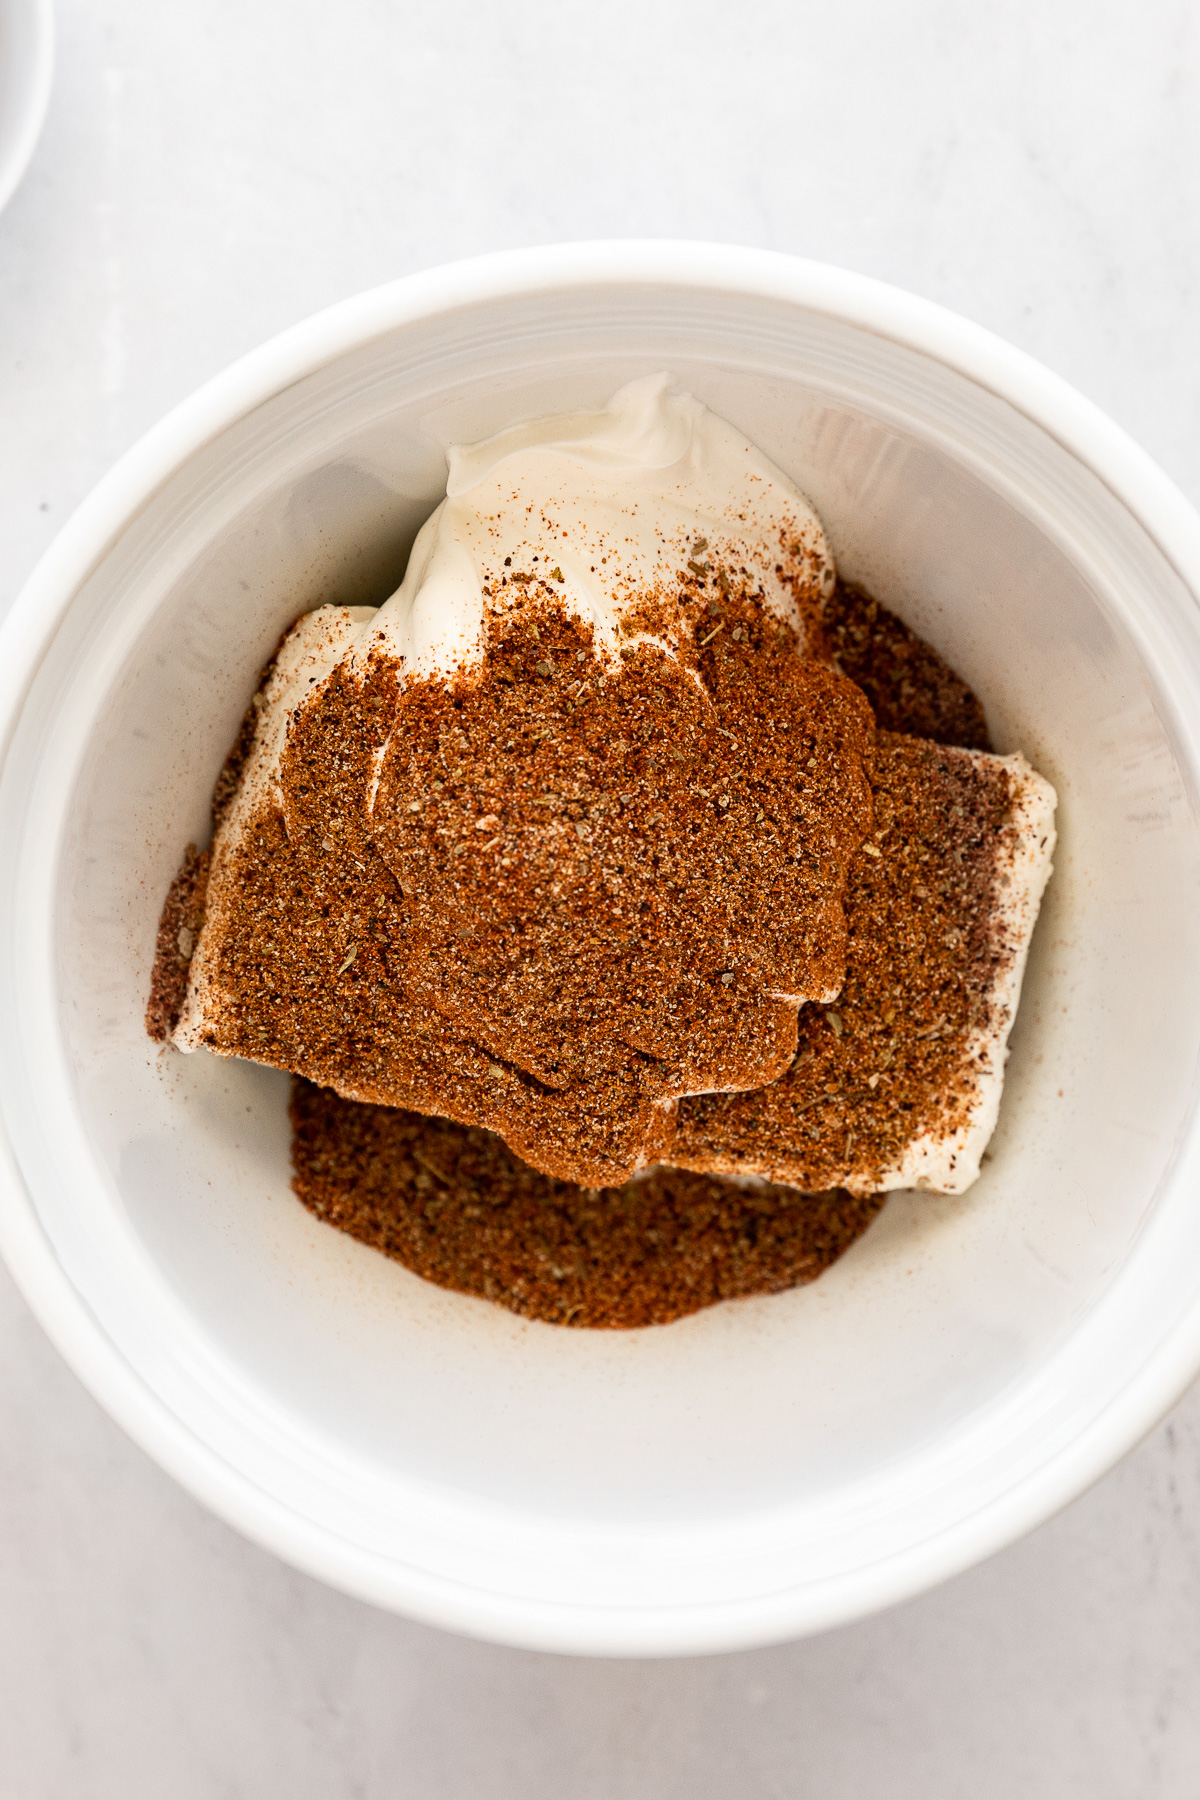
We don’t skimp on flavor around here, so we’re dividing the taco seasoning into both the refried beans and the sour cream and cream cheese layers.
In one bowl, simply stir together 1 tablespoon of the seasoning and the refried beans until fully incorporated. Because the canned beans, even if low-sodium, contain added salt, there shouldn’t be any need to add salt to this layer.
Spread this layer across the bottom of a 9″ tart or pie pan, or another 1-2 quart serving dish.
The beans are going down first because they’re pretty thick, which makes them harder to spread. This way, there’s no mess and we can press them into an even layer.
2. Sour Cream & Cream Cheese
Oh, the creamy layer! The combination of sour cream and cream cheese is velvety, with the slightest tang. The rest of the taco seasoning gets added to this layer. And if you’re using my homemade no-salt version, I recommend adding a pinch of salt to this layer to help bring out the flavors.
To make this process super easy, use a hand mixer to whip it all together. You can use pure muscle strength, but the mixer is efficient and smooths out the softened cream cheese really well.


Spread this layer on top of the beans.
Stop! If you have time, make these layers ahead of time and place them in the fridge to chill. The extra time allows the flavor to develop and is OH SO GOOD. Yep, one of those recipes that is actually better made in advance.
3. Salsa
Your favorite salsa is perfect for this layer. Chunky or smooth, hot or mild, it doesn’t matter, as long as you love it!
Feel free to also use pico de gallo, too. I recommend adding the cheese first if you do though.

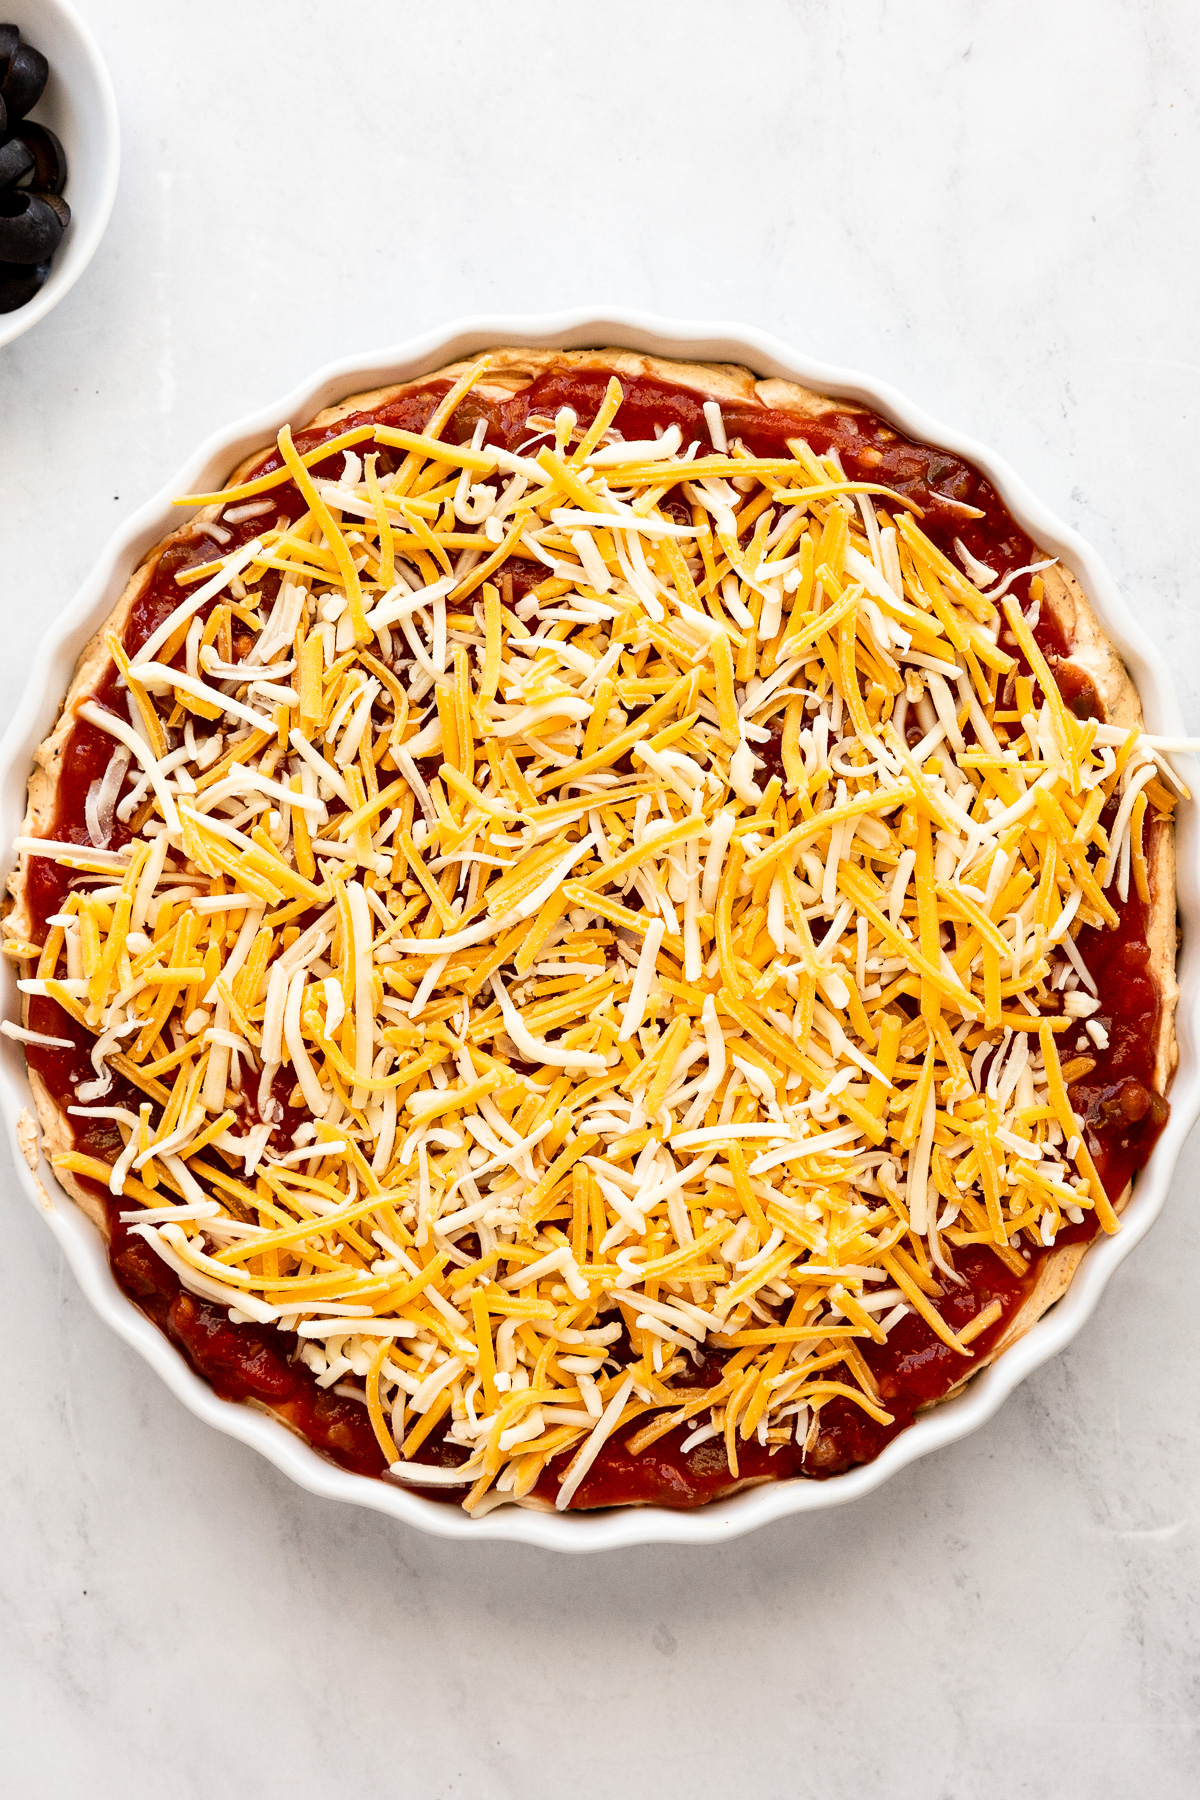
4. The Remaining Toppings
Ok, layers 4, 5, 6, 7, and garnishes are coming up next! This is where I like to say measure with your heart (or stomach) because there’s no right or wrong.
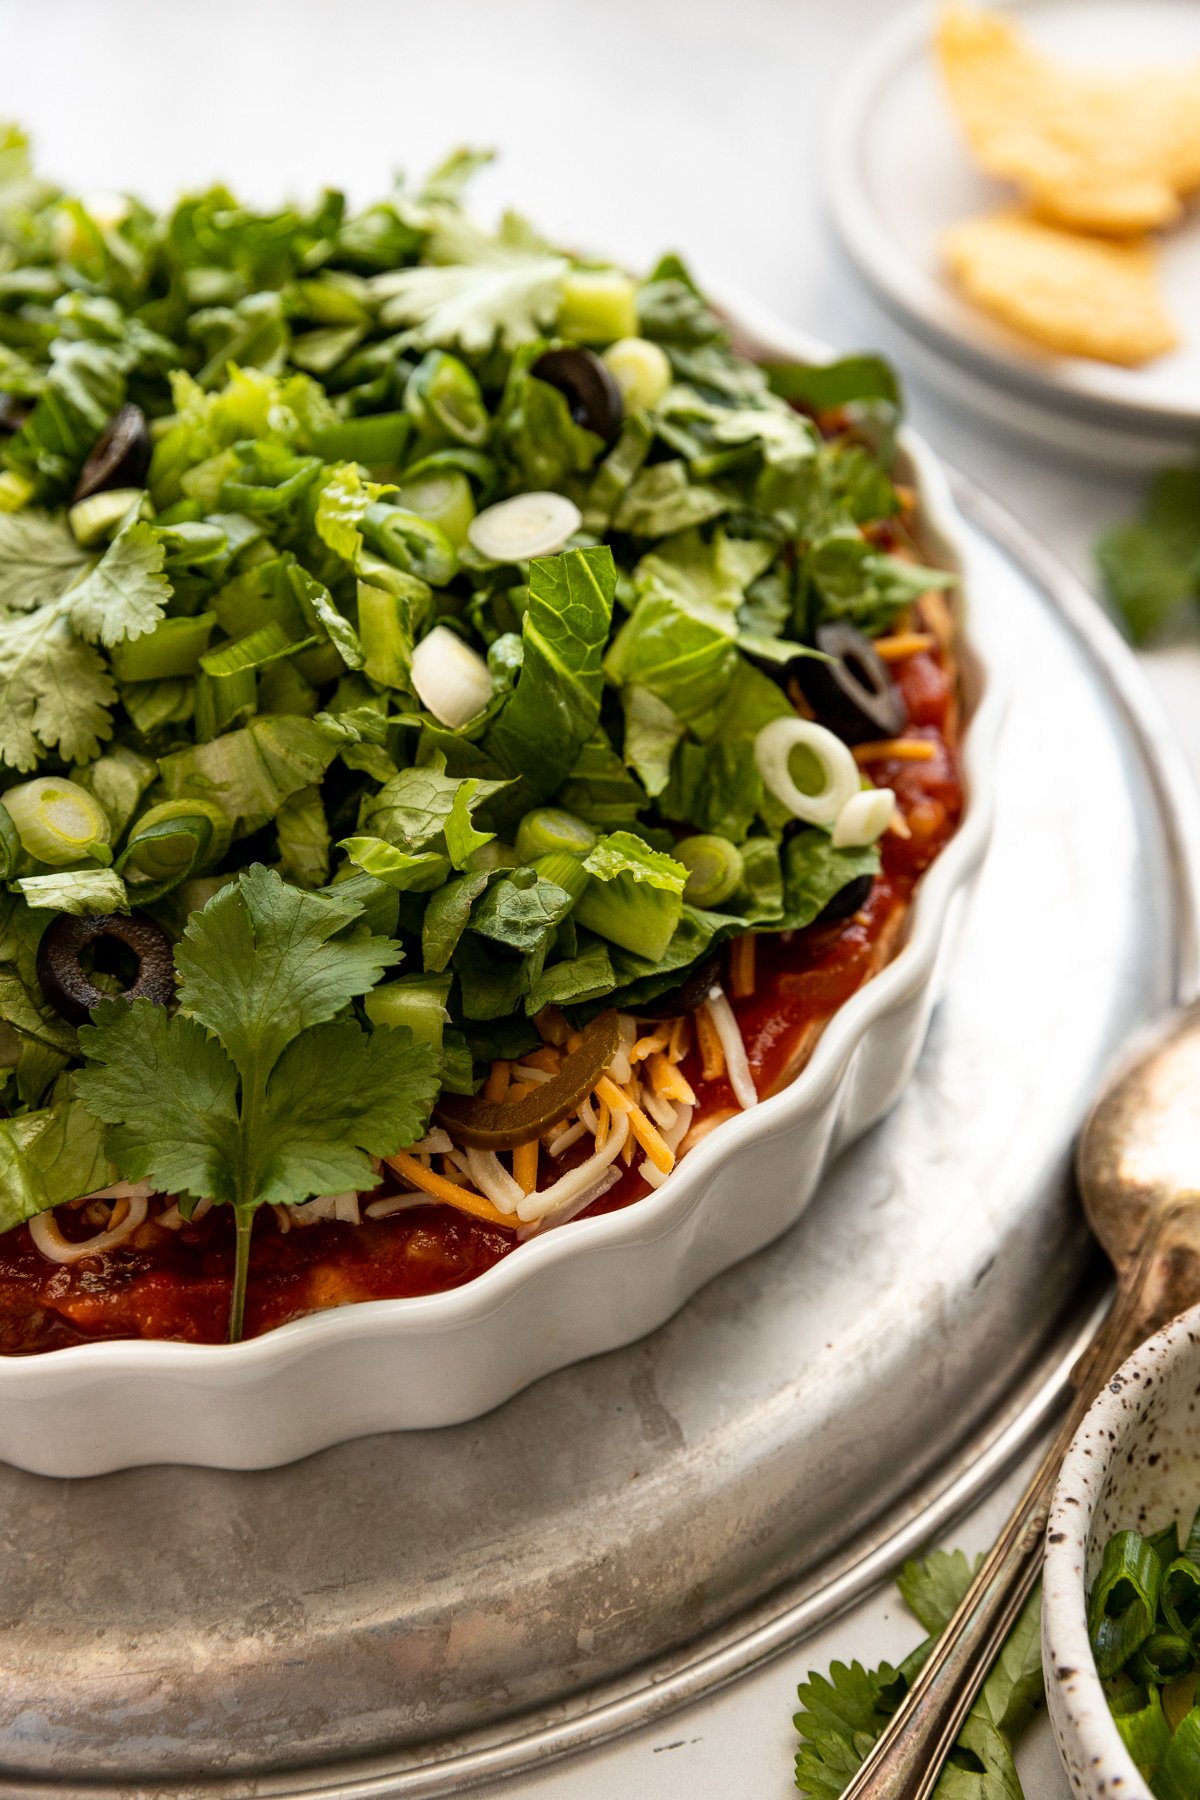
Sprinkle on the layer of shredded cheese so that it adheres to the salsa for its own layer. Then, add the jalapenos and black olives. Top it off with lettuce, cilantro, and green onions.
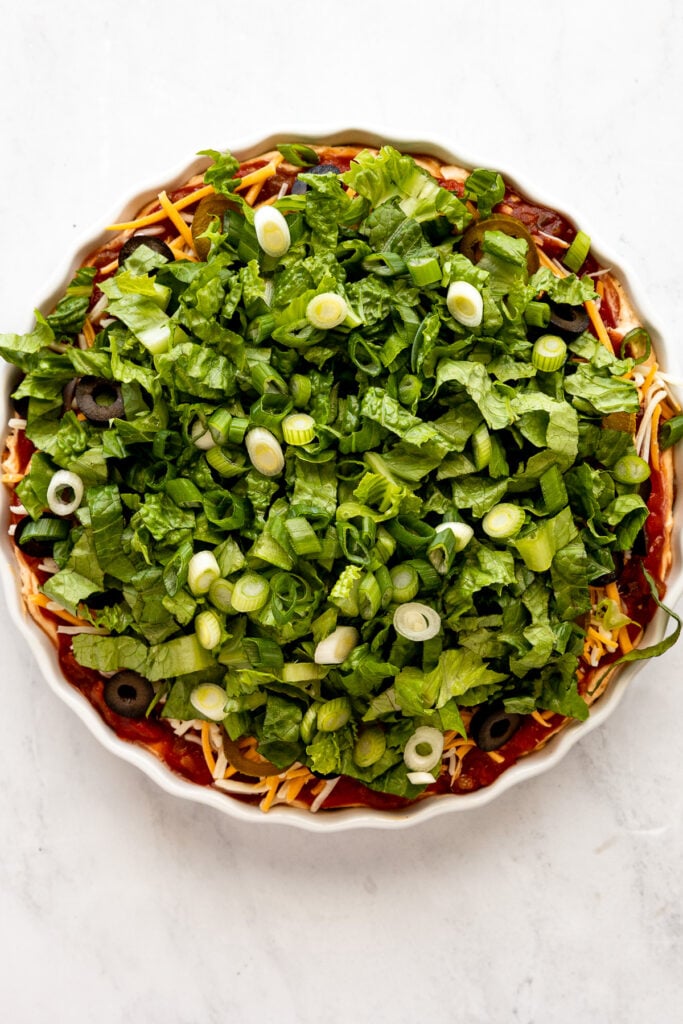
To go the extra mile and make sure those garnishes are incorporated, toss the greens together in a big bowl before adding. You can even add a squeeze of lime juice for a little pizazz.
Serve it Up!
This vegetarian 7-layer taco dip is best served with crunchy tortilla chips, which keeps this whole appetizer gluten-free. Find ones that are hearty enough to withstand dipping into all those layers of goodness. Try it with Fritos or mini flour tortillas for a taco-of-sorts, too!
Make Ahead & Storage Tips
As I mentioned above, this taco dip with cream cheese is best made ahead of time so the creamy layers with sour cream and refried beans have time to meld with the taco seasoning.
When making it ahead of time, prepare the dip through the step of layering on the salsa and cheese (you could add the jalapenos and olives, too). Cover with plastic wrap flush against the top and store in the fridge for up to 24 hours in advance. Before serving, top with freshly chopped romaine lettuce and cilantro, if using.
For any leftovers, cover the dish with plastic wrap again (unless it has a lid) and place it in the fridge. The lettuce should remain OK on top for up to 2 days. Otherwise, remove the lettuce layer and store the leftover dip in an airtight container for up to 5 days.
Did you make this recipe? Please leave a star rating and review in the form below. I appreciate your feedback, and it helps others, too!

Get the Recipe Vegetarian Layered Taco Dip with Refried Beans
Ingredients
- 16 ounces vegetarian refried beans, storebought or homemade
- 3 Tablespoons taco seasoning, equal to 1 packet, divided
- 8 ounces cream cheese, softened to room temperature
- 8 ounces sour cream
- ½ teaspoon kosher salt, or to taste
- 1 cup salsa of choice
- 1 cup shredded Mexican-style cheese
- ¼ cup black olive slices
- ¼ cup pickled jalapenos
- 1 ½ cups romaine lettuce, shredded
- ¼ cup cilantro , roughly chopped
- 2-4 Tablespoons green onions, sliced
Instructions
- In a small bowl, combine the refried beans with 1 tablespoon taco seasoning until combined. Spread in an even layer on the bottom of a 9-inch pie pan or 1-2 quart baking dish.16 ounces vegetarian refried beans
- In a separate bowl, add the cream cheese, sour cream, salt, and remaining taco seasoning (about 2 Tablespoons). Use a hand mixer or muscle strength to combine until smooth. Spread the layer on top of the beans. If possible, place these two layers in the fridge at least 2 hours before serving (up to 24 hours in advance) to allow the flavors to develop.8 ounces cream cheese, 8 ounces sour cream, ½ teaspoon kosher salt
- Spread the layer of salsa and top with shredded cheese. Then sprinkle the black olives and jalapeno slices across the top. Finish with shredded lettuce, cilantro leaves, and green onions. Serve cold or room temperature with tortilla chips – enjoy!1 cup salsa of choice, 1 cup shredded Mexican-style cheese, ¼ cup black olive slices, ¼ cup pickled jalapenos, 1 ½ cups romaine lettuce, ¼ cup cilantro, 2-4 Tablespoons green onions
Notes
- Homemade Taco Seasoning: 1 Tablespoon chili powder, 1 Tablespoon + 1 teaspoon cumin, 1 teaspoon onion powder, 1 teaspoon garlic powder, 1 teaspoon oregano, ½ teaspoon cayenne pepper, ¼ teaspoon smoked paprika, ⅛ – ¼ teaspoon black pepper.
- The dip develops more flavor if it’s made in advance. Prep the bean and sour cream layers, up to the point of the cheese, if desired, and cover and place in the fridge for 2 hours or overnight before finishing with the remaining layers and serving.
- Customize the toppings! Other ideas:
- Chopped tomatoes
- Diced red onion
- Diced avocado or layer with guacamole
- Corn
- Fresh Jalapeno


