
Let’s make cold-brew coffee at home! It’s incredibly easy to DIY, it doesn’t require any fancy equipment, and it’s 100% budget-friendly because it’s so much more cost-effective than running to the coffee shop.
Even better? You can batch-make cold brew ahead of time and you will be set all week long. No more busy morning rush where you’re scrambling to make coffee. It will already be made, leaving you plenty of time to savor each sip while enjoying your favorite breakfast.
Iced Coffee or Cold Brew?
Let’s get this out of the way first: there is a difference between cold brew and iced coffee. Cold brew is a type of iced coffee, but iced coffee is not always cold brew.
Cold Brew is a type of iced coffee, made when coarse coffee grounds are steeped in cold water for 12-24 hours, then strained. This brewing process results in a less acidic, smooth coffee that is then served cold, over ice, and/or diluted with additional milk or water to a desired strength.
Iced Coffee is when coffee is brewed using hot water and is then poured over ice. Iced coffee does not inherently eliminate the acidity that comes from hot brewed coffee, as the cold brew method does. However, the flavor nuances in the coffee do shine through more.
The Perfect Ratio of Beans to Water
In my many years of making cold brew coffee at home, I’ve found the ratio of 1:4, grounds to water, is perfect. For me, this typically looks like 1 cup of beans, ground, to 4 cups of water. Easily double this for more coffee, too!
Because the coffee grounds absorb water, the final result will have less liquid than you started with.
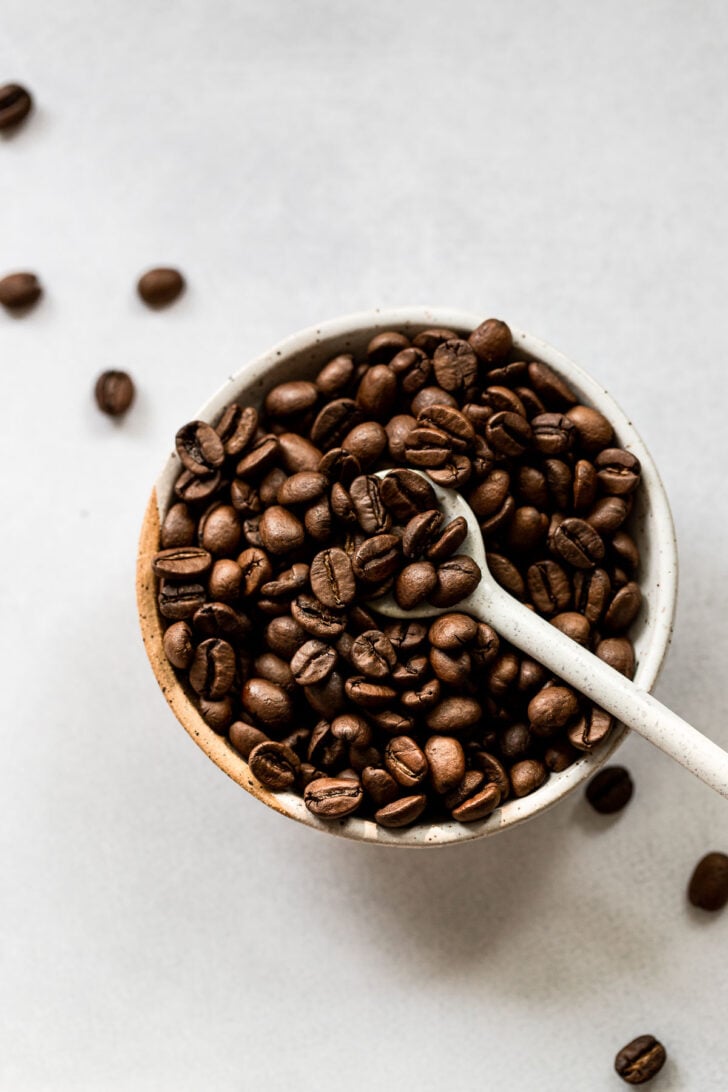
The Best Coffee Beans for Cold Brew Coffee
Above all, I recommend using coffee beans that you love! You can use a light or dark roast, it’s simply about the flavor you prefer.
If you’re not sure, I find the best results with medium to dark-roast coffee beans for cold brew. Because the cold brew process results in a smoother taste than a cup of hot coffee, and is, therefore, less acidic, using a darker roast creates a rich, smooth coffee flavor in the cold brew.
Steps for Making Cold Brew at Home
It only takes a few simple steps to make cold brew — with equipment you likely already have in your kitchen. A coffee bean grinder) will make the process even easier, but it’s not necessary.
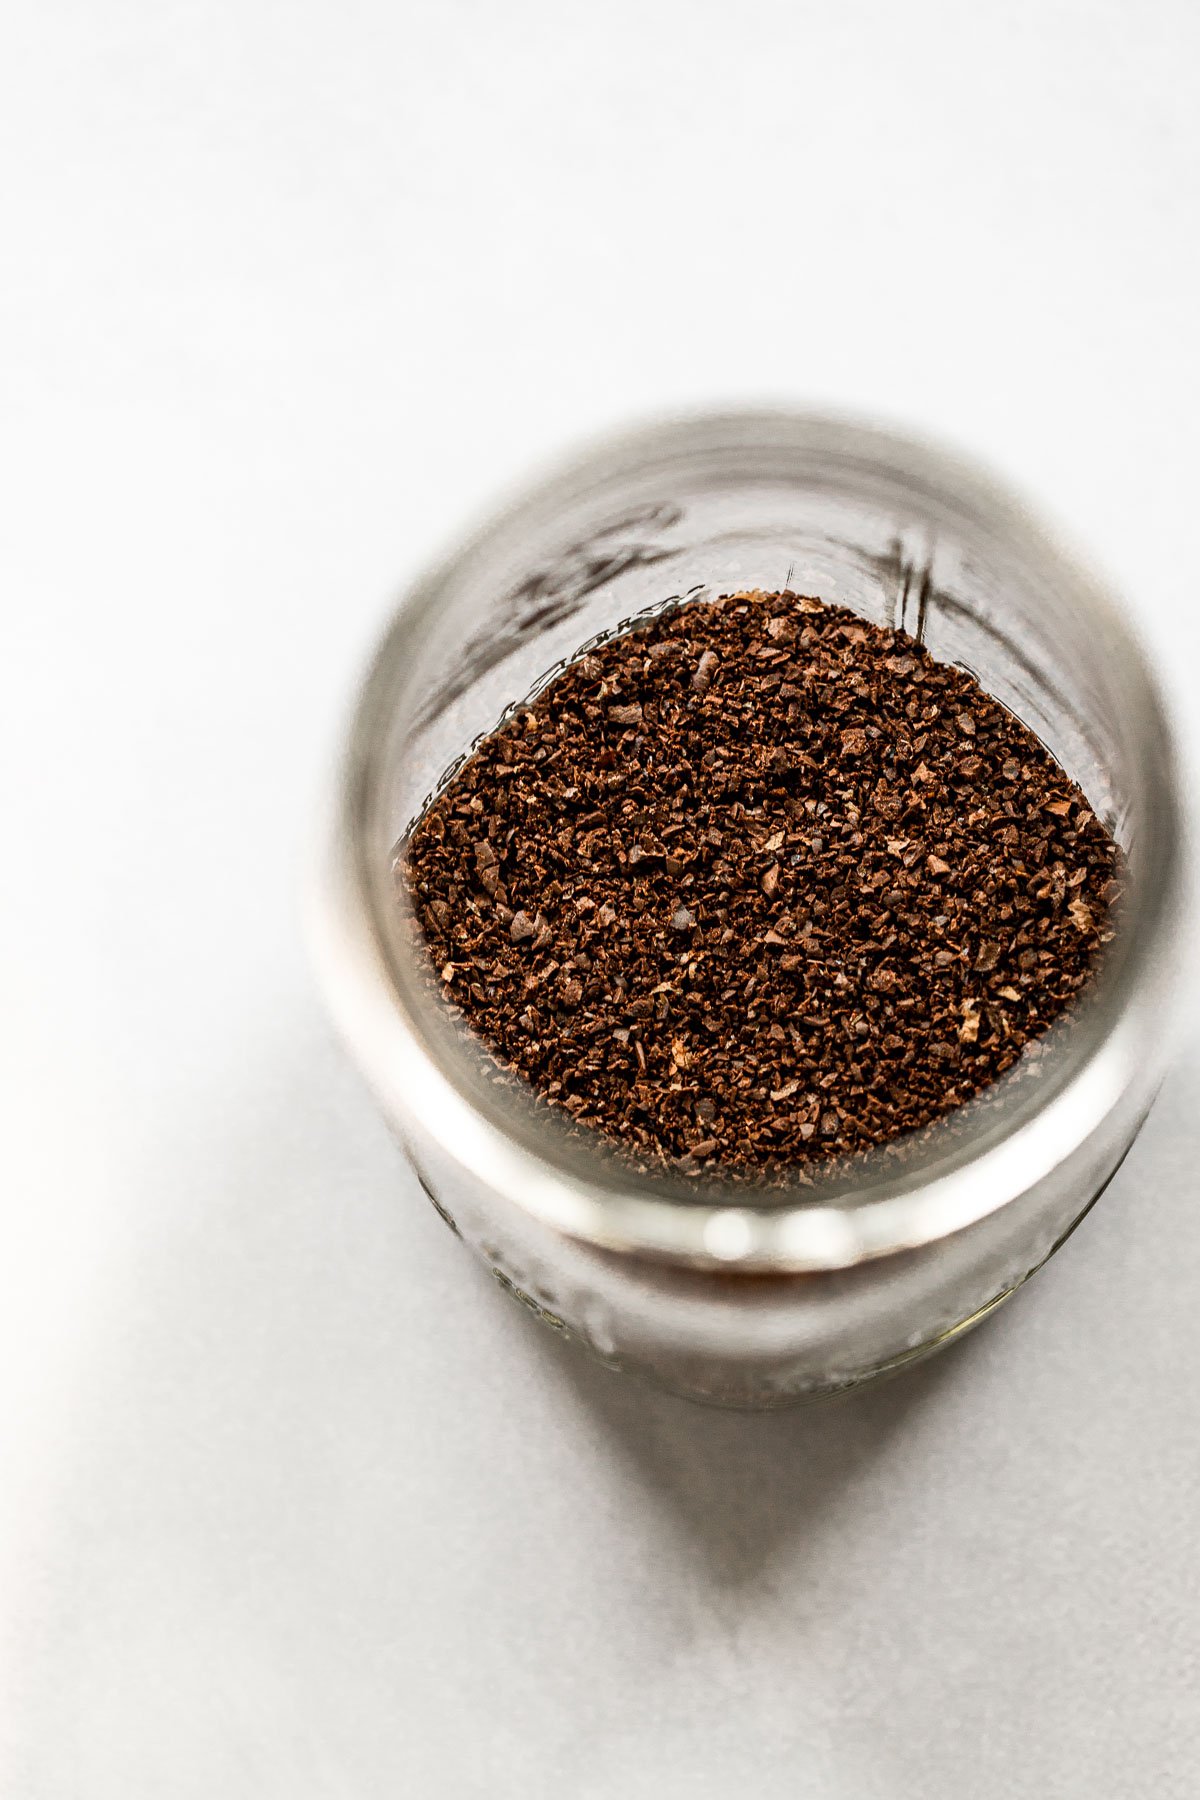
1: Grind the Coffee Beans
Regardless of how you’re brewing coffee, using freshly ground coffee beans always results in the best flavor, but it’s especially important when making cold brew.
For cold brew, coffee beans need to be coarse ground. If grinding them at home, use the “French Press” setting.

If you don’t have a coffee grinder at home, buy the beans at a coffee shop and ask them to grind them, or do it yourself at the grocery store in the whole coffee bean section.
I do not recommend using preground coffee to make cold brew. Preground coffee is finely ground and ideal for coffee machines, not for cold steeping. It’s too fine and will over-extract in the cold brew process, resulting in a bitter cup.
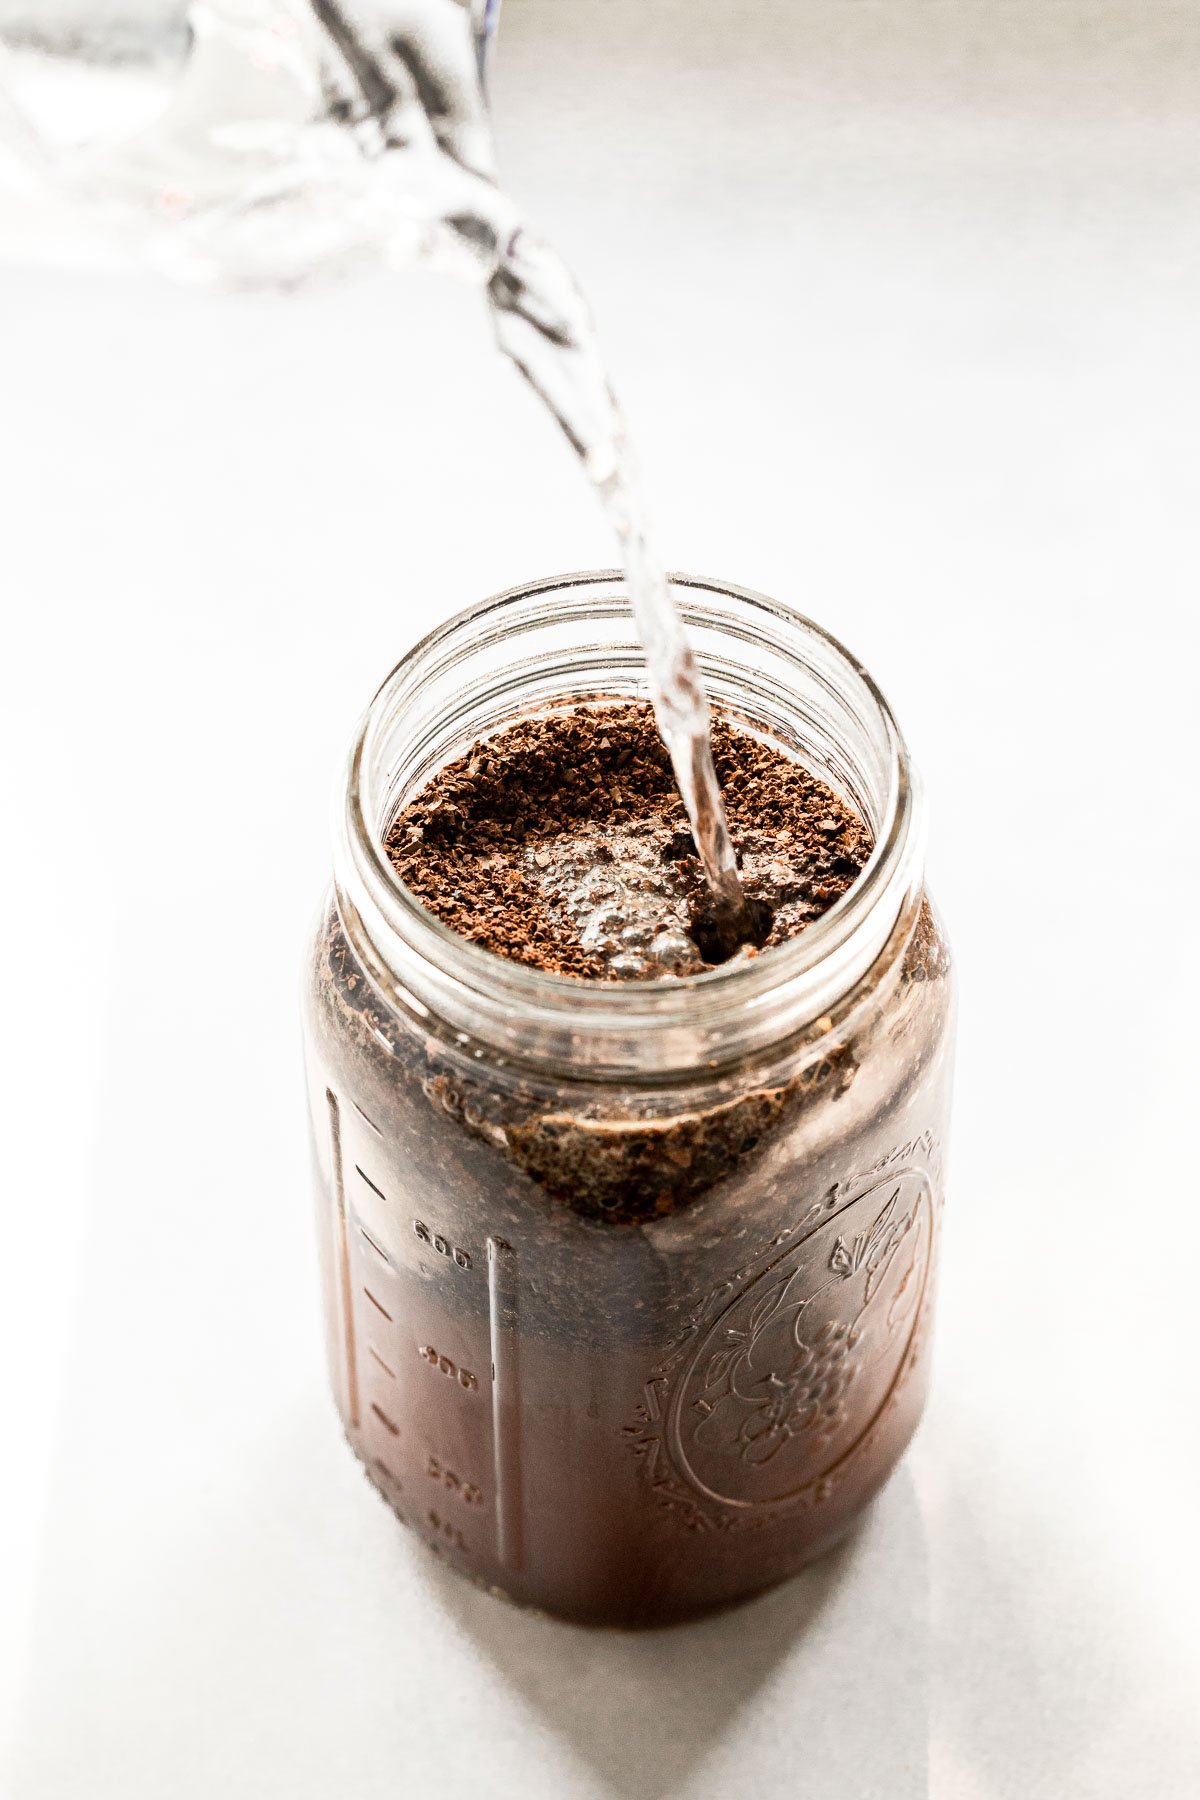
2: Combine with Cold Water
Add the coffee grounds to a container of choice, then pour cold water onto them. If needed, use a spoon to gently press the grounds down once you’ve added the water to ensure they are all thoroughly wet.
A variety of vessels will work. Try one of these:
- I like using a quart-sized wide-mouth mason jar. It does hold a little less water than I’d like for the perfect ratio, but it’s super convenient.
- A large quart glass measuring cup, bowl, or pitcher.
- Use a French Press. Then, when it’s time to strain, you simply have to press down on the filter.
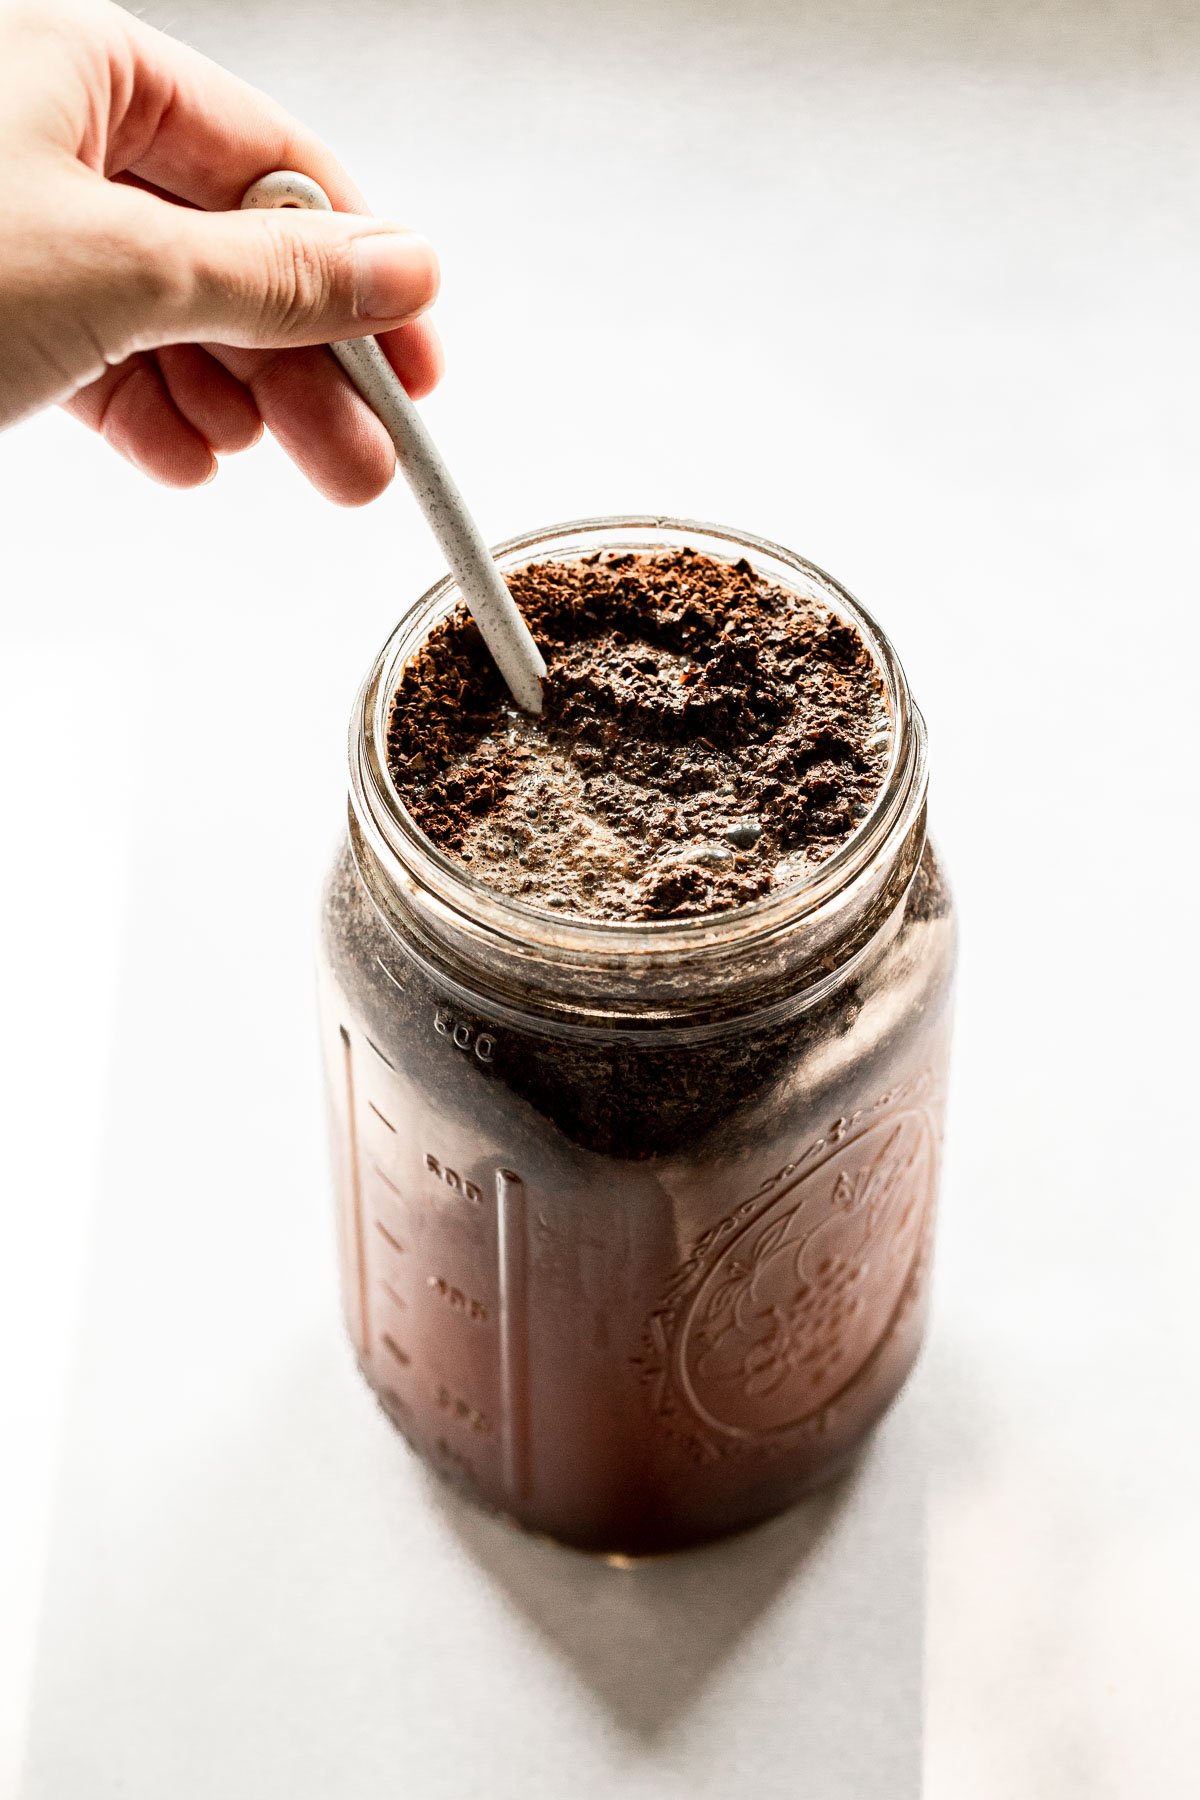
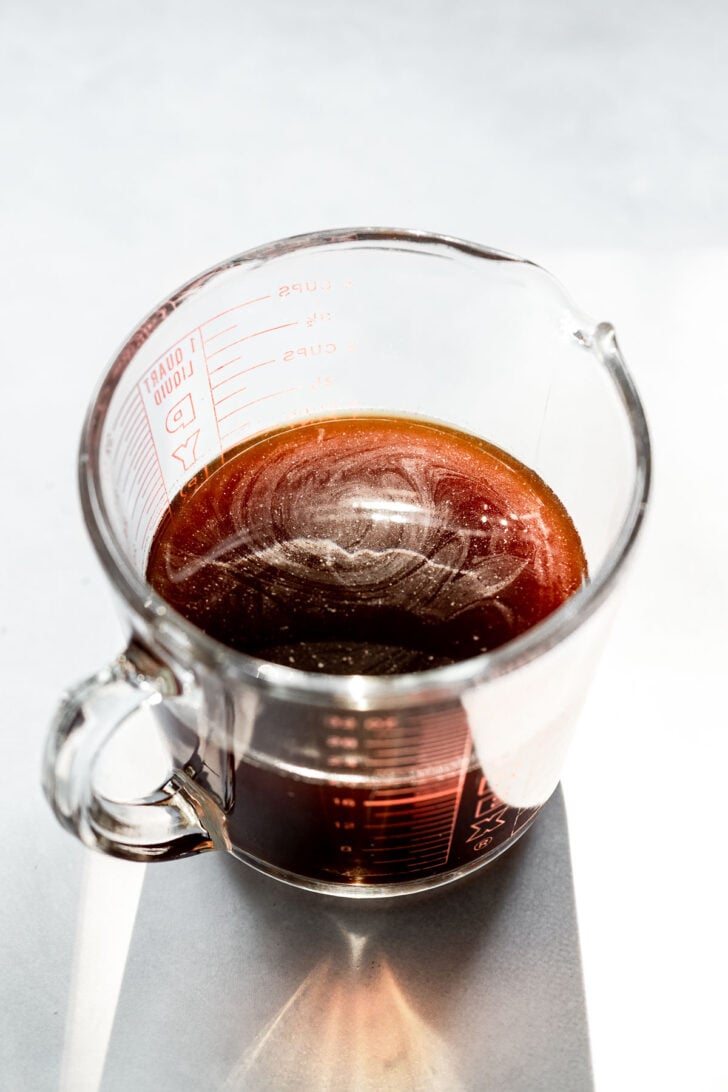
3: Cover and Steep
Now it’s time to let time work its magic. Cover the jar, pitcher, or whatever you used, with a lid or plastic wrap. Leave some room for expansion, as the coffee grounds absorb the water. Place it on the counter or in the fridge and let it steep for 12 to 24 hours.
I find that right around 18 hours is the sweet spot for me; the coffee has had time to fully brew and is rich, bold, and smooth.

4: Strain the Coffee Grounds
Once the coffee has brewed, it’s time to strain it. There are several methods to strain the coffee grounds that I’ll share with you, but the most important part of straining is ensuring you’re using a method that is fine enough to catch all the grounds. Let’s have a look at our options:
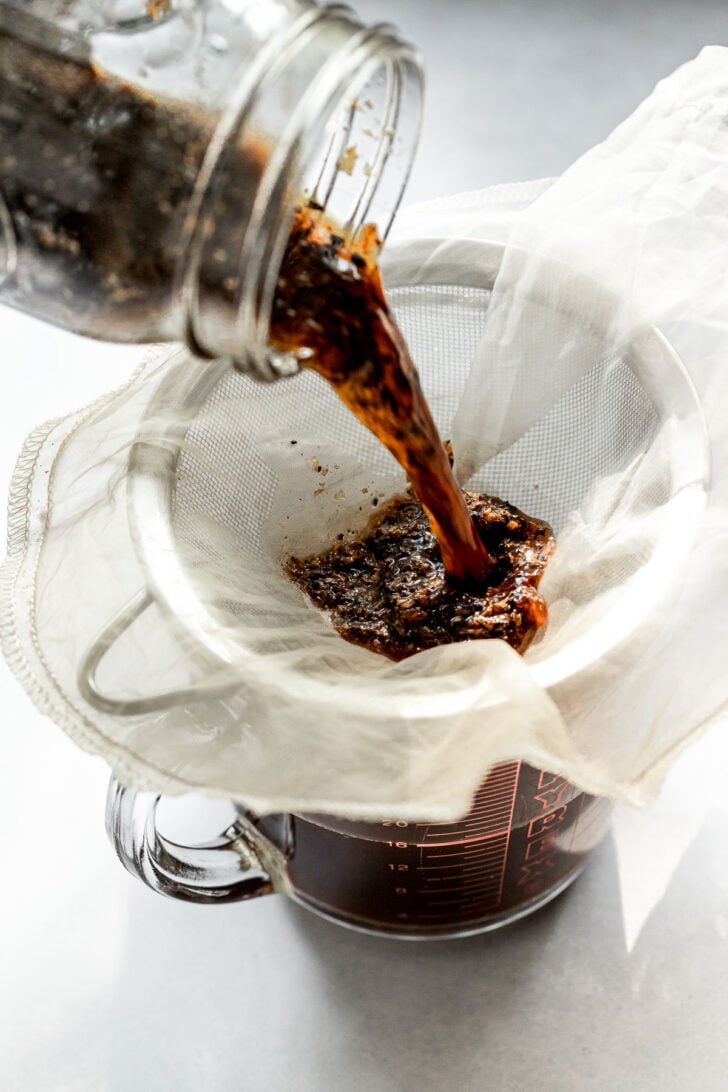
- Fine Mesh Coffee Strainer – you can purchase a fine mesh strainer specifically designed to filter coffee or tea, and that fits in a mason jar for brewing.
- In my experience, it’s best when the grounds have direct contact with the water while steeping. So, I often just pour the cold brew through this strainer once it’s ready. You can also purchase a reusable coffee filter.
- Fine Mesh Sieve paired with a Fine Cloth or Nut Milk Bag – Adding a finer strainer on top of the sieve catches the little grounds that would otherwise sneak through. This wonderful reusable option is pictured.
- French Press – this makes it easy to strain out the coffee grounds just like you would coffee.
Save the grounds and add them to your compost or work them into your garden soil to use as fertilizer.
How to Store Cold Brew Coffee
Cold brew coffee needs to be stored in the fridge once it has been strained. A jar or pitcher with an airtight lid is best. It will keep in the fridge for up to 1 week before it starts to lose its flavor.
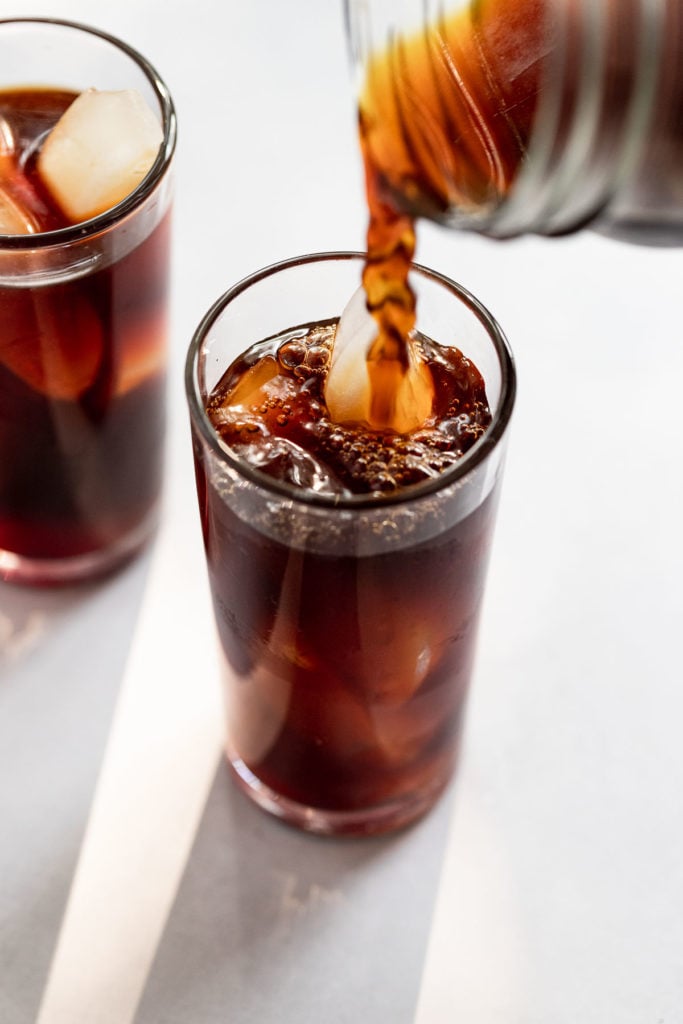
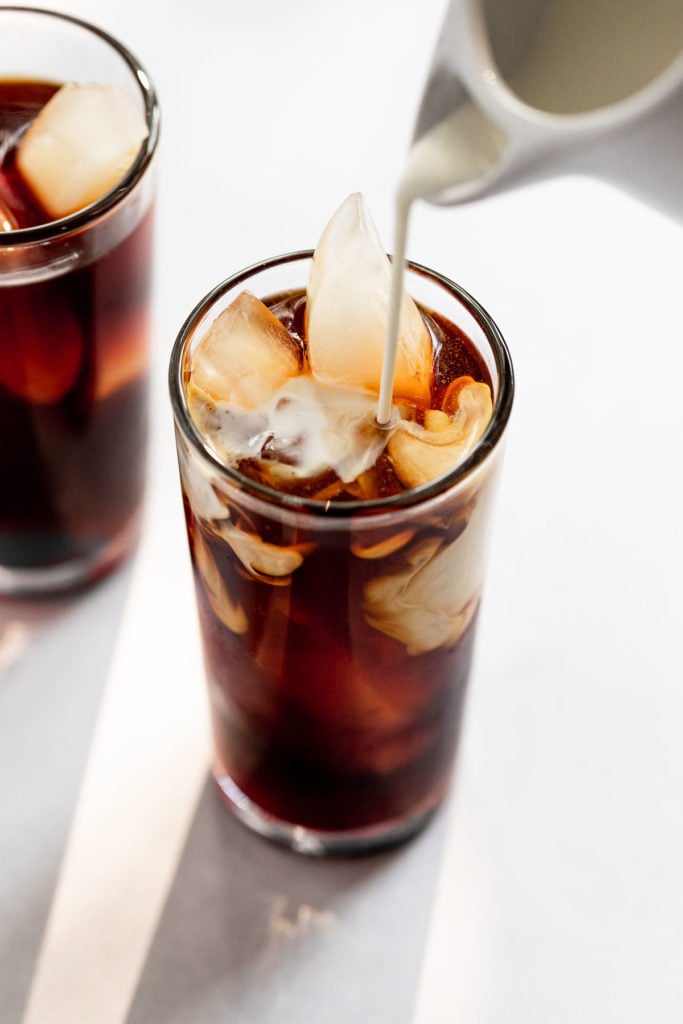
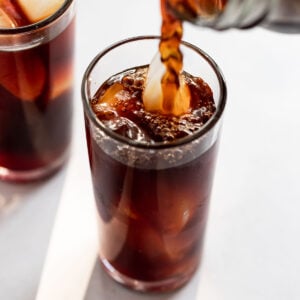
Ways to Serve Cold Brew
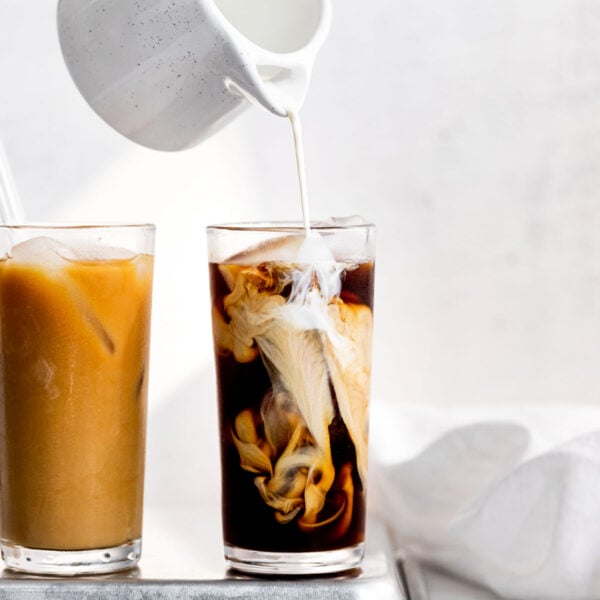
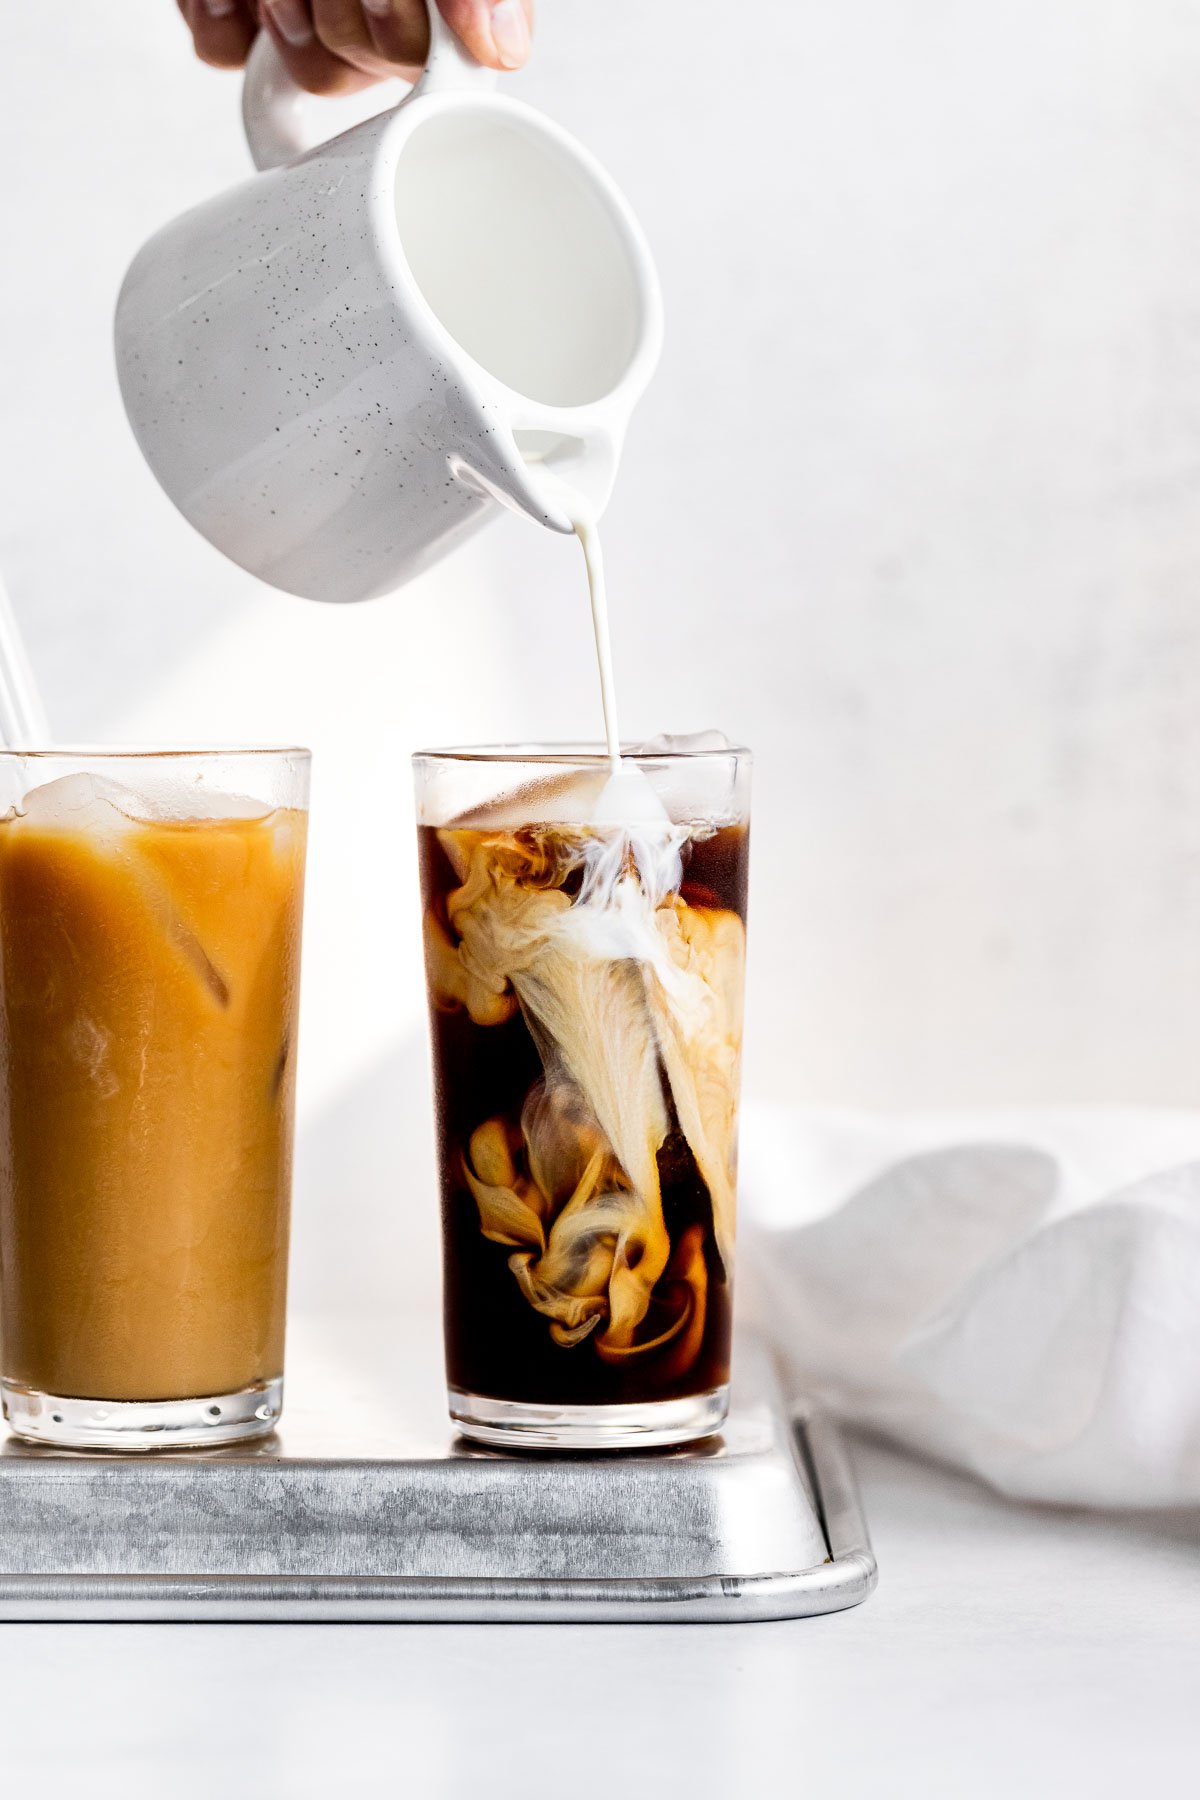
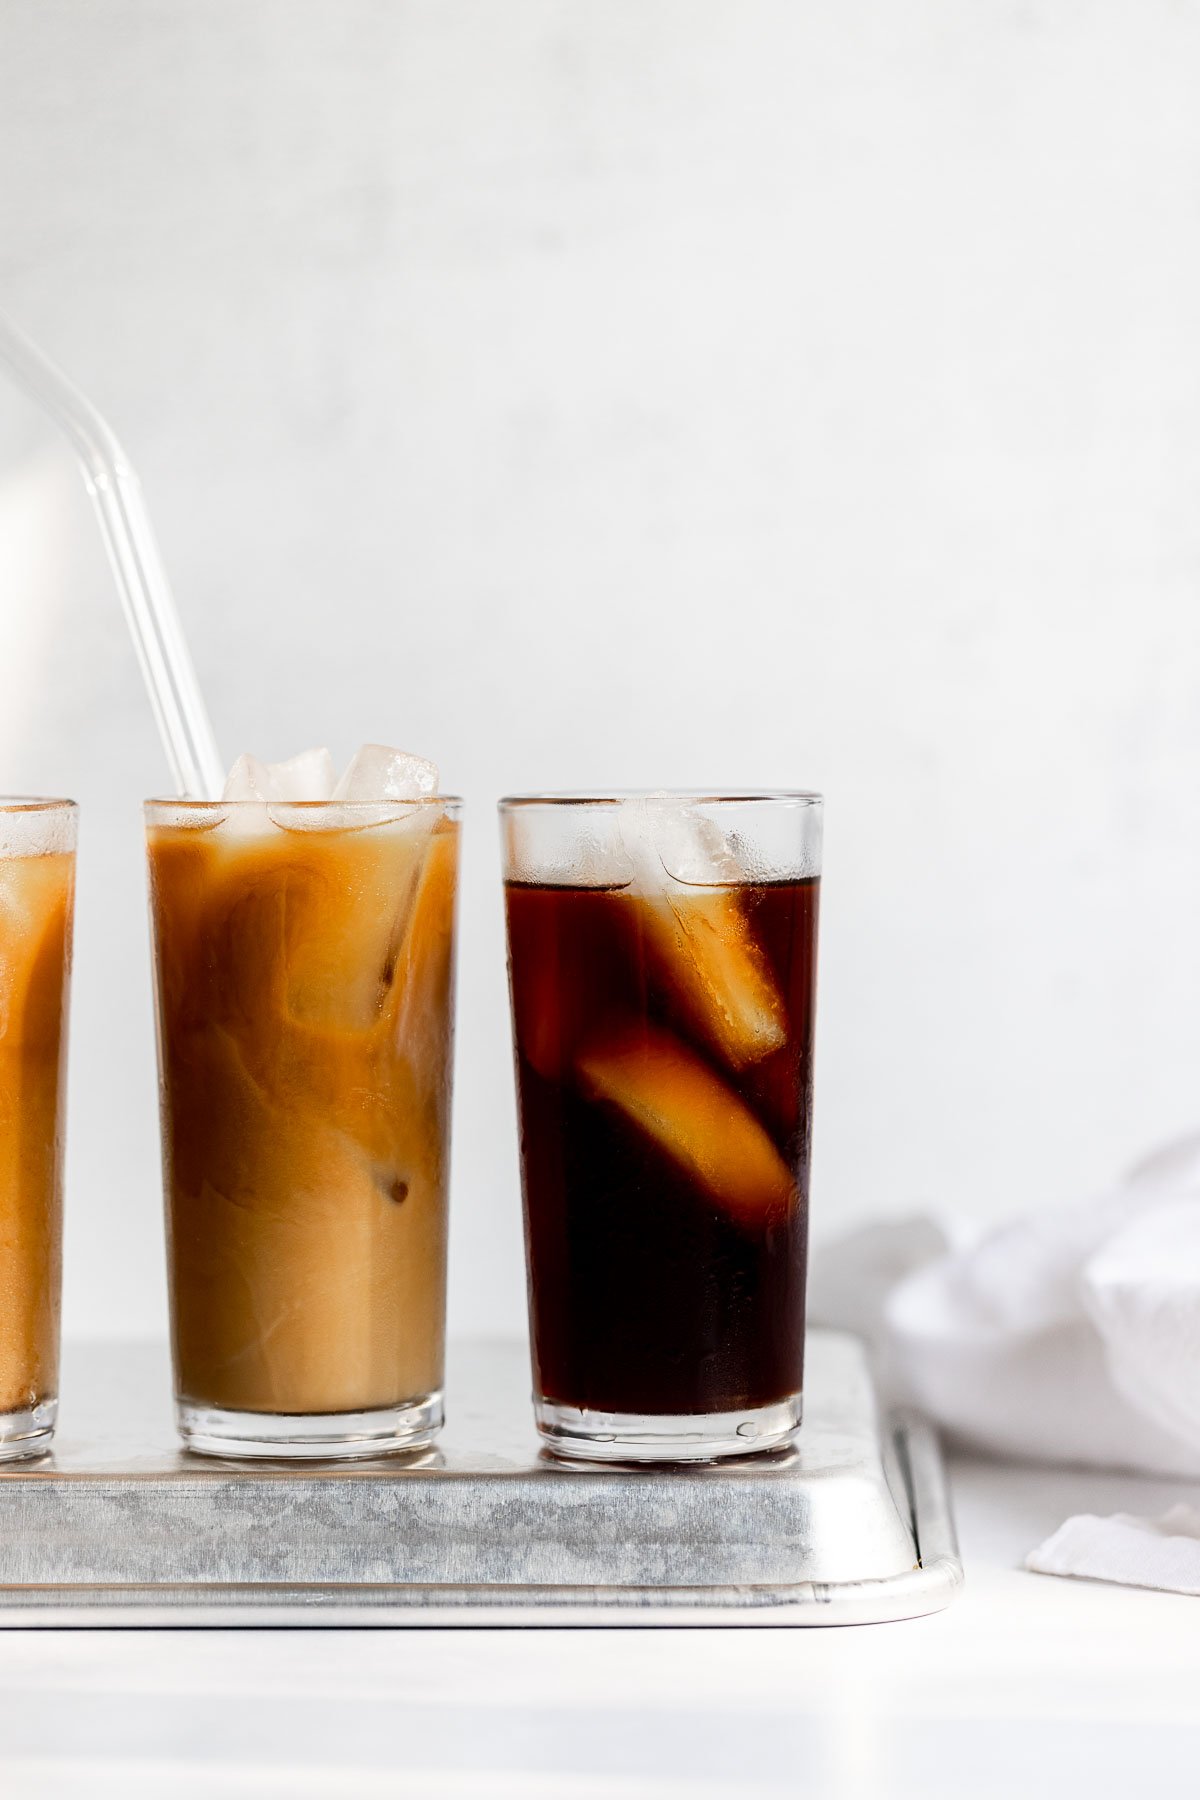
Fill a glass with ice and pour in the cold brew, topping off with creamer, milk, or sugar – however you take your coffee. If the cold brew concentrate is too strong, dilute it with additional water.
Elevate your cold brew with flavor! Here are a few of my favorite ways:
- Stir vanilla syrup into your glass of cold brew.
- You can also add 1 tablespoon of vanilla bean paste or a split vanilla bean pod to the grounds when you brew them.
- Add a cinnamon stick to the grounds before brewing. The flavor is incredible! It leaves a hint of warm cinnamon in each sip of the finished cold brew. You can reuse the cinnamon stick several times to save on cost and get the most out of each stick.
- Add maple syrup. This is a great way to add a hint of flavor and sweetness. Just pour a little into your glass, add the cold brew, and stir to combine!
- Stir in syrups like caramel, lavender, autumn spice, rosemary simple, or almond syrup. Just like iced lattes, you can flavor cold brew in many ways!
- Use coffee ice cubes to prevent further dilution from regular ice cubes. Simply pour leftover cold brew or coffee into an ice cube tray and once frozen they’re ready to use.
Cold Brew Product Resources
Here are a few of my favorite products mentioned in the post for making cold brew. Again, you can easily use what you have on hand to make cold brew following the simple steps, many of these are just nice-to-haves. These are affiliate links.
- Wide Mouth Quart Mason Jars – the perfect multi-use-what-you-have vessel
- Fine Mesh Mason Jar Strainer – a specific-for-brewing filter that can also be used for cold brew tea
- Fine Mesh Sieve – a good base option for straining
- Nut Milk Bag or Cheese Cloth – easy methods for straining out coffee grounds
- Coffee Grinder – coarse and freshly ground coffee is best
- Cold Brew Coffee Maker – this is essentially a large French Press that’s perfect for beginners
- Reusable Straws – why is it that straws are a must-have for cold brew?
Did you make this recipe? Please leave a star rating and review in the form below. I appreciate your feedback, and it helps others, too!
Get the Recipe How to Make Perfect Homemade Cold Brew Coffee
Ingredients
- 1 cup (82 g) whole coffee beans, freshly ground
- 4 cups (946 mL) filtered water
Optional Add-ins
- 1 cinnamon stick
- 1 Tablespoon vanilla bean paste, or whole vanilla bean, scraped
- Milk or creamer, as desired
Equipment
Instructions
- Freshly grind the coffee beans on the coarsest setting. If you don't have a grinder, ask a local coffee shop to grind their beans on the coarsest setting, or grind them at the grocery store. I don't recommend using preground coffee.1 cup whole coffee beans
- Place the grounds in a quart-sized mason jar or another large vessel like a pitcher. As long as you can cover it – even with plastic wrap – and the liquid will fit, you're set! If adding a cinnamon stick or vanilla bean paste, do so now.1 cinnamon stick, 1 Tablespoon vanilla bean paste
- Pour the water over the beans, working to saturate all of the grounds. As needed, use a spoon to gently mix in all the grounds to ensure that they are all wet.4 cups filtered water
- Cover the cold brew and let rest on the countertop or in the fridge for 14-24 hours, as desired. I find the sweet spot is 18 hours.
- Place a fine-mesh sieve over a bowl and spread a piece of cheesecloth or a nut milk bag on top of the sieve (see the post for additional straining options). Pour the coffee into the bowl to strain it.
- To serve, fill a glass with ice and add the cold brew. As needed, dilute the concentrate with water, cream, or milk. Stir in flavored simple syrup as desired and enjoy!
Notes
- This recipe makes around 20 ounces of strong cold brew. Keep in mind that ice and any dilution will extend it to 3-4 servings depending on the above.
- My favorite ratio for cold brew is 1:4 beans to water; feel free to double or triple the recipe as needed, or adjust the ratio as needed based on your preferences.
- 1 cup of whole beans is the same amount as 1 cup of coffee grounds.
- Time matters – if it steeps for less than 12 hours, it will taste watered down because it hasn’t extracted enough coffee. Longer than 24 hours, you might find it too acidic and/or bitter (just dilute it down more).


10/10 Recipe!!
I love Cold Brew and I usually make myself to last me a couple of days.
My current setup – Fellow ODE Grinder, Hario Cold Brew Bottle ~ 13 Hour brew.
This is strong but amazing! I love it!
So glad to hear you love it! Thanks, Tiffany!
Just put this in the fridge to try tomorrow!
What would you recommend is a good cold brew with water to dilute ratio that will extend it a little but still keep a strong coffee taste?
Awesome! The ratio for dilution is going to depend entirely on your preferences; I actually just add cream to this recipe as is and it’s strong enough for me, with the ice helping to dilute it slightly. I’d start with maybe 1/4 cup and taste test to find your perfect ratio. Hope this helps!
Such a great recipe, filled with information to make it a no-brainer
I’m so glad you’ve found it helpful, thanks so much!
This article was so informative Thanks so much for creating it. You’ve made a subscriber with this person!
I’m so glad you found it helpful! Thanks, Shona!
Hi Becca! I would like to make decaf cold brew is the ratio still 1:4 – coffee to water? Or do I need more coffee? Thanks for your help!
Hi Elaine! Yes, the ratio is still the same for decaf coffee too. No need to change anything. Enjoy!
Hi Eddie, this is a blog page. There’s a helpful ‘jump to recipe’ button right at the top that you can use next time instead of leaving a rude comment.
👏🏻 preach, lady!
😊
Is it best to use a glass container or can you get a good flavor in a plastic container?
Hi Cari! A plastic container will work just fine. Enjoy!
This is the PERFECT cold brew recipe. Added cinnamon sticks and I didn’t need sugar.
I am so happy to hear you’re loving it, Linda! Thanks so much for your review!
At what stage do you put in the cinnamon stick when making cold brew?!
Hi Ashley – in step 2, add it with the grounds before you add the water (although it won’t matter if you add it after the water either). Then let it sit overnight and strain. Enjoy!
Thanks Becca, I’ve made it a few times and it’s great. I’m making a concentrate this time – wish me luck! Btw for hot coffee at home I make a pour over. Now I’m using the pour over maker for my cold brew. I pour the cold brew over the same pour over paper filter to filter out the grounds.
I’m so glad to hear you’ve been enjoying it, Gene! Love the tip about using the pour-over filter. Thanks so much for sharing!
How long will the keep in the refrigerator?
It’s usually good for up to a week. I’d recommend enjoying it within the first 3-4 days for the best flavor.
I want a coffee with a lot of caffeine. What’s is the process for calculating the amount of caffeine in a cold brew?
Hey Jonathan – there are a lot of factors that go into determining the amount of caffeine in any kind of coffee; I’m not sure an exact process for calculating, but you might want to check out this article. Good luck!
Very clear and accurate recipe, thanks from argentina
I’m glad you enjoyed it! Thanks, Charly!
Just used this recipe, and I’m wondering if I need to cut the cold brew with water once it is ready? Thank you!
Hi Gabby! It truly comes down to your preference. It’s more of a concentrate because it’s a strong recipe, but doesn’t have to be cut with water. If you like strong coffee, serving it with ice is generally enough to water it down a little. Otherwise, if you enjoy milk/cream, that usually is enough to “dilute it”. Otherwise, if it is too strong, you can add equal parts water. I’d recommend starting with a serving glass and adjusting as you like. Hope this helps!
I just ground a whole bag of coffee. Any idea of much ground coffee equals one cup whole bean? 🙂
Great question! Surprisingly, they are 1:1, so 1 cup of whole beans is equal in volume to 1 cup of ground coffee. If you do have a scale, I like to measure 82 grams of beans for 4 cups of water. You can find more info on that in the ratio section in the post. Let me know if you have any other questions! Enjoy!
Thank you!! I do have a scale, even better:)
Hi! Can you pour it back into the same mason jar after straining it into a bowl?
Also can you put the syrup in after you strain it or is it best to do it as you go when you have your cup ready to drink?
Hi Cindi! Yes, you can absolutely use the same mason jar, I’d just recommend rinsing it out first to make sure no coffee grounds remain in the jar. You can add syrup to the cold brew, I just prefer adding it to each glass. I hope this helps!
Maybe I missed it but there’s nothing about heating up your cold brewed coffee. I am attached to the ritual of a warm/hot drink in the morning as wells the caffeine. What would doing that spoil? How could heating it up hurt?
Hi Sue – you can certainly heat it up if you prefer, it won’t hurt anything. Cold brew is just usually served over ice as the extraction process is that which makes it smooth to enjoy cold.
Thank you for this recipe. What are the ratios if I already ground my beans? 3/4 cup ground to 4 cups water? Please and thank you
Hi Michele – great question, it’s actually equal so you’ll need 1 cup of coffee grounds. There’s more information under this section in the post. I hope this helps!
Great recipe. Very good. However, when I pour it back into the mason jar, it’s about a little over half, almost 3/4s full. Did I do something wrong?
I’m glad you enjoyed! No, you didn’t do anything wrong, the coffee grounds absorb a good amount of water that’s then lost in the process. It sounds like you have the just right amount, around 20 ounces. I’ve updated the notes to reflect this, too. Thanks, Cindi!!
Excellent instructions and explanation. I made the concentrate and it was delicious! I was able to dilute it with filtered water and creamer to taste and stretch it over several servings. Thank you!
Perfect, I’m so glad to hear! Thanks, Greg!
Thank you! Fun reading and I found what I wanted by simply using a search engine. (Yay, the internet works!)
Yay!! Thanks, Daryl!
For anyone wanting the exact weight for the 1:4 ratio in the 3 Cup mason jar, I did the math for you, it’s 61.5g
As for the recipe, it’s cold brew it’ll work.
Five stars for the tips.
Just tried the 1:3 ratio (42g : 3 Cups water) with regular medium roast pre-ground Folgers. so I’ll see how that turns out next morning, despite the specific advice not to
Thanks, Clayton III!
Super recipe! Wish I had started making our own cold brew earlier, didn’t realize how perfect homemade brew can taste.
Better now than never 🙂 I’m so glad to hear you love it, thanks, Lena!
What happens to 12 ounces of liquid? Recipe starts with 32 and ends with 20.
It gets absorbed by the coffee grounds. Hope this helps!
Hi! Looks great! I’m stocking up/meal prepping for the first few school weeks. Would this be ok frozen into larger ice cube trays? I have a cup each of silicone ice cube trays (for baby food) and wondering how it will hold up frozen then reheated on the busy mornings! Any experience with this? Thanks!
Great question! I’ve frozen it and used it as coffee ice cubes, which works great, so I would assume that you could also do it this way. I wouldn’t freeze it with any cream or sugar though. Hope this helps, would love to hear how it works out!
Hello, nice to get a diy for coldBrew. But 1:4 is not really 946 to 82 or?
Should it not be 344ml?
Cheers,
Denis
Hi Denis – great catch, you’re right that the 1:4 ratio doesn’t remain the same when the amounts are converted individually. 🤔 I’ll look further into the ratio when using metric, but the amounts as written have been tested and are correct.
Thanks for the recipe. Can I just shake the lidded jar to wet the grounds instead of stirring?
Hi Georgia – sure, that will work!
Easy to follow recipe and great ideas for serving the brew. The coffee is smoother, less bitter and strong the way I like it.
I’m so glad you enjoyed it! Thanks, Johnny!!
Really nice design and wonderful content material , hardly anything else we require : D.