
Stop EVERYTHING right now and get ready to dive into the most indulgent, delicious, incredible, rich, salty-sweet, fudgy ice cream cake of your life.
I can’t believe I made this recipe back in June (!!!) for my brother’s birthday and am just posting it. Blogger fail, huh? Big time because it’s incredible and deserved to be shared with you RIGHT then and there.
But it’s here now so we’re moving forward and focusing on the positives: peanut butter ice cream cake.
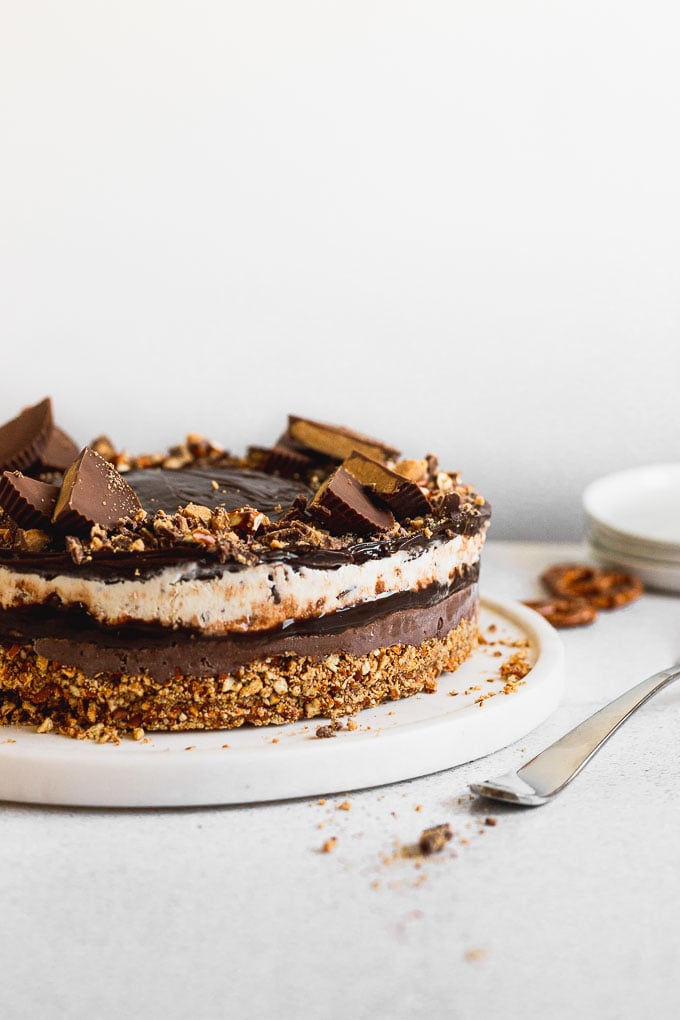
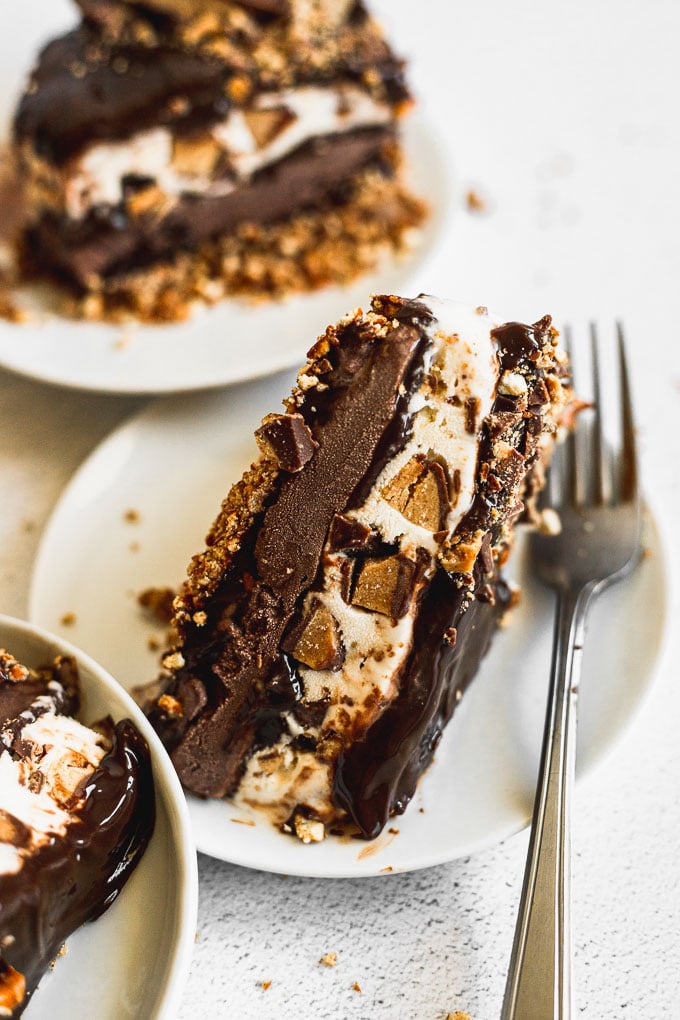
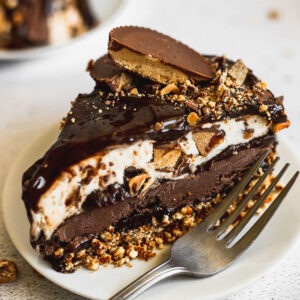
First being, the way the salty-sweet combo comes together. Second being the epic level of fudginess in this cake. THREE layers. Third being, the textures: crunchy pretzel crust, thick, smooth fudge, and creamy ice cream.

This peanut butter cup ice cream cake is really the genius creation of my brother (the then-birthday boy, remember). His request: an ice cream cake that’s sweet and salty, with peanut butter cups. The result: the ice cream cake before you.
You see, we used to do DQ ice cream cakes for our birthdays for a long time. But now, now we’ve gone homemade and much, much, much more epic. When you make homemade ice cream cake, the beauty is you can add as much chocolate, fudge, Reese’s peanut butter cups, and ice cream as you want. You can go over the top and satisfy that sweet tooth to no end. Which is exactly what we did.
The Ice Cream Cake Layers

Let’s dive into the layers because the layers are what make this cake indulgently delicious. They each deserve the spotlight, as each individual layer shines on its own, and together they form the most epic ice cream cake you’ll have all summer (year, eternity?!).
1. Pretzel Crust
We’ve all had an ice cream cake with Oreo crust. It’s great. There’s absolutely nothing wrong with a good ol’ ice cream crust.
But this pretzel crust?
It makes this ice cream cake.
It adds crunch, texture, and the salt balances out all the rich sweetness so perfectly. Even better? It’s…you guessed it… it’s easy to make!

Use a food processor to blend up the pretzels into a fine crumb. You will likely end up with some pieces that are a little larger, and that’s ok to some extent. The finer you can pulse the crumb, the better the crust will stick together in the end.
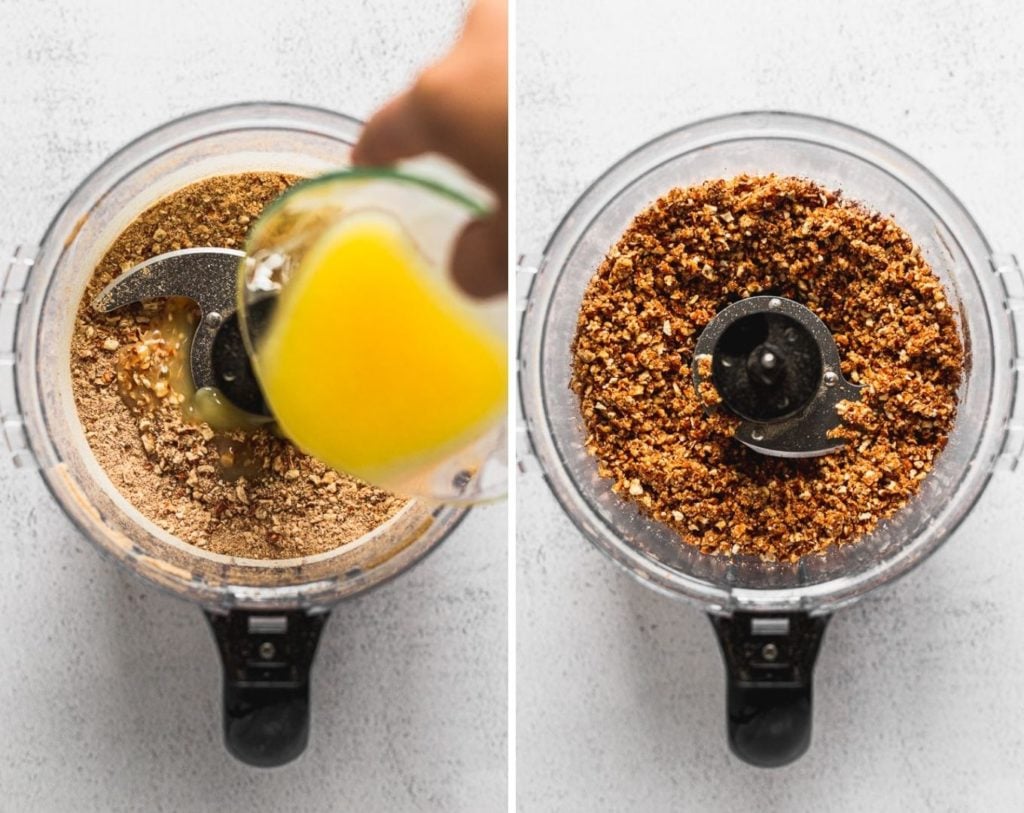
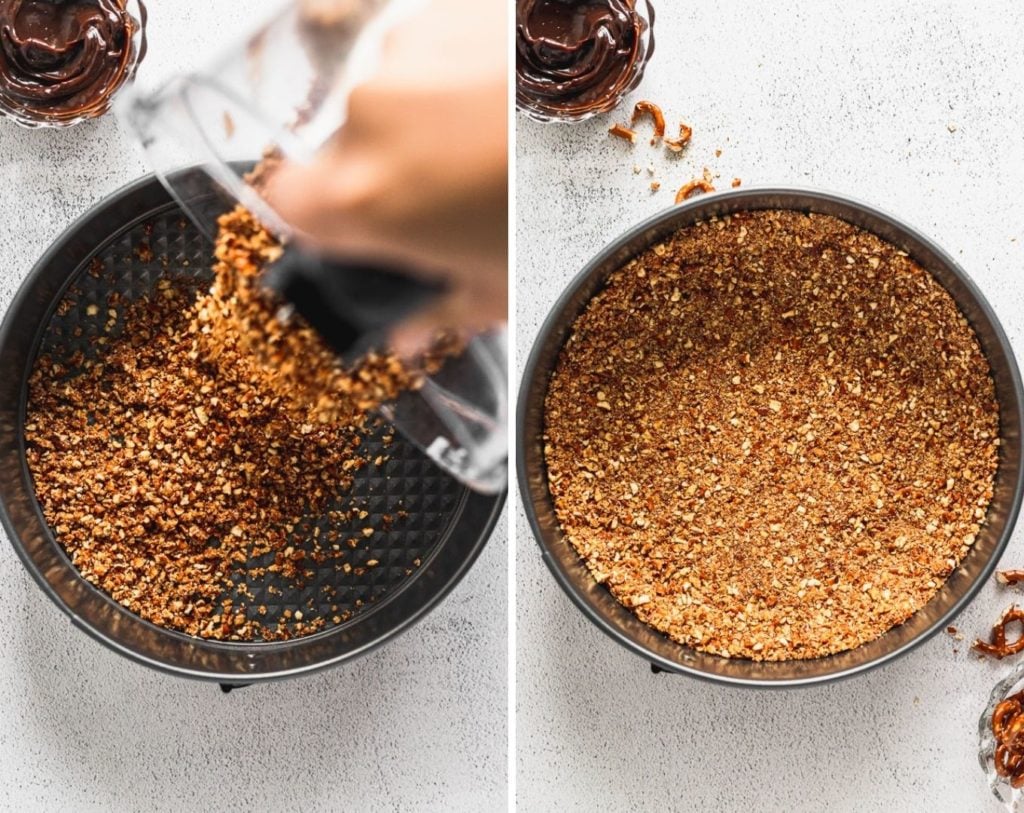
Then, mix the pretzel crumbs together with melted butter and then press them into a springform pan. The springform pan is key because you can easily remove the sides which make cutting out slices of the cake super easy. Use a measuring spoon or flat bottomed cup to firmly press the crumbs into shape.
Voila, once you’ve pressed the crust down firm, go ahead and stick this in the freezer for a few minutes, so it firms up and is ready for…
The Fudge Layer
Did I mention that this cake is fudge-tastic? That was an absolute requirement.
FUDGE FUDGE FUDGE. And it’s oh, oh, oh so good.
I don’t know what it is about hot fudge and ice cream together, but the combination of thick, chocolatey fudge and cold, creamy ice cream is one of the best out there. So we layered it on in this peanut butter ice cream cake.
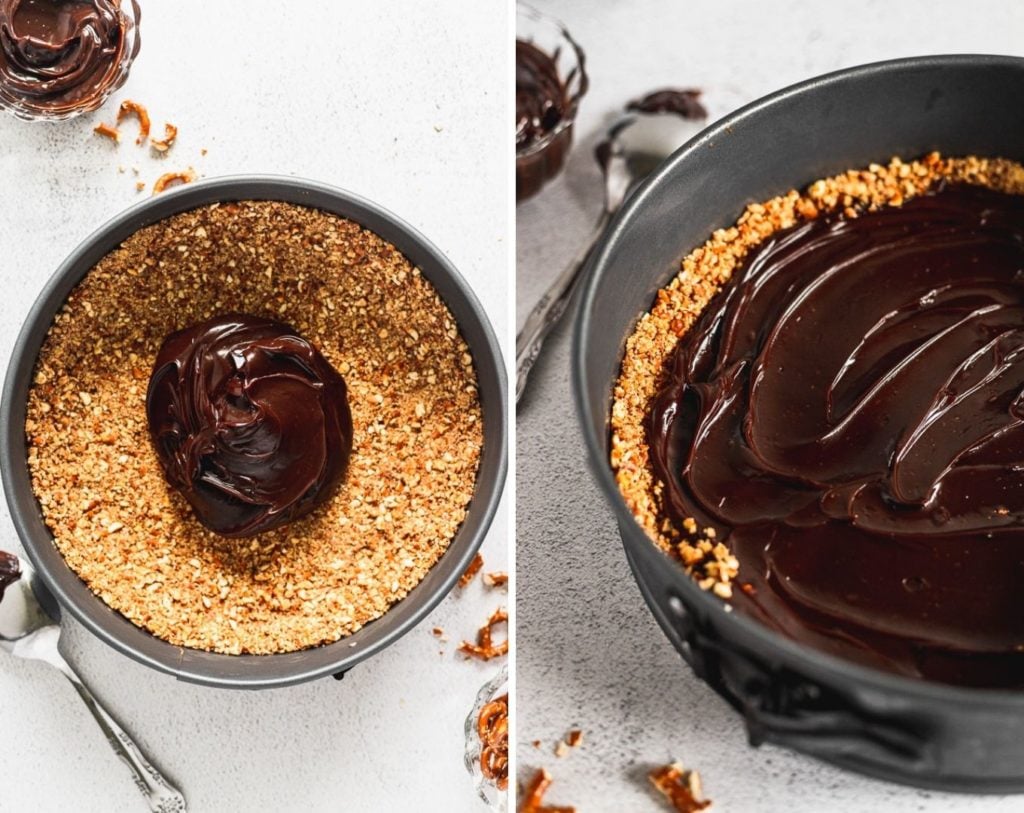
There iss a layer of fudge at the base of the cake, right on top of the crust. This first layer helps prevent the crust from becoming soggy from the ice cream layers. And you know, naturally, we need to get fudge in at every layer of the cake, so we do. You will add hot fudge after each layer of ice cream, including the top of the cake for the perfect finish.
Chocolate Ice Cream Layer
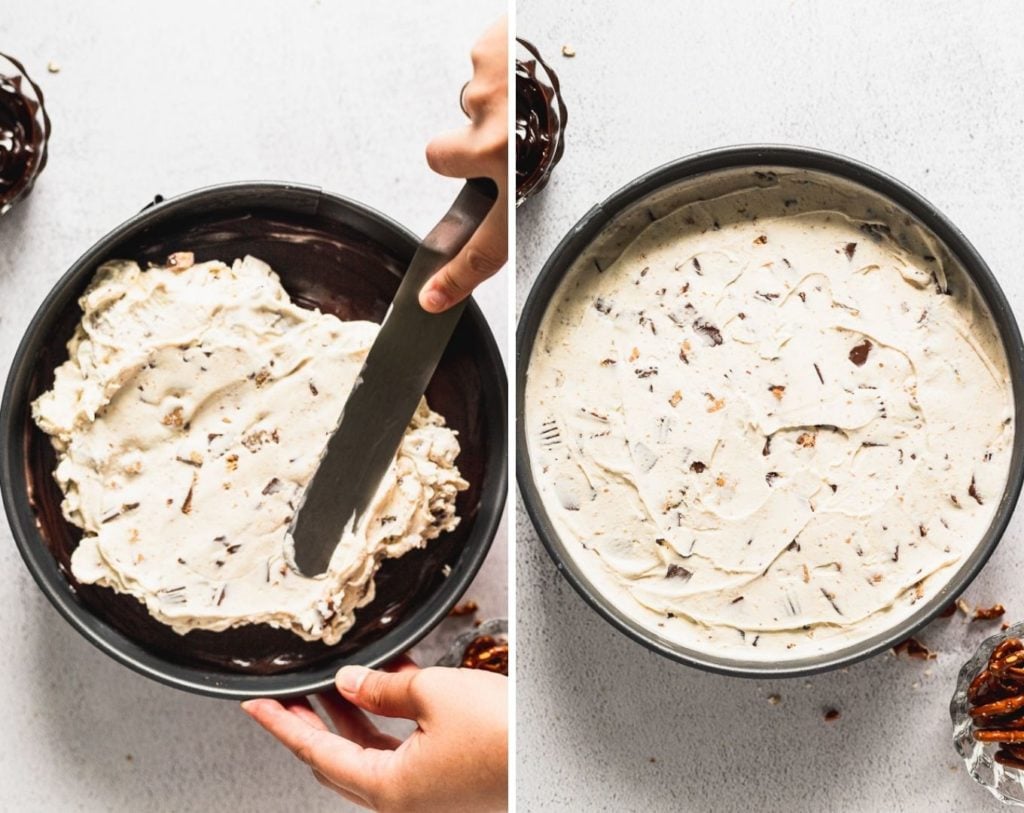
Why not add more chocolate to this fudge ice cream cake? Go big or go home. After the first layer of fudge goes chocolate ice cream. You will want the ice cream slightly softened so that it’s easy to spread. I like to use a frosting spatula to make this process easier, but the back of a spoon will work too.
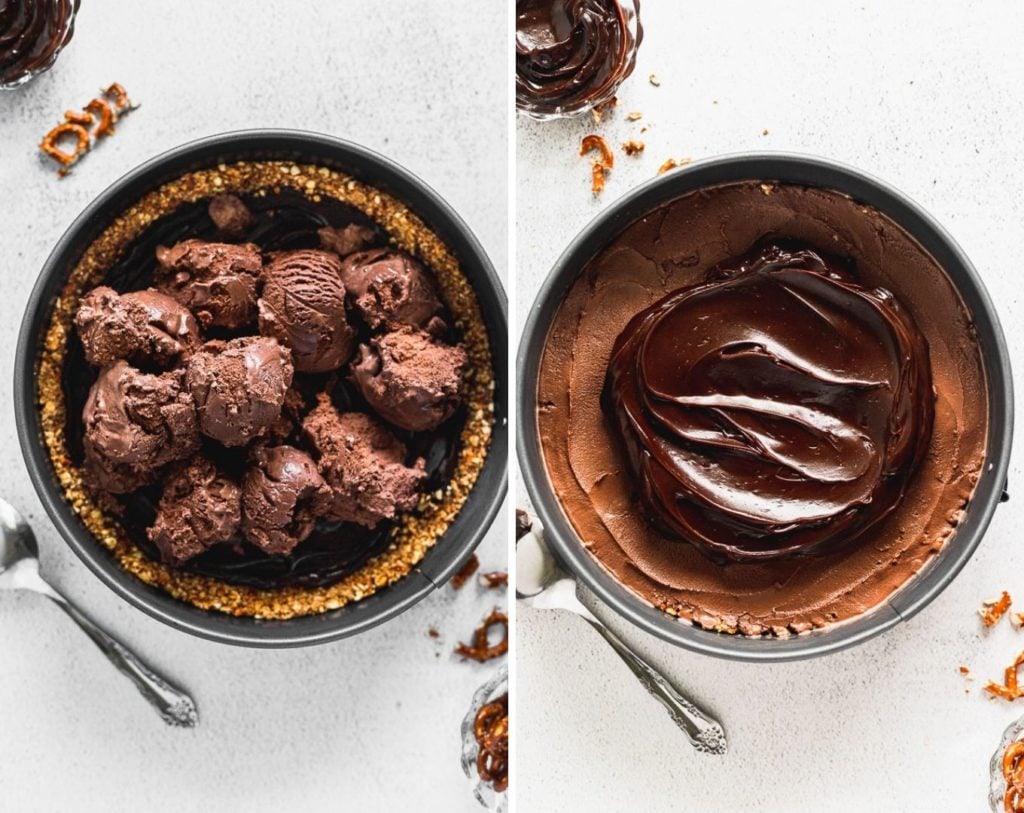
I recommend using high quality ice cream to keep it top notch. It’s creamy, chocolatey, deliciousness. Simple as that. Of course, you can absolutely mix up the chocolate ice cream layer. Maybe you’re feeling chocolate brownie ice cream, or peanut butter cup chocolate ice cream for an ultimate peanut butter cup experience. Really, it’s up to you.
Oh, then once the ice cream has spread out, go ahead and put that other layer of fudge on before the…
Peanut Butter Cup Ice Cream
GAH, have more beautiful words ever been read/seen/uttered? What’s better than peanut butter cup ice cream? I’ll wait.
For this cake, we are mixing up our own peanut butter ice cream. The beauty of mixing up our own is that you get to make it as peanut-butter-cuppy as you want. YES YES YES. Dreams do come true.
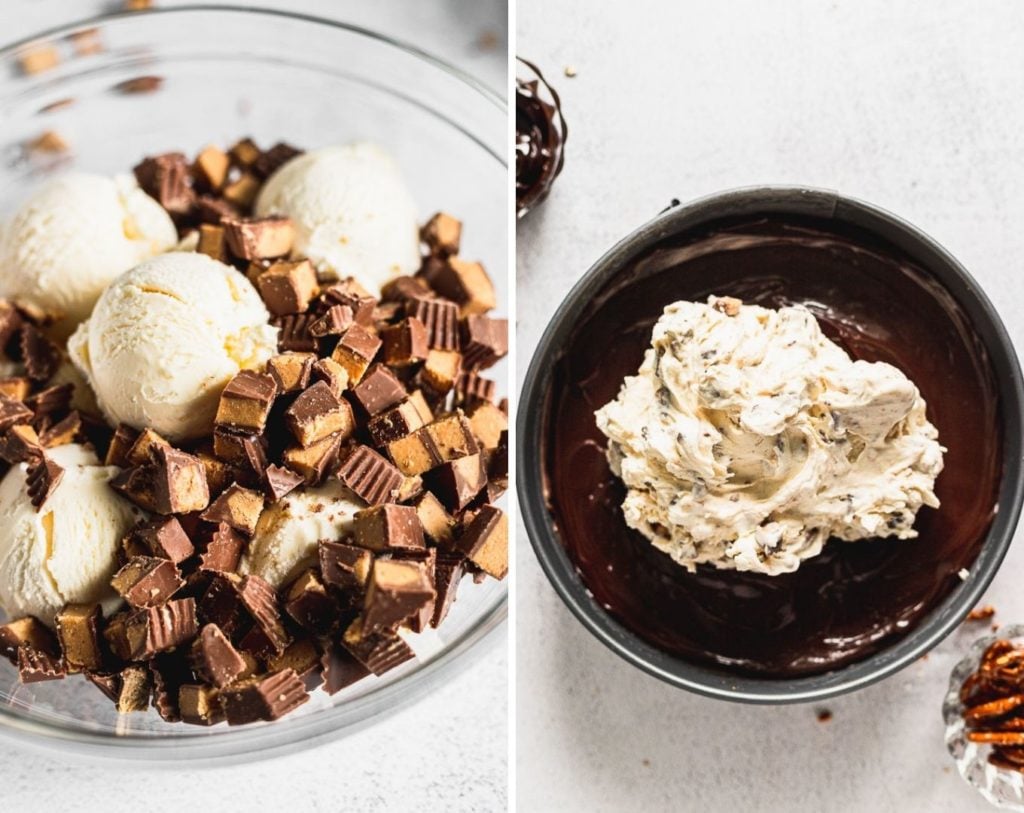
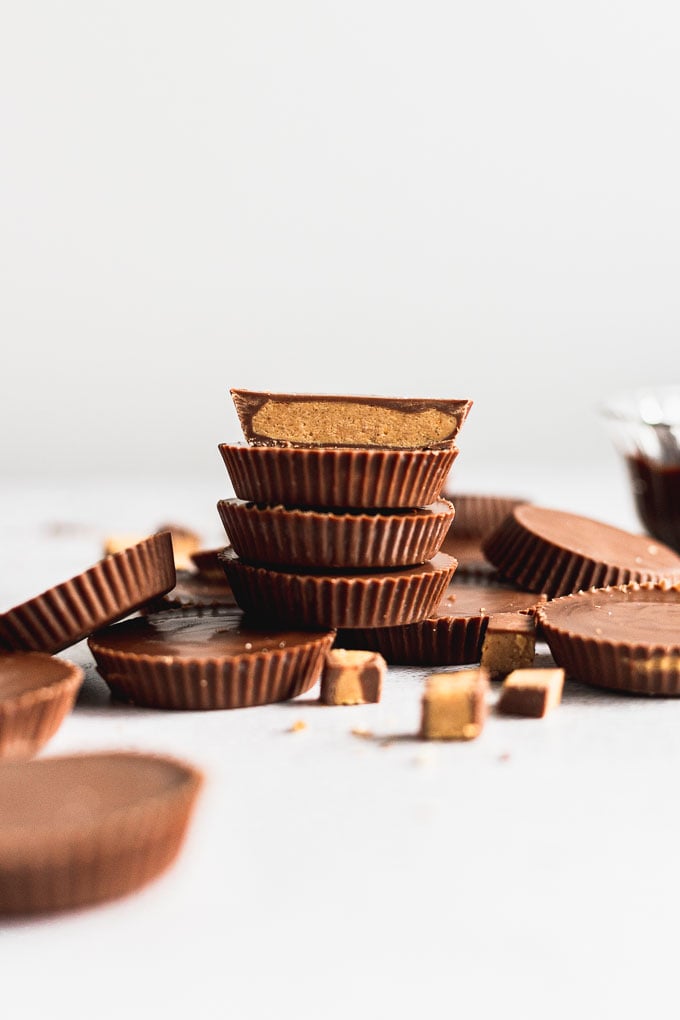
I use about 12 peanut butter cups, which I don’t know, might seem like a lot, but my friends, this is an ice cream cake and we are NOT cutting corners. We are including ALL the peanut butter cups we can.
Chop up the cups, then mix them in the slightly softened vanilla ice cream. As with the chocolate ice cream, having it slightly softened will allow you to easily mix and spread the ice cream.
Don’t want to mix your own peanut butter cup ice cream? You can certainly buy a version of peanut butter cup ice cream that you love instead of doing so.
Once the peanut butter layer is down, I’m sure you guessed it… spread on that thick layer of fudge on top because OBVIOUSLY we’re adding more fudge. You have been paying attention, haven’t you?
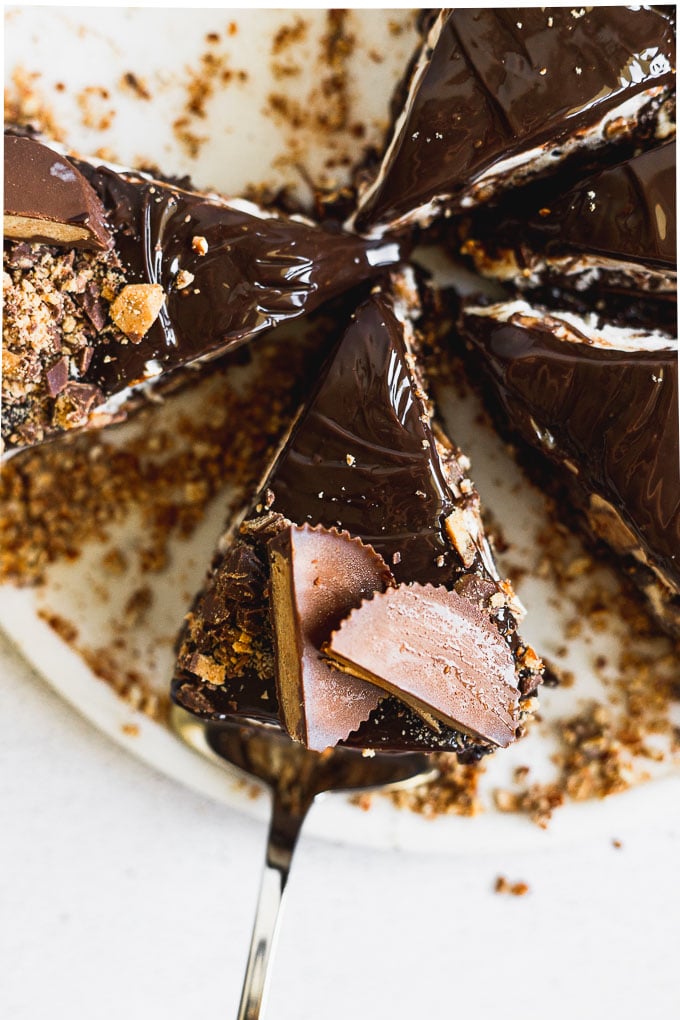
Now, the thing to note is that this final layer of fudge goes on after the final freeze of the cake.
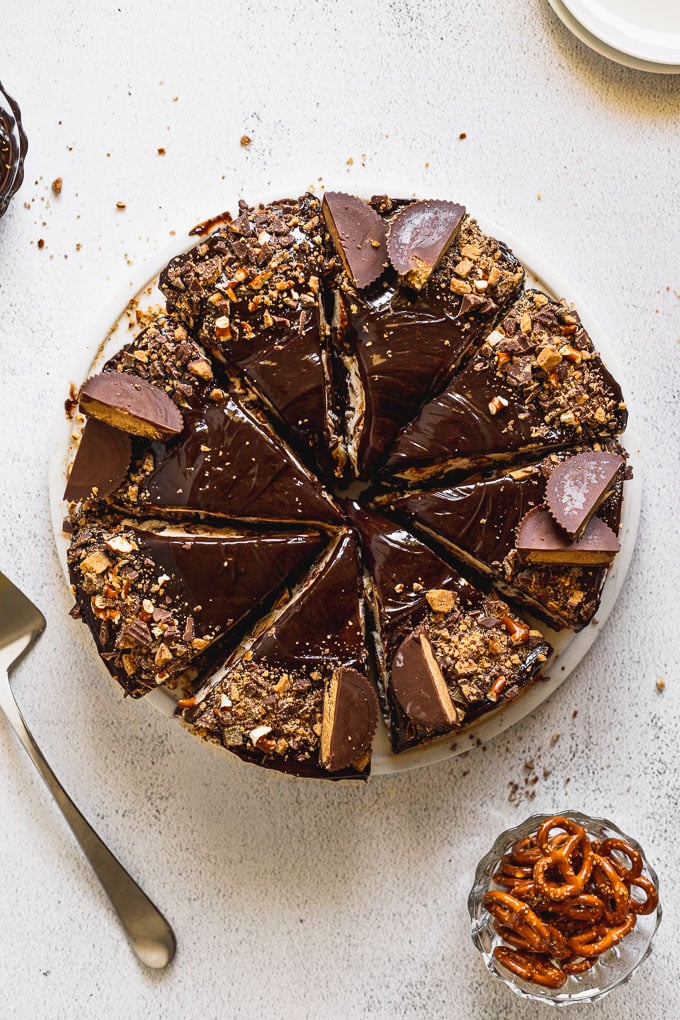
The final fudge layer goes on just before serving so that it remains super fudgy and shiny, which makes the presentation key and helps the toppings stick to the final layer. You can pop it back in the freezer for about 30 minutes before serving if you’d like the fudge topping a little more firmed up, too.
Peanut Butter Cup Ice Cream Cake Toppings
Now, you can top the cake in whatever way your heart – er, stomach – desires. I like to add some chopped peanut butter cups and pretzels, to keep the sweet-and-salty theme going. You could also drizzle melted peanut butter, more chocolate, or caramel on top. There’s no wrong way to do it.
If you’re feeling extra indulgent, add some whole Reese’s Peanut Butter Cups for decoration; regular size, or mini (they’re so cute!) and whomever you’re sharing with will be in for an extra treat.
And if you’re really really really feeling indulgent, drizzle on some sea salt caramel.
Yes, we did this on the bro’s birthday. Yes, it was incredible and amazing.
I did leave the caramel part off of the recipe, and photos, but do not let that stop you. I am in full support of drizzling/pouring/spooning on all the sea salt caramel.
BECAUSE THE SALTY SWEET COMBO REALLY IS A TASTE-BUDS DREAM COME TRUE.
Ok, enough shouting. Let’s discuss some tips and then get to “baking”.
Tips for Making Ice Cream Cake
Since this ‘cake’ is literally just all ice cream, and no ‘cake’, it’s important to have your freezer ready. A cold freezer with space for your springform pan is essential.
You’ll freeze each layer of the cake in between additions. Doing this makes it easier to spread it each, and ensures less melting.
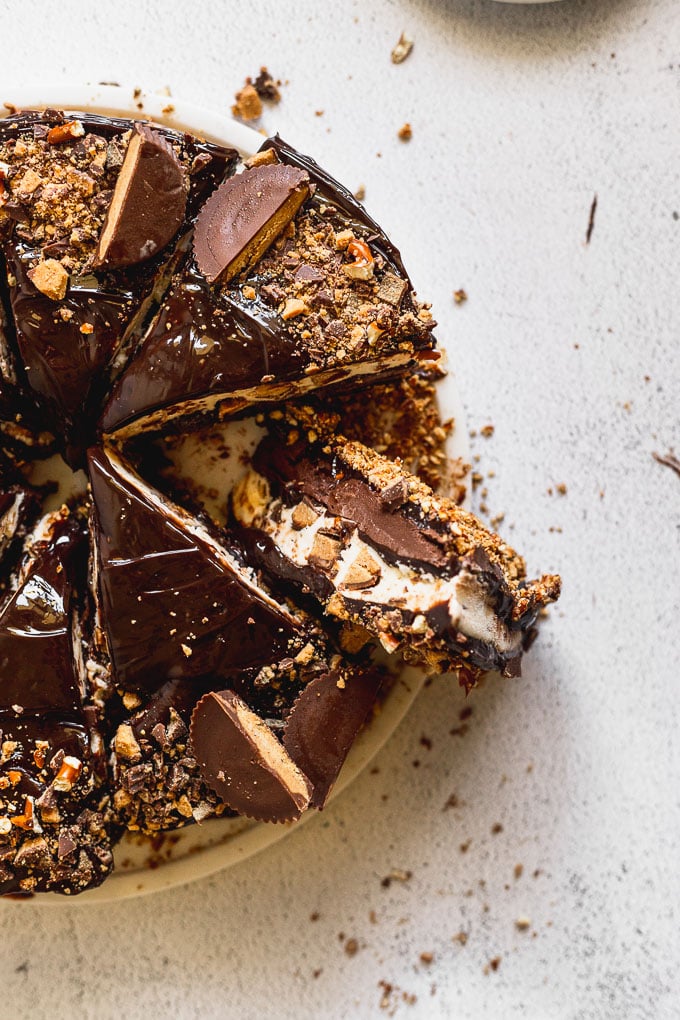
Using a springform pan makes serving the cake a breeze and I hiiiighly recommend using one (plus, you can make cheesecake in it, so it’s a win-win pan to have). Pop off the outside and either remove the cake from the bottom or be a rebel like I can be and gently cut it on the pan.
You can see the layers beautifully then, and it removes the stress of getting each piece out of a pan.
Soften the ice cream a little before spreading in on each layer. I recommend taking the ice cream out of the freezer for about 10 minutes before adding it to the cake.
The slightly softened ice cream will spread easier, resulting in a more uniform layer and saving you some muscle work. It also helps when you mix the peanut butter cups and vanilla ice cream.
Add the final layer of fudge before serving. I’ve found that letting the cake completely freeze through (for several hours or overnight) solidifies the cake more and when the final layer of fudge is put on, it easily does so. If not, it tends to slip and slide around, leaving a strange-looking top to the cake.
You can then freeze the fudge for another 30 minutes or go ahead and serve. Of course, after you’ve added your toppings.
Remove the ice cream cake from the springform pan by releasing the sides and gently pulling it away from the cake. You generally don’t want to cut on the bottom of the springform pan, but I do (gasp!) and am just exceptionally careful to not cut the bottom itself. Otherwise, gently transfer to a plate or cutting board before serving.
Your friends and family are going to fall in love with this indulgent, fudgy, creamy ice cream cake instantly – and so will you (you may not even want to share…and that is a-ok!).
Need more ice cream desserts?
- Chocolate Crunch Ice Cream Pie
- Mini Ice Cream Cake with Banana Creme Anglaise
- Brookie Cookie Dough Ice Cream Sandwiches
- Sweet Corn Caramel Ice Cream
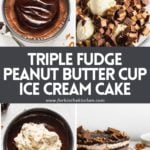
Get the Recipe Triple Fudge Peanut Butter Cup Ice Cream Cake with Pretzels
Ingredients
- 4 1/2 cups pretzels
- 10 Tablespoon unsalted butter, melted
- 3 cups hot fudge topping, divided (room temperature or chilled in the fridge)
- 3 cups chocolate ice cream
- 3 cups vanilla ice cream
- 12-14 peanut butter cups, chopped
Equipment
Instructions
- In a food processor, blend the pretzels until a fine crumb forms. Pulse in the melted butter until combined. Press the pretzel crumbs into the bottom of a springform pan, pressing slightly up the sides. Place in the freezer for 10-15 minutes to set up.
- Spread 1 cup of fudge on top of the pretzel crust. Freeze for an additional 15 minutes (this freezing helps the ice cream spread easier).
- Remove chocolate ice cream from the freezer about 10 minutes before adding it to the cake. Spread the chocolate ice cream on top of the first fudge layer. Freeze for 30 minutes to 1 hour.
- Spread 1 cup of fudge on top of the chocolate ice cream. If the ice cream didn’t freeze through enough, it may start melting as you add the fudge and come through during the spreading. That’s ok, just work around it or continue spreading (but this is why the additional freeze is recommended after each layer). Place in the freezer for 15 minutes while preparing the next layer.
- Remove the vanilla ice cream from the freezer for 10 minutes to soften slightly. Stir in the chopped peanut butter cups until thoroughly combined. Spread on top of the fudge layer and return to the freezer for “the big freeze”. Freeze for at least 4 hours, or overnight (preferred).
- Before serving, spread the final 1 cup of fudge on top of the cake. Top with additional peanut butter cups and/or pretzels as desired. Freeze again for 30 minutes if you want the fudge to be more firm, or serve immediately. Drizzle with salted caramel if desired.


I made this over the last two days and oh wow, it’s so good! It was easy to do the cake layers in between cooking and doing kitchen chores. It’s only me, so this cake will be lasting me a long while for those nights when I have a salty/sweet craving.
So glad you enjoyed, Danielle! I love having those slices stowed away in the freezer for when the craving hits, too! Thanks for commenting!
I saw this post and knew I NEEDED to have some. So I went to the store to buy all the fixings to make it and was sure my wife would whip it up for me. Well, she had other things to do – so I made it myself! It was not only so easy to follow the recipe and make this, but it actually turned out great too! I am a kitchen newbie – but this made me look like a veteran! YUMMY!!
Love this so much, Levi! Way to go giving it a try – it’s a good one to break into the kitchen with. So glad you enjoyed! 🙂
Made this for a family dinner! Major hit. We used Choc PB ice cream for one layer and was so happy! Can never get enough PB!
DELISH! I couldn’t agree more, Becky, the more PB the better! Thank you!
Amazing!!!! A winner from a casual cookout to big bday bash… simply wonderful and works anywhere, anytime. Irresistible
Yay! Thank you so much, Eva!
A quick question, what size springform pan should I use for this recipe?
Hi! I use a 9-inch but you could easily use a 10-inch too, the layers will just be a little thinner. Hope this helps!
Hello! I can’t wait to make this for my husband’s birthday. Do you have a recipe for the hot fudge? I don’t love store bought and my homemade hot fudge is too thin for this recipe. Thank you! Leslie
Hey Leslie! What a great question! Unfortunately, I do not have a homemade hot fudge recipe…sounds like it needs to be added to the calendar ASAP! I do have an espresso chocolate ganache recipe that might work though. It’s a 2:1 ratio of of chocolate to cream, so it’s pretty thick once it cools. If you give it a try, just omit the espresso powder. Would love to hear what you end up using and your thoughts!
Is there a substitute for pretzels , maybe a cookie crust ?
Hi Mary – I haven’t made it with a different crust but yes, I am sure a cookie crust would be delicious! I’d try an Oreo cookie crust. Hope this helps!
Super easy and delicious. I did add 1/4 cup of peanut butter that I folded into the vanilla ice cream before adding it to the top layer of the cake.
Awesome! Thanks, Lisa!